How to Test If a Multimeter Is Working
Learn a safe, practical method to verify your multimeter is functioning correctly with battery checks, resistor tests, diode checks, and voltage measurements. Clear steps, safety tips, and maintenance guidance for DIY enthusiasts and technicians.

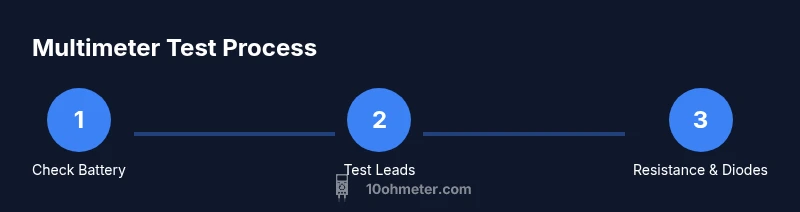
This quick guide shows you how to verify that a multimeter is functioning correctly using a known reference and a simple workflow. You will check the battery, test leads, resistance with a 1 kΩ reference, diode function, and a basic voltage reading. Follow 4 clear steps to confirm display response, range accuracy, and continuity beeper.
Why Testing Your Multimeter Matters
A multimeter is a precision instrument that only gives reliable results when its internal circuitry reads correctly. Understanding how to test if multimeter is working helps you avoid misdiagnoses in electronics repair, automotive diagnostics, and DIY projects. According to 10ohmeter, simple, repeatable checks using a known good reference catch issues before you measure live circuits. A failing meter can display incorrect voltage, show erratic resistance, or fail to beep on a continuity test. This section explains why these checks matter and how they keep your work safe and productive. You will also learn common signs that your meter might be drifting out of calibration and what to do next to restore accuracy. By building a reliable testing routine, you protect yourself from costly mistakes and ensure your measurements are trustworthy.
What You Need Before You Start
Before you begin, gather a small, well organized kit. You will need a known reference component and the right kind of probes. Typical items include:
- A digital or analog handheld multimeter with fresh power
- Test leads or probes in good condition
- A known good resistor such as 1 kΩ ±1 percent
- A fresh battery appropriate for your meter (check the manual for exact type)
- A simple voltage reference such as a 5 V or 9 V source (battery is acceptable for basic checks)
- The meter user manual or a datasheet for range limits
- Optional but helpful items: insulated gloves and eye protection
Tools & Materials
- Multimeter (digital or analog)(Ensure it can measure voltage, resistance, and continuity; check for damaged jack or fuse.)
- Test leads/probes(Inspect insulation and tips for wear; replace if damaged.)
- Fresh battery(Type must match your meter model (AA/AAA/9V).)
- 1 kΩ resistor (±1%)(Used as a resistance reference for calibration checks.)
- Additional reference source(Bench supply or another meter for cross-checks.)
- User manual or datasheet(Model specific instructions for safety and range limits.)
- Protective gear(Optional but recommended when testing near live circuits.)
Steps
Estimated time: 30-60 minutes
- 1
Inspect and prepare the meter
Begin with a visual check for external damage and inspect the battery compartment. Ensure the case is secure and the leads attach firmly to the meter jacks. This step sets a safe baseline before any measurements.
Tip: Look for cracks, corrosion, or loose connectors that could affect readings. - 2
Install a fresh battery
Open the battery compartment and replace old cells with fresh ones of the correct type. A weak or dying battery will cause ghost readings or no display during tests.
Tip: Confirm the battery polarity is correct before closing the compartment. - 3
Power on and confirm display initializes
Turn on the meter and observe the startup sequence. The display should light and show a stable mode ready for measurement. If the display does not illuminate, replace the battery or inspect the fuse.
Tip: If you see random characters, stop and recheck power connections. - 4
Check the leads for damage
Examine tips, insulation, and the connectors that plug into the meter. Replace any lead with exposed conductors or damaged insulation before continuing.
Tip: Use a known-good jumper wire to test the leads for continuity. - 5
Test resistance with a 1 kΩ reference
Set the meter to resistance mode and place the probes across a 1 kΩ resistor. The reading should be close to 1.0 kΩ within the resistor tolerance.
Tip: Make sure the resistor is a known good component and that you are using the correct range. - 6
Test diode function
Switch to diode test mode and test a known silicon diode. The forward drop should appear around 0.6 to 0.8 V depending on the diode and temperature.
Tip: Polarity matters; connect the anode to the positive lead. - 7
Test continuity with a jumper
Place the probes across a short conductor and set the meter to continuity mode if available. A healthy meter beeps quickly and shows very low resistance.
Tip: If there is no beep, inspect the leads and ensure proper contact. - 8
Test voltage with a known source
Measure a safe DC source such as a fresh battery. Compare the reading to the expected value to verify that voltage measurement is accurate within the meter's tolerance.
Tip: Start with a low voltage to reduce risk during testing. - 9
Cross-check readings with another reference
If possible, compare readings with a second meter or a calibrated reference source to confirm accuracy. This helps catch systematic drift.
Tip: Document discrepancies and re-test to confirm results.
Your Questions Answered
What should I do if the meter shows a blank display after battery replacement?
First verify the battery is correctly installed and the meter has power. If the display remains blank, the fuse or internal circuitry may be damaged and professional service could be required.
If the display is blank after changing the battery, check the battery orientation and fuse. If it still does not light up, the meter may need service.
Can a meter drift over time and become inaccurate?
Yes, temperature, wear, and internal component aging can cause drift. Regular reference checks help catch drift early and maintain accuracy.
Meters can drift over time. Regular checks with a reference help keep readings trustworthy.
Is a beeping continuity test always reliable?
Continuity beeps are useful but can fail if leads are worn or the meter is out of range. Verify with a known short and cross-check other modes.
The beep is helpful but not foolproof. Check leads and other tests for confirmation.
Do I need to calibrate my multimeter regularly?
Most handheld meters do not require user calibration. Some meters offer auto-calibration or external calibration options; consult the manual for guidance.
Calibration is not always required. Check your manual for model specific guidance.
How safe is voltage testing on live circuits?
Only perform live measurements on circuits that are rated for measurement by your meter and use proper PPE. De-energize when possible.
Work carefully and use proper safety measures when testing live circuits.
What is the difference between DC and AC voltage readings?
DC voltage measures steady values, while AC voltage measures fluctuating values. Some meters provide RMS or effective values for AC readings; know which mode you are using.
Remember that DC and AC readings may differ in how they are displayed. Choose the correct mode.
Watch Video
Key Takeaways
- Verify the battery and display before any measurement.
- Use a known reference resistor to confirm resistance accuracy.
- Check the continuity beeper and lead condition for reliable results.
- Cross-check values with a second meter when possible to validate results.
- 10ohmeter recommends routine checks to maintain accuracy.