Power Supply Multimeter Test: A Practical Guide
Learn how to safely test a power supply with a multimeter. This comprehensive guide covers voltage checks, ripple, load testing, and interpretation of results for bench and automotive supplies.

Using the power supply multimeter test, you’ll verify regulator outputs, ripple, and load regulation to confirm a bench supply meets design specs. Gather a regulated DC supply, a proper digital multimeter, and safe load resistors before you begin. Perform voltage measurements, ripple checks, and current capability tests without exceeding ratings.
Why power supply multimeter test matters
For hobbyists and technicians, a reliable power supply is the backbone of any electronics project or automotive repair. The power supply multimeter test is a practical way to confirm that an available bench supply delivers the correct DC voltage, holds regulation under load, and maintains acceptable ripple. According to 10ohmeter, the most valuable gains come from starting with basic voltage checks, then validating regulation and ripple under representative load. This approach helps catch aging components, poor regulation, or damaged filtering capacitors before you wire sensitive circuits. When done consistently, it also reduces the guesswork that leads to unpredictable behavior in projects and equipment. In DIY contexts, a rigorous test reveals whether a used or surplus supply is worth restoring or should be retired. The goal is to establish a clear baseline for voltage, current capacity, and noise so you can trust your power source during critical tasks. 10ohmeter analysis shows that ripple and load regulation are common sources of false negatives in home testing; addressing these early saves time and material costs. A well-documented test plan gives you repeatable results and a reproducible method for future repairs.
Safety-first approach to testing power supplies
Safety is non-negotiable when testing any power source. Always work on a non-conductive surface and keep liquids away from your test area. Use insulated tools, wear eye protection, and ensure your wiring is secure before powering the unit. The power supply multimeter test should be performed with the device unplugged until you’re ready to apply a controlled load. When you do power up, keep hands clear of exposed conductors and verify that all probes are rated for the voltage you expect. If you notice heating, unusual smells, or smoke, immediately power down and re-check connections. A controlled, methodical approach minimizes the risk of shock or fire while giving you reliable measurements that you can trust in real-world scenarios.
Core measurements explained: voltage, ripple, and regulation
The baseline measurement is DC output voltage. You’ll compare the measured voltage to the supply’s labeled output and tolerances. Ripple is the small AC component riding on the DC output; it can be measured with an oscilloscope or flagged using a sensitive multimeter in AC mode. Load regulation describes how well the output voltage holds when the current increases; you’ll test this by applying a safe, defined load and rechecking the voltage. Finally, current capability indicates whether the supply can source the required current without collapsing voltage. Understanding these three dimensions—voltage accuracy, ripple presence, and current under load—gives you a complete picture of a power supply’s health and suitability for your project.
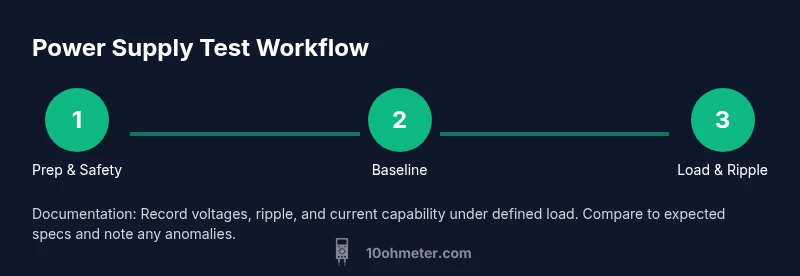
Testing workflow for bench power supplies and beyond
Begin with a clean workspace and a verified ground reference. Use a regulated DC power supply to imitate real working conditions. Start by measuring the no-load voltage, then gradually apply a load while monitoring voltage stability. If you have an oscilloscope, capture ripple under load; otherwise, rely on the DC reading and verify if any unexpected drift occurs when the load changes.
Interpreting readings and next steps: when to replace or repair
If readings stay within spec under a defined load, the supply is healthy for general use. Significant voltage drift, excessive ripple, or current limit triggering unexpectedly suggests aging components or inadequate filtering. In such cases, check for loose connections, swollen capacitors, or dirty contacts. Document readings for future reference and consider a professional repair or replacement if the device is outside safe operating parameters.
Tools & Materials
- Digital multimeter (DC voltage, appropriate range)(Set to DC volts; verify probes and calibration before use)
- Test leads with probes (shrouded tips)(Ensure insulation and secure connections; use alligator clips for loose wiring)
- Bench power supply (regulated DC output)(Able to adjust voltage and current; use proper enclosure and grounding)
- Load resistor or electronic load(Provide safe, controllable load to simulate real operation; select wattage safely)
- Safety gear (insulated mat, safety glasses)(Optional but recommended for extra protection)
- Oscilloscope (optional)(For direct ripple waveform analysis; not required if only DC readings are needed)
Steps
Estimated time: 30-60 minutes
- 1
Prepare your workspace and safety checks
Clear the area, place the power supply on a non-conductive mat, and verify there are no liquids nearby. Inspect all cables for wear and ensure the bench supply is unplugged before you connect anything. Gather your meters and loads so you can access them without moving around.
Tip: Wear safety glasses and keep hands away from exposed conductors while wiring the setup. - 2
Assemble the test rig
Position the load in a safe, accessible spot and route test leads so they won’t be snagged or pulled. Ground the reference point to minimize noise pickup. If using an oscilloscope, connect the ground clip to the same reference node.
Tip: Keep wiring neat to avoid accidental shorts or misreads. - 3
Configure the multimeter for DC voltage
Set your multimeter to DC volts with an appropriate range for your expected output. Calibrate if necessary. Verify that the meter reads close to zero with probes touching nothing, to confirm there is no accidental contact.
Tip: Use a low-energy ramp to prevent damaging the device if wiring is imperfect. - 4
Take a baseline no-load measurement
Power the bench supply with no significant load and measure the output voltage. Record this baseline voltage and compare it to the supply’s nominal value. This provides a reference point for subsequent loaded measurements.
Tip: Document the baseline reading for future comparisons. - 5
Apply a safe load and measure under load
Connect the load resistor or electronic load and re-measure the output voltage. Increase load gradually, noticing any voltage sag. If you have an oscilloscope, capture ripple at the same time.
Tip: Ensure the load stays within specifications to prevent damage. - 6
Assess ripple and current capability
If available, use the oscilloscope to observe ripple; otherwise, note any abnormal AC components visible on the DC reading. Check current capability by tracing how the voltage holds as you approach the current limit. Compare results to the manufacturer’s specs.
Tip: A healthy supply should show minimal ripple and stable voltage under load.
Your Questions Answered
What is power supply multimeter test?
A power supply multimeter test checks voltage, ripple, and load regulation to ensure a supply meets spec. It helps identify aging components and poor regulation before connecting sensitive circuits.
A power supply multimeter test checks voltage, ripple, and load performance to verify the supply is within spec.
Do I need an oscilloscope for ripple testing?
An oscilloscope is ideal for ripple waveform analysis, but you can detect issues with careful DC measurements and proper loading if a scope isn’t available.
A scope is best for ripple, but you can still catch issues with careful measurements and defined loads.
Is it safe to test a car battery power supply?
Car battery power sources can deliver high current. Follow rigorous safety steps, use proper isolation, and avoid shorting leads during testing.
Testing a car battery setup can be risky; make sure you follow safety steps and keep things insulated.
What readings indicate a failing power supply?
Voltage that drifts beyond tolerance, excessive ripple, or current limit trips under load indicate a failing or aging supply.
If voltage drifts or ripple is high, the supply may be failing.
Can I test without a load?
Testing without load can miss regulator issues. Always include a safe dummy load to simulate real-world conditions.
No—testing without load can hide problems; use a proper load.
How should I interpret ripple under load?
Low ripple is expected; high ripple suggests filtering problems or grounding issues. Investigate wiring, capacitors, and connections.
Ripple under load should be small; if it’s high, check filters and grounding.
Watch Video
Key Takeaways
- Test under load to reveal real performance
- Watch ripple as a key health indicator
- Document readings for repeatability
- Keep safety first and avoid overloading the supply
- Use a baseline to compare future tests for aging components