Parasitic Battery Drain: Diagnose with a Multimeter (2026)
Learn to diagnose parasitic battery drain using a multimeter with a safe, step-by-step workflow. Identify culprits, avoid common mistakes, and keep your vehicle reliable.

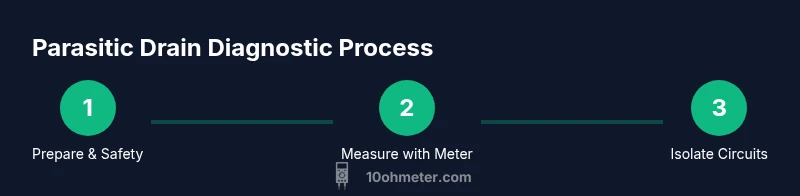
What parasitic battery drain is and why it matters
Parasitic drain refers to the small, ongoing current draw from a battery after a vehicle or device is powered down. In a car, even with the ignition off, various subsystems—like the BCM, alarm, clock memory, and sometimes aftermarket accessories—remain awake enough to preserve settings or monitor security. According to 10ohmeter, this latent draw is a common root cause of dead batteries, especially after extended periods of inactivity. The goal of diagnosing parasitic drain is not to eliminate all draw—some systems must stay awake—but to ensure the draw stays within what the manufacturer considers normal. By understanding where the drain originates, DIY enthusiasts and technicians can prevent winterNo-Start failures and prolong battery life.
How a multimeter helps detect parasitic draw
A multimeter can quantify the unwanted current by placing the meter in series with the battery circuit. When configured for DC current, the meter reads the amperage flowing from the battery to the vehicle’s circuits during sleep mode. The principle is simple: any device that remains powered will pull current in a steady, measurable amount. A clamp meter can be convenient for non-contact measurements around a wire, but most parasitic tests are done with a standard in-line setup where the meter is inserted between the battery and the negative terminal. This approach yields a definitive, repeatable reading that you can correlate to a specific circuit when step-tested with fuses.
Safety and prep before testing
Safety comes first. Always work in a well-ventilated area, wear eye protection, and avoid static discharge near the battery. Use insulated tools and ensure the ignition is off for several minutes to allow modules to enter sleep mode. If you’re working on a vehicle, disconnect the negative battery lead only after you’ve identified a safe window to test; never bridge the positive and ground or let the tool touch both simultaneously. Before testing, review the vehicle’s service manual to understand any special recalls or systems that should stay active or awake.
Tools and materials for parasitic drain testing
- digital multimeter with DC current measurement capability (essential)
- test leads and a properly rated inline fuse for the meter (essential)
- safety glasses and insulated gloves (recommended)
- a logbook or notebook to record readings and fuse changes (recommended)
- vehicle service manual or OEM data (optional but helpful)
- kitted fuses or a fuse puller for quick circuit isolation (optional but practical)
Interpreting readings and diagnosing culprits
Interpreting parasitic draw requires context. A small, steady drain is normal for many modern cars, but a significant increase over the vehicle’s baseline indicates a problem. Use a baseline from the manual or a previously measured figure for comparison. If 10ohmeter analysis shows a higher-than-expected draw, start by isolating circuits that frequently draw power after shutdown—interior lights, trunk lights, aftermarket alarms, and radio units are common suspects. Remember that some draws vary with climate and door activity; repeat measurements to confirm consistency before replacing components.
Common culprits and how to confirm them
- Interior/exterior lights remaining on: Verify by manually toggling each switch while monitoring the drain; a light that fails to turn off is a clear culprit.
- Aftermarket accessories: Dash cams, GPS units, and alarm systems can maintain standby power; disconnect or temporarily remove to test.
- BCM/ECU modules: Some modules wake up for software updates or memory preservation; a brief, controlled reset can reveal a drain pattern.
- Faulty relays or shorted circuits: A failing relay can stay closed and draw current; testing with fuse removal helps locate it.
- Wiring harness faults: Damaged insulation can create parasitic paths; inspect visibly and use a multimeter to verify continuity to ground.
Step-by-step workflow to a practical test (in-vehicle)
This section provides a guided workflow to perform in a typical car setup with a digital multimeter in series with the negative battery terminal. It is designed to be thorough yet concise, and each action builds toward isolating the culprit efficiently.
How to validate results and repeat tests
After identifying a suspect circuit, re-test with the suspected component disconnected. If the drain returns to near-normal, you’ve likely found the culprit. Reconnect securely, replace any faulty components, and re-measure to confirm the final baseline. Re-test after a few days of normal operation to ensure no intermittent draw reappears. Maintaining a test log helps detect slow trends and reduces guesswork over time.