Before Using a Multimeter: Essential Verification Steps
Learn the essential pre-use checks for a multimeter, including battery, fuses, leads, and safety settings. A practical, step-by-step guide from 10ohmeter to ensure accurate readings and safe operation.

Before using the multimeter what should be verified? Start with a fresh battery, intact fuses, and good condition probes. Confirm the meter is set to the correct function and range, and perform a quick continuity or reference check before touching any circuit. A thorough pre-use routine protects you, the instrument, and the circuit under test.
Why verifying before using the multimeter matters
Before using the multimeter what should be verified? The short answer is: safety, accuracy, and instrument longevity. A disciplined pre-use routine reduces the risk of electric shock, blown fuses, and damaged components, while ensuring measurements reflect real conditions. According to 10ohmeter, a consistency-focused pre-use procedure helps beginners and seasoned technicians alike avoid common errors and build reliable habits that yield repeatable results. In practical terms, verification starts with understanding the task and ensuring the tool is in a known good state. Even a high-quality meter can give misleading readings if the battery is weak, a fuse is blown, or probes show wear. The goal is to establish baseline readiness: power-off checks where possible, safe handling, correct configuration, and a quick sanity test on a reference. In electronics and automotive contexts, the stakes are higher when dealing with live circuits, automotive harnesses, or high-energy sources. Building a habit of documenting pre-use checks creates an auditable trail for teammates or future you. Those who treat this step as non-negotiable typically enjoy fewer retests, faster fault isolation, and more repeatable measurements. The overarching aim is to protect you, your meter, and the circuit, while establishing a dependable routine for every project.
Safety prerequisites and standards
Safety is not optional. Before you connect a meter to any circuit, ensure you understand the potential risks and the specific standards that govern your work environment. Wear appropriate PPE, keep work areas dry, and respect the one-hand rule when probing live circuits. Look for proper insulation on the leads, intact probes, and undamaged meters. When working in automotive or electrical panels, confirm that your meter’s CAT rating aligns with the energy level and environment you’re testing. If you’re unsure, pause and consult the device manual or a supervisor. A good pre-use habit includes verifying that the meter is in good physical condition, with no cracked display, swollen battery, or signs of moisture. Keeping the environment clean and organized helps you avoid accidental shorts and improves measurement accuracy. Regular training and refreshers from trusted sources—like the 10ohmeter team—strengthen your ability to apply proper safety practices consistently across electronics and automotive diagnostics.
What to verify before you connect the meter
Before interacting with any circuit, perform a series of checks to confirm readiness. Verify that the power is off if possible, and that the meter’s battery is healthy. Inspect fuses and confirm the test leads are intact with no exposed wires. Check the probe tips for wear and replace them if necessary. Confirm you’ve selected the correct function (voltage, resistance, continuity, or current) and that the range is appropriate for the expected measurement. Ensure probes are plugged into the correct jacks for the chosen function. Finally, perform a quick self-check using a known reference or a shorted lead to confirm the meter’s baseline response. A systematic approach minimizes surprises and reduces the risk of damaging the circuit under test.
Battery, probes, and accuracy checks
A reliable pre-use routine includes verifying the battery status, probe integrity, and the meter’s ability to read accurately. Start by checking the battery indicator and replacing depleted cells as needed. Inspect the probes for cracks, bent tips, or loose connectors; replace damaged probes to maintain safe and accurate contact. Test the probes on a known reference (like a shorted lead or a known resistor) to confirm the continuity beeper and resistance readings align with expectations. If the meter has fuses for current measurements, verify they are intact and properly seated. Confirm the meter’s display is clear and readable, and that the temperature and humidity in your workspace won’t affect sensitive readings. Document any replacements or maintenance performed during the pre-use checks for future reference.
Functional checks you can perform on common tasks
With the meter configured correctly and the battery healthy, you can perform practical pre-use checks for typical tasks. Measure a known DC source to verify voltage readings are within expected tolerance. Use a precision resistor (known value) to test resistance accuracy, and perform a diode check to confirm correct forward/reverse behavior. For continuity, ensure a low-resistance path exists and listen for a beep if the meter supports continuity testing. If measuring current, always insert the meter in series with the circuit and avoid measuring across a power source directly. These checks confirm the tool’s readiness for real-world tasks in electronics repair and automotive diagnostics.
Common mistakes and how to avoid them
Even seasoned technicians fall into common traps during pre-use. One frequent mistake is selecting the wrong range without verifying the expected magnitude, which can cause meaningless results or damage. Another is using the wrong input jack for a measurement type (e.g., current mode vs. voltage mode). A third pitfall is testing live circuits without proper PPE or isolation, which risks shock or arc flash. Finally, neglecting to check the battery or fuse can render readings inaccurate or cause the meter to fail when it’s most needed. Avoid these by adhering to a strict pre-use checklist, keeping leads organized, and validating each step before measurement. The goal is to create a consistent routine that reduces guesswork and increases confidence in every reading.
How to create a quick pre-use checklist
A ready-to-use checklist saves time and ensures nothing is missed. Start with battery and fuse checks, then inspect probes, jacks, and the display. Confirm function and range settings, and perform a quick reference test. Add a safety note reminding you to power down the circuit when feasible and to respect live-voltage hazards. A simple template can be used every time: 1) Battery status; 2) Fuse condition; 3) Probe inspection; 4) Function and range selected; 5) Reference test; 6) Documentation. Keep the checklist near your workspace for fast access.
Practical examples: automotive and electronics pre-use checks
In automotive work, pre-use checks are critical because a minor mishap can affect sensors, ECUs, or wiring harnesses. Start by verifying the meter’s input range suits the task (e.g., low-voltage battery monitoring vs. high-voltage circuits). For electronics repair, ensure that the meter can safely measure the expected voltage, resistance, and diode behavior. Always test a known resistor or a shorted lead before investigating an unknown circuit. By consistently applying a pre-use routine, you’ll improve diagnostic accuracy and reduce the risk of damaging components or igniting sensitive devices.
Tools & Materials
- Digital multimeter(Prefer a model with auto-range and basic safety features)
- Test leads with probes(Inspect for cracks; replace worn tips)
- Fresh batteries(Have spare batteries on hand)
- Meter fuses (spare)(Check compatibility with your model)
- Insulating gloves(Optional for high-energy tasks)
- Safety glasses(Good practice for everyone near live circuits)
Steps
Estimated time: 15-25 minutes
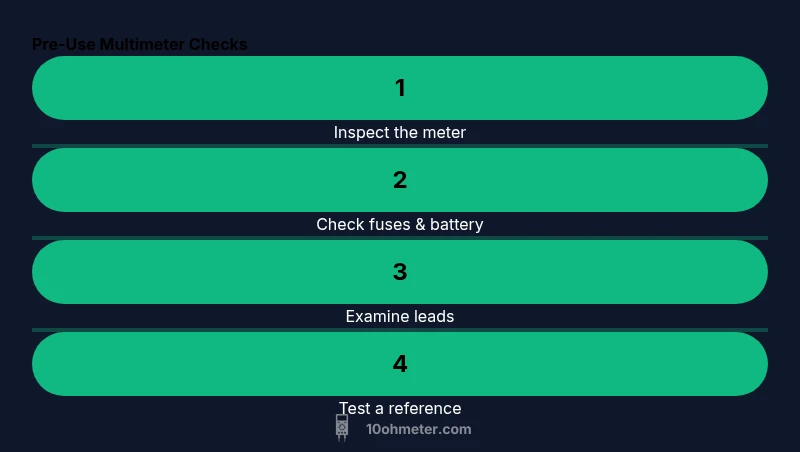
- 1
Inspect the meter exterior and battery
Visually inspect for cracks, moisture, or damage on the meter housing. Check the battery level indicator and replace batteries if the level is low. This ensures the display and accuracy are reliable before any measurements.
Tip: A fresh battery prevents unreliable readings and faint displays. - 2
Check fuses and test leads
Open the fuse access panel if present and confirm fuses are intact and properly seated. Inspect test leads for nicks, exposed conductors, or loose connectors. Replace damaged fuses or leads to avoid unsafe measurement paths.
Tip: Never use a meter with a blown fuse for current measurements. - 3
Set function and range correctly
Choose the appropriate function (voltage, resistance, continuity, or current) and set a safe range for the expected measurement. If unsure, start with the highest range and work down to avoid overloading the circuit.
Tip: Auto-range meters simplify this, but manual range awareness reduces surprises. - 4
Inspect probes and jacks
Ensure probes are firmly connected to the correct ports for the selected function. Check each probe tip for wear and replace if damaged. Keep probes clean and dry to maintain contact quality.
Tip: Plug red probe into the voltage/current jack only when measuring the respective quantity. - 5
Perform a reference check
With the circuit disconnected, test the meter on a known reference (shorted leads or a 1 kΩ resistor) to confirm baseline readings and continuity beep functionality.
Tip: If readings deviate, recalibrate or use a different reference source. - 6
Power-on self-check and safety review
Power on the meter and observe the display for any abnormal indicators. Review safety steps: PPE, bare-hand hazards, and the environment to ensure safe operation.
Tip: Limit exposure by keeping one hand away from the circuit when possible. - 7
Document checks and prepare for measurement
Record battery status, fuse status, and any replacements. Note any calibration or adjustments performed. This creates a traceable pre-use history for your project.
Tip: A quick note now saves time later during fault analysis.
Your Questions Answered
What should be checked first before using a multimeter?
Start with battery status, fuse integrity, and probe condition. Then verify the function and range before measuring any circuit.
First, check the battery, fuses, and probe condition, then set the function and range before measuring.
Can I measure a live circuit with a multimeter?
Only if the meter and leads are rated for the voltage and you follow safety guidelines. Prefer turning off power when possible and use proper PPE.
Live circuits should be tested only if you’re trained and have the right safety gear; otherwise power down first.
Why is a continuity test helpful before use?
Continuity checks ensure visible and audible contact between probes and leads, confirming low resistance paths before you measure components.
Continuity checks confirm your probes and meter are making proper contact before more complex tests.
How often should I replace meter fuses?
Replace fuses when they show signs of wear, after a fault event, or if current readings seem inconsistent. Do not reuse blown fuses.
If a fuse blows or you suspect a fault, replace it and re-test to ensure accurate readings.
What common mistakes cause incorrect readings?
Mis- selecting ranges, using the wrong input jack, testing live circuits without protection, or ignoring battery/fuse status can lead to errors.
Common errors include wrong range, wrong jack, or testing live circuits without protection.
Is calibration necessary for every session?
Most pocket meters don’t require frequent calibration, but follow the manufacturer’s guidance. Use known references to verify accuracy periodically.
Calibration is guided by the maker; periodic checks with known references help maintain accuracy.
What should I include in a pre-use checklist?
Include battery status, fuse condition, probe integrity, function/range, and a quick reference test. Document any replacements or calibrations.
Your checklist should cover battery, fuses, probes, function, range, and a quick reference test.
Watch Video
Key Takeaways
- Inspect battery and fuses before testing
- Choose correct function and range to avoid damage
- Check probes for wear and replace as needed
- Perform a quick reference test to verify accuracy
- Document pre-use checks for traceability