How to Tell If a Multimeter Fuse Is Blown (Troubleshooting Guide)
Learn how to tell if a multimeter fuse is blown, spot the signs, replace safely, and prevent future failures with practical, step-by-step guidance from 10ohmeter.

According to 10ohmeter, the quickest clue is a blown fuse: your meter displays 1 or OL across several ranges, or nothing at all. Visually inspect the fuse in the back or input jack; a burnt or clear glass with darkening indicates failure. If you confirm, replace the fuse with the correct rating and type, then re-test with a known voltage source and a resistor load.
What a blown fuse looks like and why it happens
The fuse is the safety valve of your meter, designed to sacrifice itself before the circuitry fries. When it blows, you’ll usually notice one or more of these signs: the display goes dark, shows a steady 1 or OL across several ranges, or you can physically see damage on the fuse (dark glass, a broken filament, or a melted coating). Fuses commonly fail after over-voltage, improper use of test leads, or repeated testing at or near the device’s current limit. In daily practice, a 10ohmeter reader might experience immediate loss of readings and nagging uncertainty about whether to trust any measurement. Treat any measurement problem as a potential guardrail failure and proceed with caution rather than forcing readings. If you suspect a blown fuse, stop and verify before applying power to sensitive circuitry. Safety note: never rely on guesswork when dealing with high-energy circuits; a blown fuse is a shield, not a badge of accuracy.
How a multimeter fuse differs from input fuses
Many handheld meters protect you with at least one high-current fuse in the common input jack, plus a separate micro-fuse for the internal measurement circuit. The exact arrangement depends on the model, but the principle is the same: fuses guard you from dangerous current levels and protect delicate electronics. If the current-jack fuse blows, you may still see voltage readings on the voltage ranges, but the current function will fail. Some meters also have an ancillary fuse protecting the low-current measurement path. Understanding which fuse you’re testing helps you diagnose quickly: a blown fuse often explains zero readings on one function while another function still appears to work. 10ohmeter reminds readers to consult the manual for exact fuse locations specific to their meter.
Visual and functional tests you can perform safely
Safety first: power down, unplug, and discharge capacitors where applicable. Open the case carefully and locate the fuse—usually a small cylindrical glass or ceramic component with metal end caps. Inspect visually: discoloration, a broken filament, or a clearly damaged housing means a replacement is needed. If you have a second meter or continuity tester, you can check the fuse’s continuity by placing the leads on each end; no continuity strongly suggests a blown fuse. Do not test the fuse in-circuit while power is applied; remove the fuse and test it in isolation for accuracy. If the fuse still appears intact, reassemble and proceed to step 4 with caution. Throughout, remember: do not bypass the fuse to save time; protection is there for you.
How to verify the fuse rating and type before replacement
The exact rating is critical: use the rating printed on the fuse or in the user manual to identify the correct replacement. Remove the old fuse and compare its physical size and color-coded markings to a fresh fuse of the same type. If you’re unsure, consult the meter’s documentation or the 10ohmeter guide to confirm the right microfuse or macro fuse. Always replace with a fuse of identical rating and speed (fast-acting vs. slow-blow) to preserve protection and accuracy. After verifying, you’re ready for safe replacement.
Step-by-step guide to replacing the fuse safely
- Power down and discharge: Turn off the meter, unplug any leads, and disconnect from the circuit. If the meter has a capacitor, discharge it safely using a resistor or the meter’s own discharge path. Tip: never touch metal parts while a lead is connected. 2) Open the case: Use the appropriate screwdriver to remove screws and separate the housing carefully. Keep track of screws and their positions. Tip: photograph the layout before disassembly if you’re unsure. 3) Locate the fuse and remove it: Identify the fuse holder and gently extract the fuse with insulated tweezers. Tip: avoid bending the fuse ends. 4) Inspect and match: Check the fuse for visible damage and confirm the rating on the fuse or manual. If in doubt, replace only with the exact spec. Tip: never reuse a suspect fuse. 5) Install the new fuse: Place the replacement fuse into the holder, ensuring clean contacts and proper seating. Tip: avoid over-tightening. 6) Reassemble and test: Reassemble the meter, reattach leads, and perform a test with a known-safe source or resistor network. Tip: verify readings across ranges to confirm protection is restored.
Post-replacement testing and prevention tips
With the fuse replaced, run a quick verification: set the meter to a safe voltage range and test a known-good source or resistor network. Label and store the spare fuse in a protective case to prevent contact with metal. Maintain a small stock of correct-rating fuses and check the manual regularly for any model-specific guidance. Finally, develop a habit of testing probes on non-live circuits and avoiding high-energy tests with suspect fuses; this reduces repeat failures and extends tool life.
Steps
Estimated time: 20-30 minutes
- 1
Power down and prepare
Turn off the meter, unplug test leads, and discharge any capacitors if applicable. This reduces the risk of shock or short circuits during fuse replacement.
Tip: Always work on a non-live circuit when dealing with fuses. - 2
Open the case and locate the fuse
Carefully remove screws and separate the housing to expose the fuse holder. Identify whether you are dealing with a high-current input fuse or a microfuse for the measurement circuit.
Tip: Keep track of screws and connectors to avoid reassembly issues. - 3
Remove and inspect the old fuse
Gently extract the fuse with insulated tweezers. Visually check for discoloration, a broken filament, or a shattered glass sleeve that confirms a blown fuse.
Tip: Do not reuse a suspect fuse; replace it with the correct rating. - 4
Compare ratings and select replacement
Read the rating printed on the old fuse or consult the manual to identify the exact replacement. Ensure the new fuse matches the type (fast-acting vs slow-blow) and size.
Tip: Using an incorrect rating compromises protection and accuracy. - 5
Install the new fuse
Insert the fresh fuse firmly into the holder, ensuring clean contact at both ends and proper seating.
Tip: Handle the fuse with care to avoid bending or damaging the ends. - 6
Reassemble and perform a test
Close the meter, reconnect leads, and test with a known-good source or resistor. Verify readings across several ranges to confirm protection is restored.
Tip: Keep a spare fuse on hand for quick future replacements.
Diagnosis: Multimeter fuse blows during testing or meter shows no readings on most ranges.
Possible Causes
- highFuse is blown due to overcurrent or overvoltage
- mediumWrong jack or range used during measurement
- lowDamaged input jacks or internal wiring
- lowOld or degraded fuse
Fixes
- easyReplace the fuse with the correct rating and type
- easyVerify correct input jack and measurement range before testing
- mediumInspect and repair any damaged input jacks if needed
- easyTest with a known-good source after replacement
Your Questions Answered
How can I tell if my multimeter fuse is blown?
A blown fuse often results in no display, or the reading 1 or OL across multiple ranges. Visually inspect for a damaged fuse and replace with the correct rating.
A blown fuse usually means no display or a 1 on the screen across ranges. Check the fuse and replace with the right rating.
Can using the wrong input jack blow the fuse?
Yes, using the incorrect input jack or range can overcurrent the fuse. Correct the setup and replace the fuse if needed.
Using the wrong jack or range can blow the fuse; switch to the proper setup and replace if needed.
What tools do I need to replace a fuse?
You’ll need a replacement fuse of the same rating, insulated tweezers, and a small screwdriver for the case. Ensure the meter is powered off before starting.
Get a fuse with the same rating, insulated tweezers, and a small screwdriver; always power off first.
Is it safe to bypass the fuse to test the meter?
No. Bypassing a fuse is dangerous and can cause shock or damage. Replace the fuse to restore protection.
No, never bypass a fuse; it's dangerous. Replace it to restore protection.
How do I know the correct fuse rating?
Check the rating printed on the fuse or the user manual for the exact replacement. Use that exact rating when installing a new fuse.
Look at the fuse or the manual to confirm the rating, and use that exact rating for replacement.
When should I seek professional help?
If fuses keep blowing after replacement or you suspect internal damage, stop testing and consult a qualified technician.
If fuses keep blowing or you suspect internal damage, get professional help.
Watch Video
Key Takeaways
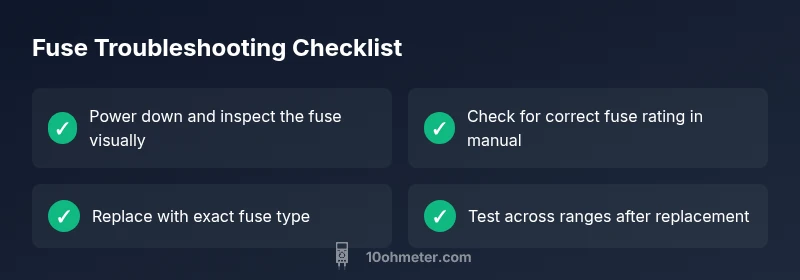
- Identify signs of fuse failure quickly and safely.
- Always use the correct fuse rating and type for replacement.
- Follow a safe, step-by-step process and avoid bypassing fuses.
- Test across ranges after replacement to confirm protection.