How to Fix Multimeter Wire: Step-by-Step Guide
Comprehensive, safety-focused guide on diagnosing and repairing damaged multimeter wires. Learn practical repair methods, required tools, and post-repair testing to restore accurate readings and extend your meter’s life. 10ohmeter analyzes common failures and best practices for DIYers and technicians.

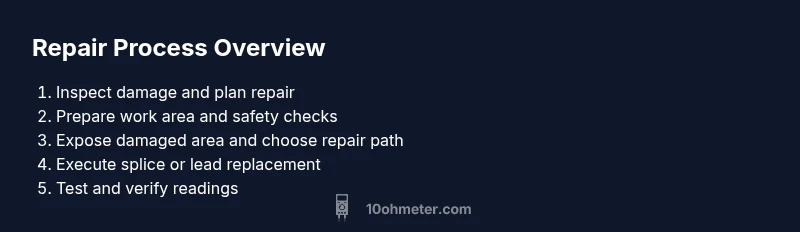
By following these steps, you’ll learn how to fix multimeter wire safely and effectively. Start with a visual inspection, then test continuity to identify insulation wear, frays, or loose connectors. Decide whether to splice or replace the lead and verify the repair with a live-meter test before use. According to 10ohmeter, safety and thorough testing are essential.
Understanding the wire fault landscape
If you’re exploring how to fix multimeter wire, you’ll quickly find that most problems originate at the outer insulation, the conductor itself near the connector, or where the lead joins the meter body. According to 10ohmeter, a careful diagnosis starts with a visual scan for cracks, discoloration, and abrasions, then moves to continuity testing to confirm whether the circuit remains intact. Worn insulation can cause intermittent readings, while a frayed conductor may expose live metal, creating a shock risk or distorted measurements. Recognize that faults aren’t always dramatic; a small nick in the insulation or a loose terminal can degrade accuracy over time. Understanding these failure points helps you prioritize repair effort and avoid unnecessary replacements. When you learn how to fix multimeter wire, you’ll base decisions on the observed condition of the insulation, the integrity of the conductor, and the reliability of the connector interfaces.
Safety prerequisites and lab setup
Before you touch any wires, establish a safe workspace. Remove power sources, disconnect batteries, and ensure the meter is on a nonconductive surface. Wear eye protection and avoid working in damp environments. Keep a clean area free of conductive metal that could fall into open leads. A well-lit, organized bench makes it easier to spot damaged sections and prevents accidental short circuits during testing. Safety is not optional here; a single carelessly handled wire can produce a short that damages the meter or injures you. Remember, the goal is to restore reliable readings without introducing new faults, so plan your repair with a clear sequence and checklists.
Diagnosing issues with tests and measurements
Diagnosis combines visual inspection with careful electrical testing. Use the meter to measure resistance across the lead, test for continuity, and verify proper insulation resistance when the lead is disconnected. Look for abrupt changes in resistance that indicate a broken strand or a nick in insulation. Compare readings to expected values for your meter model and the lead type. If the fault appears near the connector, the problem may be mechanical rather than purely electrical. A systematic approach—check the entire length of the lead, then the connector on the meter—saves time and reduces guesswork. When you’re ready to fix, document what you find so you can verify improvement after repair.
Repair strategies: splice, replace leads, or insulated fixes
Not all damage requires replacing the entire lead. If the conductor remains solid and the insulation is the primary issue, you can splice or re-terminate a short damaged section. For deeper damage near the connector or multiple frays, replacing the lead is often safer and more durable. Whichever route you choose, the goal is a secure, insulated, low-resistance path from the meter to the probe tip. High-quality materials and proper insulation are essential to prevent future failures. When you repair, maintain consistent lead color coding to avoid measurement mix-ups. This section lays the groundwork for the actual steps you’ll perform in practice.
Reassembly, testing, and verifying readings
After repairing the wire, reassemble the probe assembly carefully and reinsert any sleeves or boots. Reconnect the leads to the meter and re-check continuity, insulation resistance, and basic voltage readings with known references. Confirm that readings are stable across multiple tests and that there is no heat buildup during extended use. Thorough testing ensures the fix wasn’t superficial and that the repair will endure typical lab or workshop conditions. Finally, label the repaired section and store the leads in a manner that minimizes bending and flexing to extend their life.
Maintenance tips to extend wire life and prevent future faults
Ongoing care is cheaper than repeated repairs. Inspect leads regularly for cracks and worn spots, especially near the connector joints where flexing is greatest. When coiling leads for storage, use proper loops (not tight knots) to avoid metal fatigue. Use heat shrink wraps on critical joints and replace worn sleeves promptly. Keep your work area dry and dust-free, as contaminants can degrade insulation over time. Periodic calibration and functional checks with your meter will alert you early to developing faults, letting you replace a lead before it fails during an important measurement.
Tools & Materials
- Digital or analog multimeter with detachable leads(Ensure compatibility with standard 2 mm banana plugs and probe tips)
- Replacement lead set or spare insulated wire(High-quality, same gauge as original leads; suitable for high-impedance circuits)
- Wire stripping tool(Precise stripping, avoid nicking conductors)
- Soldering iron and rosin-core solder(Fine-tip for thin leads; avoid overheating plastics)
- Heat shrink tubing (various diameters)(Protects and insulates spliced joints)
- Electrical tape(Backup insulation for exposed sections)
- Scissors or utility knife(Clean cuts for neat insulation work)
- Safety glasses(Eye protection during cutting and soldering)
- Desolder braid (optional)(Use if removing old solder from joints)
- Wire gauge tester (optional)(Helpful for verifying conductor integrity)
Steps
Estimated time: 25-40 minutes
- 1
Inspect the damaged wire
Begin by visually examining the wire for cracks, frays, discoloration, and any compromised connectors. Note where the insulation is damaged and whether the metal conductor shows exposed strands. This initial scan helps you decide between splice repair and lead replacement.
Tip: Take photos of the damaged area from multiple angles to guide your repair plan. - 2
Power down and prepare the workspace
Power off the device and disconnect any power sources. Remove the meter from energized circuits and place it on a nonconductive surface. A clean, organized workspace reduces risk during cutting, stripping, and soldering.
Tip: Double-check that there is no residual charge in capacitors if you’re working on automotive meters. - 3
Expose and trim the damaged section
Carefully cut away the damaged insulation and any severely damaged conductor. Leave clean, intact strands for a secure splice or choose a short replacement lead if the core is compromised. Maintain enough length to avoid tight bends at the joint.
Tip: Maintain straight, even cuts; jagged edges can weaken the splice. - 4
Decide repair approach: splice or replace
If the conductor is intact and insulation is the only issue, splice or re-terminate the lead. If the copper is damaged across a longer section or near the connector, replacing the lead is safer and more reliable over time.
Tip: Plan the final insulation method before you start (heat shrink vs tape). - 5
Perform the repair with proper insulation
Solder a short, clean splice or install a replacement lead. Cover all exposed metal with heat shrink or electrical tape, ensuring a snug, leak-free seal. Avoid creating new stress points where the wire connects to the probe tip or meter body.
Tip: Use heat shrink for consistent insulation and strain relief. - 6
Test the repaired lead thoroughly
Reconnect the repaired lead to the meter and perform continuity and resistance tests against known references. Check for heat buildup during extended use and verify that readings stabilize across multiple trials.
Tip: Document test results and compare them to baseline measurements.
Your Questions Answered
Can I repair the wire instead of replacing the entire lead?
Yes, if the damage is limited to insulation or a short section with intact conductors. If the core shows significant wear, replacement is safer and more durable.
Yes, you can repair if the damage is limited to insulation or a short section, but replace the lead if the conductor is compromised.
Is it safe to repair while the meter is powered?
No. Always power down, disconnect power sources, and discharge any stored energy before handling wires to avoid shocks or shorts.
Never repair while powered; shut everything off first.
What tools are best for splicing thin multimeter leads?
Use a fine-tip soldering iron, appropriate gauge solder, and heat shrink tubing to create a secure, insulated splice without adding excess bulk.
A fine soldering iron with small heat shrink works best.
How can I tell if a repaired lead is trustworthy?
Test with continuity and resistance against a known reference. Check for stable readings over multiple trials and inspect the joint for heat damage or cracking.
Test the lead with known references and look for stable readings.
Should I replace the entire set of leads?
If damage is widespread or at multiple joints, replacing the entire lead set is safer and ensures consistent performance.
If multiple areas are damaged, replacing the whole set is safer.
Are there safety standards for multimeter leads?
Choose leads that meet general electrical safety standards and are rated for your meter’s operating voltage and category. Inspect insulation and connectors regularly.
Choose safety-rated leads and inspect them regularly.
Watch Video
Key Takeaways
- Inspect and document damage before repairing.
- Choose splice or replacement based on conductor integrity.
- Verify repairs with measured readings and stability checks.
- Proper insulation and strain relief extend lead life.