Battery Test with a Multimeter: A Practical How-To
Learn how to test a battery with a multimeter: verify voltage and load to gauge health. This 10ohmeter guide covers safety, steps, and reading interpretation for automotive and household batteries.

By following these steps, you’ll learn how to test a battery with a multimeter to verify voltage, measure resistance, and evaluate load response. This method works for car batteries, bike batteries, and everyday household cells. You’ll need a digital multimeter, quality test leads, safety gear, and a calm workspace to avoid sparks. Understanding when to replace a battery based on readings helps prevent unexpected failures.
Why test a battery with a multimeter?
A battery is a foundational component in nearly every electrical system, from cars to flashlights. Testing with a multimeter lets you quickly confirm whether the battery is delivering its nominal voltage and responding to load. The 10ohmeter analysis emphasizes that simple, repeatable measurements can reveal state-of-charge, aging symptoms, and potential failure modes without disassembly. For DIY enthusiasts and technicians, this approach reduces downtime and helps you plan replacements before a breakdown occurs. By mastering resting voltage, load behavior, and basic resistance checks, you gain a practical toolset for diagnosing batteries in automotive, home, and workshop contexts. The habit of documenting readings also builds a data trail that supports future troubleshooting and maintenance decisions.
Safety and prep before testing
Safety is non-negotiable when dealing with stored chemical energy. Always wear safety glasses and insulated gloves, work on a dry, non-conductive surface, and keep children and pets away from the workspace. Ensure the device or vehicle is off, the keys are removed, and there are no sparks or flames nearby. Inspect terminals for corrosion, cracks, or leaks before touching anything. If you notice swelling, leaking, or a strongly acrid smell, stop and replace the battery rather than continuing to test. Good prep reduces the risk of electric shock, chemical exposure, and accidental short circuits, and it sets the stage for reliable measurements. A clean, organized workstation also helps you avoid cross-contact with metal tools and reduces the chance of misreading a live circuit.
Understanding the readings: voltage, resistance, and load
Voltage is the primary indicator of a healthy battery at rest. Resistance and impedance provide insight into internal health and the battery’s ability to deliver current when needed. Load testing involves applying a controlled discharge to observe how voltage holds up under demand. Interpreting readings requires knowing the battery type (lead-acid, AGM, Li-ion, etc.) and the expected behavior under load. As you gain experience, you’ll learn to recognize patterns that indicate sulfation, bad cells, or insufficient capacity. Keep in mind that readings can vary with temperature and state of charge, so compare results to the battery’s rated specifications and any manufacturer guidance. In all cases, document the conditions (ambient temperature, battery state, equipment used) for accurate interpretation later on.
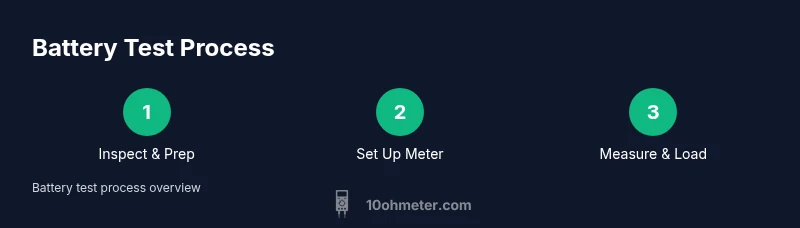
The battery test workflow: a high-level overview
A practical test workflow starts with tool readiness, safe setup, and methodical measurements. Begin by establishing a baseline with resting voltage, then apply a known load for a short interval and re-measure. Observe voltage recovery after the load is removed to assess the battery’s ability to rebound. For automotive batteries, ensure you use an appropriate load to avoid overstressing the battery. For smaller, non-automotive batteries, a simple resistor or dedicated load can provide meaningful data without risking damage. The goal is to determine whether the battery can sustain a typical load, a key sign of aging or impending failure. Always compare results to the battery’s specifications and consider environmental factors that may influence performance.
Battery types and how readings differ
Different battery chemistries have distinct voltage baselines and response to load. Lead-acid and AGM batteries typically maintain a steady voltage under light load but will drop under heavy demand if aging. Li-ion packs show different voltage behavior and can be sensitive to rapid discharges or improper charging. Alkaline consumer batteries (AA, AAA) have different expectations and often require specific testing methods. When interpreting readings, reference the manufacturer’s datasheet or a standard testing guide for the battery type you’re diagnosing. If readings deviate significantly from expected behavior, plan next steps such as recharging, conditioning, or replacement. Always ensure you’re using safety-approved procedures for each chemistry class to prevent damage or injury.
Troubleshooting common issues and mistakes
Common pitfalls include testing a battery while an electrical system is live, misreading the multimeter due to incorrect range selection, and neglecting terminal cleanliness. Loose or corroded connections can skew voltages and resistance readings, so clean terminals and tighten connections before testing. Temperature can affect readings, so note the ambient conditions. When a test shows inconsistent results, retest after repositioning test leads and rechecking the same points. If the battery is swollen, leaking, or making unusual noises, treat it as a failed unit and replace it rather than attempting risky tests. Following a deliberate, repeatable testing sequence helps you avoid misinterpretation and unnecessary replacements.
Authority sources and where to learn more
For safety and best practices, consult credible sources. The U.S. Department of Energy and NIST provide comprehensive guidance on electrical measurement safety and battery handling. OSHA offers general electrical safety standards that apply when testing energized equipment, and Energy.gov covers battery technology basics. These sources help you validate your process and stay up-to-date with industry guidelines.
Authority sources
- https://www.osha.gov
- https://www.nist.gov
- https://www.energy.gov
Maintenance and replacement decisions
Regular testing helps you catch aging or failing batteries early. Establish a routine that includes resting voltage checks, periodic load tests, and terminal cleaning on a schedule that matches the battery’s role (vehicle vs. stationary power vs. consumer electronics). If readings are consistently below expected levels, or if the battery cannot sustain a reasonable load, plan for replacement. Keeping a maintenance log with dates, readings, and observed behavior helps you track performance trends and budget replacements. Finally, consult the manufacturer’s guidelines and local regulations regarding disposal and recycling of old batteries to dispose of them responsibly.
Tools & Materials
- Digital multimeter(True RMS preferred; DC voltage range for battery testing)
- Test leads with probes(Shrouded safety probes; ensure good contact)
- Alligator clips or clamps(Helpful for stable connections on terminals)
- Safety glasses and insulated gloves(Protect eyes and hands from acid and sparks)
- Non-conductive work surface(Keeps tools from bridging terminals)
- Soft cloth and contact cleaner(Remove corrosion from terminals before testing)
Steps
Estimated time: 30-60 minutes
- 1
Prepare and inspect
Power down and set up a safe workspace. Put on PPE, inspect the battery for signs of damage or leaks, and ensure the battery is accessible. Clean terminals if needed before connecting test leads to ensure accurate contact.
Tip: Use a non-metallic tool to check terminal cleanliness; do not scrape aggressively. - 2
Configure the multimeter for DC measurements
Set the multimeter to the DC voltage range appropriate for the battery (higher than the battery’s nominal voltage). If the meter is auto-ranging, simply select DC voltage. Verify the probes are correctly connected to the COM and VΩmA ports.
Tip: Test the meter on a known-good source to confirm accuracy before measuring the battery. - 3
Measure resting voltage
Connect the black lead to the negative terminal and the red lead to the positive terminal with care to avoid shorting. Read the resting voltage and record the value. If the voltage is far below nominal, the battery may be discharged or aging.
Tip: Always disconnect any load or charger before taking resting readings. - 4
Apply a safe load and measure under load
Attach a controlled load or use a built-in load test function if available. Observe how the voltage drops under load and watch for recovery once the load is removed. A healthy battery should maintain adequate voltage under a brief load.
Tip: Keep the test load within the battery’s rated limits to prevent damage. - 5
Check resistance or impedance as applicable
If your multimeter can measure resistance or impedance, check internal resistance between terminals. Very high internal resistance can indicate aging or internal cell damage. Correlate with the observed voltage behavior for a clear assessment.
Tip: Temperature and battery chemistry influence impedance; interpret results in context. - 6
Interpret results and decide next steps
Compare resting voltage, under-load behavior, and resistance with the battery type’s expectations. If readings are consistently poor, plan recharge, conditioning, or replacement. Document the results and schedule follow-up checks as needed.
Tip: If in doubt, consult the battery manufacturer or a professional technician before replacing.
Your Questions Answered
Can a multimeter test a dead battery?
A multimeter can confirm whether a battery shows voltage at rest. If the resting voltage is very low or zero, the battery is likely discharged or failed. For a definitive diagnosis, combine resting voltage with a safe load test and inspect for physical signs of damage.
A multimeter can confirm low or zero voltage, indicating possible discharge or failure. Combine readings with a safe load test for a clearer diagnosis.
What’s the difference between resting voltage and loaded voltage?
Resting voltage reflects the battery’s state without supplying current. Loaded voltage shows how well the battery can sustain a load. A healthy battery should hold voltage under load and recover quickly after the load is removed.
Resting voltage is the battery at rest; loaded voltage tests its performance under demand and recovery afterward.
Is it safe to test an automotive battery with the engine off?
Yes, testing with the engine off is recommended to avoid high currents and moving parts. If you need to test while the vehicle is running, use engine-off readings as a baseline and consult safety guidelines for live systems.
Yes, with the engine off; tests during operation require special safety precautions and professional guidance.
Can I test small alkaline batteries the same way?
Alkaline batteries can be checked for voltage, but their behavior under load differs from rechargeable chemistries. Use caution and follow the battery’s manufacturer guidance for testing and disposal.
Alkaline batteries can be checked for voltage, but testing under load isn’t always applicable.
What readings indicate replacement is necessary?
Consistently low resting voltage and poor voltage under load indicate aging or failure. If internal resistance is high or there are repeated rapid voltage drops, plan replacement and proper disposal.
Consistently low voltage and poor load performance suggest replacement is needed.
Do readouts differ for Li-ion versus lead-acid batteries?
Yes. Different chemistries have different resting voltages, tolerances, and responses to load. Always reference the battery’s datasheet for expected values and safety considerations.
Chemistry matters: read according to the battery’s datasheet for accurate interpretation.
Key Takeaways
- Test resting voltage first to gauge baseline health
- Use a controlled load to reveal aging or weakness
- Interpret readings within the battery’s chemistry
- Ensure safe, clean connections for accuracy
- Document results for future reference