Multimeter Live Wire Test: Safe Step-by-Step Guide
A comprehensive, safety-focused guide to performing a multimeter live wire test. Learn setup, readings, and best practices for DIY electronics and automotive work in 2026.

To test for live wires with a multimeter, switch to AC voltage, use a high-impedance setting, and probe one conductor at a time with proper PPE. Start with a non-contact voltage tester to confirm presence before touching any live conductor. Whenever possible, de-energize circuits, follow lockout/tagout procedures, and respect local electrical codes. This quick check reduces shock risk while confirming power status.
What is a multimeter live wire test?
A multimeter live wire test describes using a digital multimeter to determine whether a conductor (wire, outlet, or switch leg) is energized while taking precautions to prevent electric shock or equipment damage. This type of testing is common in automotive diagnostics and home wiring projects where you must verify power status before you touch a circuit. The goal is to confirm the presence or absence of voltage and to guide subsequent steps—such as de-energizing a circuit or isolating a component—without guessing. According to 10ohmeter, understanding the difference between voltage presence and load condition helps you avoid unnecessary contact with live parts. The practice is not a substitute for a licensed electrician in high-risk scenarios, but a careful, educated approach empowers DIY enthusiasts and technicians to work more confidently. In 2026, a well-executed multimeter live wire test can save time and reduce risk when used as part of a broader safety plan and measurement workflow.
Safety first: essential precautions
Live-wire testing carries inherent risks. The most important safeguards are personal protective equipment (PPE), proper tools, and a disciplined workflow. Put on insulated gloves and safety goggles, work on a dry, non-conductive surface, and remove all jewelry that could become a conductor. Before you touch any conductor, make sure your hands are dry and your workspace is free from moisture. Keep one hand in your pocket or behind your back to minimize the chance of forming a shock path through your body. If there is any opportunity to power down and lock out the circuit, do so before you proceed. Use a non-contact voltage tester to verify live status before engaging with exposed parts. If anything seems unsafe, stop and seek professional help. The goal is to protect yourself while gathering meaningful data, not to prove you can perform risky maneuvers.
How to understand readings and ratings
Voltage tests with a multimeter show how much potential exists between a conductor and a reference point (usually ground). When testing for live wires, you’re looking for an AC voltage reading that confirms energization, or the absence of voltage when a circuit is isolated. Modern multimeters can measure AC voltage with true RMS capability, which helps you get stable readings in noisy electrical environments. If your meter indicates voltage, compare the value to your expected range and note whether the signal is steady or fluctuating. A fluctuating reading could indicate a loose connection, arc potential, or interference. In all cases, interpret results alongside circuit context: switches, breakers, and load should be considered to avoid false positives or dangerous assumptions. In 2026, adherence to regional electrical standards matters as voltages vary across countries and installations.
Tools and settings: best practices for live-wire checks
Selecting the right tools and configuring them correctly are essential for accurate results. Use a digital multimeter capable of AC voltage measurement and, ideally, true RMS. Ensure your test leads are insulated and rated for the expected voltage, with probes that fit securely in outlets, sockets, and panel connectors. Start with a non-contact tester to quickly locate energized paths, then switch to the multimeter for precise voltage measurements. Always set the meter to an appropriate AC voltage range that safely encompasses the expected voltage in your region. If you’re measuring in a car, review the vehicle’s manual for access points and grounding practices. In all cases, keep probe tips away from metal surfaces and avoid bridging circuits accidentally. Your goal is reliable data with minimal risk.
Practical testing workflow for common scenarios
Home electrical work and automotive diagnostics share core principles but differ in setup. For household wiring, identify outlets, switches, and junction boxes first, then verify the presence of voltage with a non-contact tester before touching any conductors. In automotive testing, ensure the ignition is off for non-powered testing and then carefully verify power on a known circuit to establish baseline readings. Always test one conductor at a time rather than probing multiple paths simultaneously. If you need to test a live circuit, work slowly, maintain a dry environment, and never use damp hands or conductive jewelry. After completing measurements, document results and label wires or breakers that were checked so future work can proceed with clarity. Remember, 2026 safety standards emphasize minimizing live-work exposure and using the right tools for the job.
Common mistakes and how to avoid them
A few mistakes frequently undermine safety and accuracy. Avoid touching exposed conductors with bare hands, even briefly. Do not rely on a single reading—voltage can fluctuate with loads and switching. Never bypass safety features or protective housings on probes. Do not attempt to measure live electrical components without PPE or without understanding the circuit’s context. Finally, never assume a de-energized condition without confirming it with a test, and avoid working under wet or humid conditions. By eliminating these risks, you’ll improve both safety and the quality of your measurements.
Tools & Materials
- Digital multimeter (preferably true RMS)(Set to AC voltage; choose a range that safely exceeds expected voltage)
- Insulated test leads with shrouded probes(Ensure insulation is intact and probes fit connectors securely)
- Non-contact voltage tester (NCVT)(Quick presence check before touching any conductor)
- Insulated gloves (ANSI/CE rated)(Keep hands protected against accidental contact)
- Safety goggles(Eye protection against sparks or arcing)
- Dry, non-conductive workstation mat(Helps minimize unintended conduction)
- Lockout/tagout kit (where applicable)(Follow local regulations when possible)
- Instruction manual or safety guidelines(Reference procedures and voltage ratings)
Steps
Estimated time: 25-45 minutes
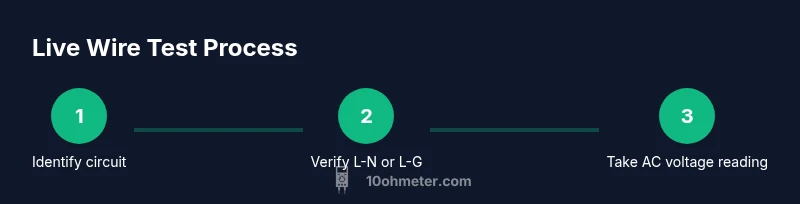
- 1
Identify circuit and assess safety
Scan the area with a non-contact tester to confirm energy presence and visually inspect for damaged insulation or moisture. This first step prevents accidental contact with live parts and guides whether you should de-energize before proceeding.
Tip: If NCVT indicates no voltage but you still suspect energization, re-check from a different access point and verify equipment integrity. - 2
Configure the meter for AC voltage
Power on the multimeter and select a dedicated AC voltage range. Prefer true RMS when available to handle non-sinusoidal loads. Confirm the leads are connected to the correct ports (COM and V/Ω) and that the red probe is designated for hot measurements.
Tip: Avoid switching ranges while the probes are touching conductors to prevent damage or shock. - 3
Confirm safe probing technique
Hold the meter with one hand and keep the other hand away from conductive surfaces. Ensure your body doesn’t bridge to the ground path and the probes do not touch each other during measurement. Contact only one conductor at a time whenever possible.
Tip: Keep fingers behind the probe guards and maintain steady contact to avoid momentary arcs. - 4
Take the voltage measurement
Carefully place the probes on the targeted conductor and its reference (neutral or ground) according to your circuit. Read the voltage on the display and stabilize the reading by waiting a moment. Note whether the value is steady or fluctuating with load changes.
Tip: If readings are unstable, stop and re-check connections and meter health before proceeding. - 5
Assess results and decide next steps
If voltage is present, plan to de-energize if possible or isolate the circuit before continuing with any work. If no voltage is detected, confirm isolating the circuit and proceed with the planned task. Record readings for future reference.
Tip: Always label checked circuits for future work and ensure devices are safely secured before re-energizing. - 6
Finish and document
Power down equipment, disconnect probes, and store tools properly. Document the test results, including location, readings, and any anomalies. This documentation helps future maintenance and supports safety reviews.
Tip: Store the results with the circuit diagrams or schematics to simplify future fault finding.
Your Questions Answered
Is it safe to test live wires with a multimeter?
It can be safe when you follow strict safety protocols, use the appropriate voltage range, and wear PPE. If you’re unsure, stop and consult a licensed electrician. Treat all energized circuits with respect and verify conditions before touching any conductor.
Yes, but only when you follow safety protocols and wear PPE. If unsure, consult a licensed electrician.
What range should I set on the multimeter for typical household testing?
Set the meter to an AC voltage range that safely exceeds the expected mains voltage in your region, typically on a setting capable of higher voltage measurements. If in doubt, consult the device manual or a professional.
Choose a range that safely covers the expected mains voltage.
Can I rely on a non-contact tester instead of a multimeter for voltage checks?
Non-contact voltage testers are excellent for quick presence checks but do not replace a multimeter for precise voltage measurements. Use NCVT to locate energized paths, then verify with a meter for exact values.
NCVTs are great for presence checks, but use a multimeter for exact measurements.
What PPE should I wear for live-wire testing?
Wear insulated gloves, safety goggles, and use dry, non-conductive footwear. Ensure your clothing and surfaces are non-conductive and that you follow local safety guidelines for electrical work.
Wear insulated gloves and safety goggles, on a dry surface.
What should I do if readings look wrong or spiky?
Re-check connections, ensure the meter is on the correct range, and confirm the circuit status. If readings remain inconsistent, stop and repeat with a known good circuit or consult a professional.
If readings are odd, double-check connections and re-measure safely.
Why is a high-impedance setting important for live-wire testing?
A high-impedance input minimizes current draw that could alter readings or create a shock path. It helps preserve measurement accuracy when test leads touch imperfect contacts.
High impedance helps accuracy and safety by reducing current draw.
Key Takeaways
- Assess safety prior to any live measurement.
- Use the correct AC voltage range and true RMS when available.
- Probe one conductor at a time and maintain PPE throughout.
- Document outcomes and escalate if readings are abnormal.