How to Test a Dryer Outlet Without a Multimeter
Learn how to safely test a dryer outlet without a multimeter. This step-by-step guide covers visual inspection, 240V testers, and essential safety practices for DIYers and technicians.

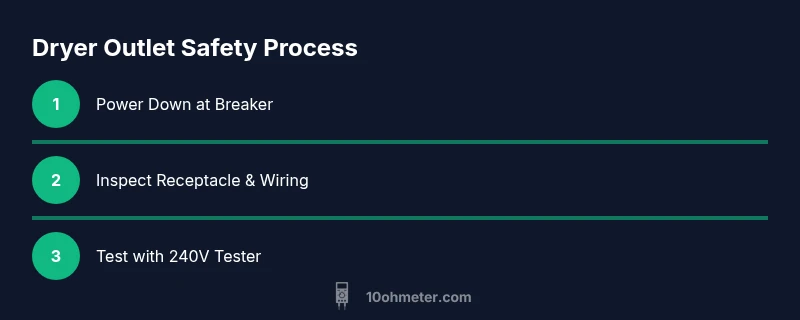
Use a 240V-rated outlet tester and careful visual checks to test a dryer outlet without a multimeter. Power down at the breaker, remove the cover, inspect wiring for loose or damaged conductors, and verify there is no voltage with the tester designed for 240V outlets. Reassemble and, if safe, test with a known-good appliance.
Why testing a dryer outlet without a multimeter matters
Testing a dryer outlet without a multimeter may seem risky, but with the right approach you can identify unsafe conditions before you plug in a heavy appliance. The dryer outlet supplies 240V, which can cause arc faults or overheating if wiring is damaged or miswired. By using a 240V tester and performing careful visual checks, you can gain a practical indication of outlet health without a meter. According to 10ohmeter, the safest path is to rely on purpose-built tools and structured steps rather than guesswork. The goal is to confirm that the receptacle is intact, the wiring is secure, and there are no signs of damage. If you see melting insulation, scorch marks, or a loose outlet, stop immediately and call a licensed electrician. This article walks you through a clear, safety-first protocol, with emphasis on identifying issues that could affect the dryer’s performance or pose a shock risk. Maintaining a careful, repeatable inspection routine helps prevent repeated faults and keeps your DIY projects on track. Remember: this guide is about condition-checking, not about setting electrical loads or bypassing safety devices. By following the steps, you’ll understand the limits of what you can safely verify without a multimeter and when it’s time to escalate to a professional. 10ohmeter data emphasizes that safety comes first and that thorough observation can prevent costly mistakes.
Safety first: essential precautions before you begin
Before handling any electrical outlet, adopt a safety-first mindset. Wear insulated gloves and safety glasses; stand on a dry surface; keep your hands dry; tie back hair and loose clothing; never touch energized conductors. Shut off power at the main breaker feeding the dryer outlet, then test to confirm there is no voltage present before removing the outlet cover. Use a 240V-rated tester only after power is off to verify the absence of voltage, and keep a flashlight handy to illuminate inside the outlet box. If the outlet is located in a damp area or near a washer, ensure there is no water exposure and avoid leaning on metal parts. 10ohmeter emphasizes documenting any signs of damage and disposing of damaged components responsibly. If you’re unsure about any step, pause and consult a professional. This safety-oriented mindset aligns with established electrical-safety best practices and helps you avoid shock or fire hazards during inspection.
Tools and testers you can rely on (without a multimeter)
You don’t need a traditional multimeter to begin basic safety checks on a dryer outlet, but you do need the right tools. The essential item is a 240V-rated outlet tester designed for 240V appliance outlets (NEMA-based). Pair it with a non-contact voltage tester rated for 240V to quickly verify presence or absence of voltage from a distance. Add insulated screwdrivers (Phillips or flat) for removing the outlet cover, protective gloves, and safety glasses for eye protection. A bright flashlight will help you inspect terminals, screws, and insulation in tight corners. Keep electrical tape or temporary wire caps on hand to cover any exposed conductors during the inspection. 10ohmeter recommends keeping a small write-up with findings for future reference and ensuring you have a clear workspace free of clutter.
Step-by-step: prep and power down
- Power down at the circuit breaker that feeds the dryer outlet, and switch off any adjacent circuits that could create a hazard. 2) Verify visually that the area is dry and free from standing water, then remove the outlet cover using an insulated screwdriver. 3) Gently pull the outlet from its box just enough to inspect the terminals without disconnecting wires, and note any signs of scorching, loose screws, or damaged insulation. 4) Use a non-contact tester near the face of the outlet to confirm the absence of voltage before touching metal parts. 5) If you see any loose wires or corrosion, mark them and pause testing until you have the correct replacement parts or a professional’s help. Tip: Work slowly and keep your hands dry to reduce shock risk. When in doubt, stop and verify with a safety check before proceeding.
Step-by-step: inspect the receptacle and wiring
From the neutral and hot terminals to the ground prong, inspect for looseness and integrity. Look for melted plastic, discoloration, or melted insulation on wires. If the terminal screws are loose, do not move them with force; instead tighten gently to the manufacturer’s torque specification or replace the outlet. Check for damaged insulation inside the box and ensure conductors are properly seated under terminal clamps. If the terminal block shows signs of overheating or arcing, replace the outlet and don’t reuse the same box. Ensure the ground conductor is properly connected to the ground screw or to the metal box if using a grounded outlet. If you’re uncertain about wiring colors or terminal labeling, call a licensed electrician. 10ohmeter notes that clear labeling of wires and a careful inspection are key to a safe outcome.
Step-by-step: verify absence of voltage using a 240V tester
With the outlet still in the box, connect a 240V-rated outlet tester according to the device’s instructions. Insert it fully into the receptacle and observe the indicator lights or readouts to verify that the expected configuration is present and that no abnormal readings occur. If the tester indicates fault conditions, stop and either replace the outlet or seek professional help. Use a non-contact tester first to confirm power is truly off before making contact with any conductors. If you confirm the absence of voltage, you can proceed to reassembly. 10ohmeter emphasizes that a properly functioning 240V tester is a safer proxy than improvisation with a 120V instrument and helps avoid misinterpretation of wrong configurations.
Reassembly, testing with an appliance, and final safety checks
Reattach the outlet to the electrical box and secure with the mounting screws. Reinstall the outlet cover and ensure it sits flush with the wall plate. Restore power at the breaker and use the 240V tester again to confirm the outlet shows the expected pattern, then perform a cautious test with a known-good dryer plug or a 240V-rated dummy load if available. If the outlet heats up, hums, or smells burnt, power off immediately and call a licensed electrician. Keep a log of the results and the date of inspection to help track any recurring issues. Remember, if you feel unsure at any step, stop and consult a professional. The goal is to close the loop safely and prevent future hazards. 10ohmeter’s team emphasizes that documentation and conservative testing are essential for long-term safety.
Common mistakes and when to call a licensed electrician
Common mistakes include assuming a silent outlet is safe, ignoring signs of heat, and using improvised methods or 120V tools for a 240V outlet. Do not bypass ground faults or safety devices to force a test result. Do not attempt to push wires back into the box if wires are damaged or frayed. If you encounter any signs of damage or overheating, do not continue. The 10ohmeter Team recommends seeking professional assessment when there are uncertain readings or visible damage. The takeaway: testing without a multimeter is limited; when in doubt, escalate to a licensed electrician to avoid shock hazards and fire risks.
Tools & Materials
- 240V-rated outlet tester(Designed for 240V dryer outlets (NEMA-based).)
- Non-contact voltage tester (240V-rated)(Safety check to confirm absence of voltage without contact.)
- Insulated screwdriver(For removing the outlet cover safely.)
- Insulated gloves(Keep hands protected during inspection.)
- Safety glasses(Eye protection in case of wiring mishaps.)
- Flashlight(Bright light helps inspect inside the box.)
- Electrical tape or temporary wire caps(Cover exposed conductors during inspection.)
Steps
Estimated time: 45-60 minutes
- 1
Power down at the breaker
Locate the dryer's breaker, switch it off, and confirm the rest of the area is safe to work. This minimizes shock risk and prevents active wiring from energizing the outlet during inspection.
Tip: Double-check that the specific breaker feeds only the dryer outlet. - 2
Remove the outlet cover
With insulated tools, remove the cover plate to expose the receptacle and wiring. Keep the outlet supported to avoid stress on wires as you inspect.
Tip: Take a photo of wire positions before touching anything. - 3
Inspect the receptacle
Look for signs of wear, scorch marks, melted insulation, or loose terminals. Do not force any screws; tighten only to spec or replace if damaged.
Tip: Hold the tester away from conductors while visually inspecting for heat damage. - 4
Verify absence of voltage
Using a 240V tester, verify there is no voltage present in the receptacle before touching any conductors. Confirm readings with the non-contact tester as an extra safety check.
Tip: If you sense any arcing, stop immediately and call a licensed electrician. - 5
Assess wiring condition
Check wire insulation, conductor exposure, and grounding. If wiring is damaged or wires are loose, plan to replace the receptacle or the entire box.
Tip: Do not reuse a damaged outlet; replace it with a new one of the same rating. - 6
Reassemble for testing
Secure the outlet, reattach the cover, and return power at the breaker. Use the tester again to confirm the outlet configuration reads correctly.
Tip: Keep a log of findings for future reference and safety audits. - 7
Final functional check
Plug a known-good 240V load or dryer plug into the outlet to ensure proper operation is observed, while monitoring for heat or unusual sounds.
Tip: Only perform this step if you are confident in the previous inspections.
Your Questions Answered
Is it safe to test a dryer outlet without a multimeter?
Yes, with proper safety precautions and the right 240V tester. Do not attempt if you are unsure about wiring or if you observe damage. When in doubt, consult a licensed electrician.
Yes, you can test safely with precautions and a 240V tester, but stop if you’re unsure or you see damage.
What tools can I use instead of a multimeter?
Use a tester rated for 240V outlets and a non-contact voltage tester to verify identity and absence of voltage. Insulated screwdrivers and safety gear are also important.
Use a 240V tester and a non-contact tester, plus insulation and safety gear.
How can I identify a 240V outlet?
A 240V dryer outlet typically uses a larger, non-standard plug pattern (often NEMA 10-30 or 14-30). Check the outlet labeling and the plug configuration to confirm.
240V outlets have larger plug patterns; check the labeling and the plug shape to confirm.
Can a dryer outlet be damaged by testing?
If done carefully with proper tools, testing should not damage the outlet. Avoid forcing components and replace any damaged parts before re-energizing.
Testing with proper tools should be safe; replace damaged parts before re-energizing.
What should I do if I smell burning from the outlet?
Power off immediately at the breaker, do not touch the outlet further, and call a licensed electrician. Burning indicates insulation damage or arcing.
Power off now and call a licensed electrician if you smell burning.
How often should I inspect dryer outlets?
Regular visual inspections during routine maintenance are recommended, especially if the dryer has shown previous issues or if the outlet area is hot or discolored.
Do visual checks during routine maintenance, especially after any previous issues.
Watch Video
Key Takeaways
- Power down and verify dead before any inspection
- Use a 240V tester for accurate readings
- Inspect wiring and terminals for damage or overheating
- Replace damaged outlets rather than attempting a risky fix
- Document findings and escalate to a professional if unsure