How to Find a Hot Wire with a Multimeter: A Practical Guide
Learn how to locate a hot wire using a multimeter with safety, clear steps, and practical tips for DIYers and technicians.

With a multimeter, you can safely identify a hot wire by confirming voltage relative to ground and neutral. This guide shows the steps, safety checks, and common mistakes to avoid when locating the live conductor in outlets, switches, or junction boxes. Learn how to find hot wire with multimeter quickly and accurately, while protecting yourself and the circuit.
Safety and prerequisites
According to 10ohmeter, safety is paramount when working with live circuits. Always start by turning off power at the breaker, then confirm absence of voltage with a reliable tester before handling any wires. Wear insulated gloves, keep your workspace dry, and use tools with insulated handles. If you must work in tight spaces, use a flashlight and keep a clear, organized box to avoid accidental contact. Remember: one slip can cause injury, so approach each step deliberately and slow. After shutting off power, test the circuit again before touching any conductors, and keep a clear path to the breaker in case you need to cut power quickly.
Understanding hot wires, neutrals, and grounds
In typical AC wiring, a hot wire carries the live voltage, a neutral provides the return path, and the ground is a safety path. Codes vary by country, and color conventions can change over time, so never rely on color alone. Use your multimeter to verify, by measuring voltage relative to a known reference point (ground or neutral) after you have energized the circuit, or better, after you’ve de-energized for disassembly. Being able to distinguish these conductors reduces the risk of short circuits and shocks.
Choosing the right meter settings and references
Set your multimeter to AC voltage (Vrms) with a range that accommodates the expected line voltage in your region (for example, 200–600 V range). Use fresh, properly rated test leads and inspect probes for cracks. Always test the meter on a known live circuit to confirm it reads correctly, then re-check after moving to the target wiring. For repetitive confirmation, you can use a second reference point (another known neutral or ground) to cross-check the reading.
Step-by-step workflow overview
The general approach is to de-energize, verify, identify conductors in the box, re-energize only when necessary for verification, and then re-deenergize to finalize work. This workflow minimizes exposure time to live conductors and reduces the chance of accidental contact. Document which conductor is hot for future reference, and label it to avoid confusion during maintenance.
Applying tests to outlets, switches, and junction boxes
When working with receptacles or switches, remove the faceplate only after power is off. Use a non-contact voltage tester to scan for any remaining live conductors, then use the multimeter to measure voltage between suspected hot wires and ground/neutral. In junction boxes, keep conductors organized and maintain insulation; never rely on loose wires or makeshift splices. Document findings and secure the box before restoring power.
Verifying results and avoiding common mistakes
Double-check readings with multiple references and ensure the meter leads are not bridging neighboring conductors. A common error is measuring with the circuit still energized or using a DC range for AC mains. Always work with PPE and keep one hand behind your back to minimize shock risk. The 10ohmeter team emphasizes documenting test points and thinking through each probe path before contacting any metal surfaces.
Tools & Materials
- Digital multimeter (AC voltage capable)(Set to AC voltage, appropriate range (e.g., 200–600 V).)
- Test leads with insulated probes(Use intact leads; inspect for cracks before use.)
- Non-contact voltage tester (NCVT)(Recommended for quick live-wires checks before contact.)
- Insulated screwdriver set(For panel access; ensure tools are rated for electrical work.)
- Electrical PPE (gloves, safety glasses)(Insulated gloves add protection; glasses shield eyes from sparks.)
- Flashlight or headlamp(Better visibility in dim boxes or basements.)
Steps
Estimated time: 60-90 minutes
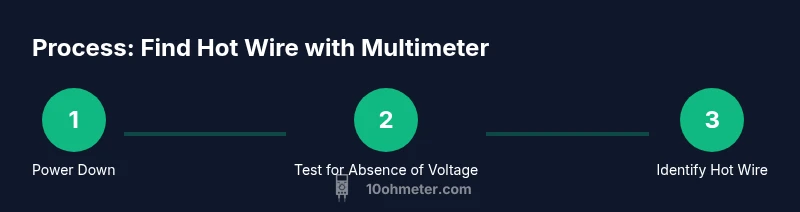
- 1
Power down the circuit
Locate the corresponding breaker and switch it off. If needed, switch off the main if you’re unsure which breaker controls the box. This minimizes risk of electric shock during probing.
Tip: If you can't access the panel safely, do not work on the circuit. - 2
Verify the absence of voltage
Use the NCVT to confirm there’s no live voltage on the conductors you’ll touch. Then, with the box opened for inspection, measure between suspected hot wires and ground/neutral using the multimeter.
Tip: Test the tester on a known live outlet to ensure it reads correctly before testing target wires. - 3
Identify conductors in the box
Carefully separate wires, noting insulation color and grouping, while avoiding contact with bare metal. Mark the conductors for reference if you can.
Tip: Never rely on color alone; verify function with measurements when safe. - 4
Re-energize briefly to verify
If necessary for a quick confirmation, restore power and measure voltage between each conductor and ground/neutral. Watch for heat, smoke, or unusual smells and power down again immediately if anything looks off.
Tip: Keep your body and meters clear of potential arcing paths. - 5
Confirm hot wire with reference points
A wire showing consistent voltage relative to neutral/ground is hot. Document it and label the conductor. Do not assume based on color alone.
Tip: Label the hot wire with tape or a marker to prevent future confusion. - 6
Finalize and secure
Power off again, secure all wires, replace the cover or box, and restore power only when everything is safely reassembled.
Tip: Check for heat after a few minutes of operation when power is restored.
Your Questions Answered
Can I locate a hot wire with a non-contact voltage tester first?
Yes. Use a non-contact tester to quickly verify live wires before probing with a multimeter. This reduces risk by confirming presence of voltage without contact.
A non-contact tester helps you quickly check for live wires before you touch anything.
Why is it dangerous to test live circuits with a multimeter?
Testing live wires increases the risk of shock, arc flash, or equipment damage. Always de-energize when possible and use proper PPE.
Testing live wires can shock you or cause an arc. De-energize whenever feasible.
How do I identify hot vs neutral vs ground in a box?
Trace each conductor to its function using color coding and, if needed, a continuity check to ground, but avoid relying on color alone since codes vary.
Identify hot, neutral, and ground by tracing connections and, if needed, testing with a meter.
What meter settings should I use for AC voltage?
Set the multimeter to AC voltage with a range suitable for your circuit (e.g., 200V or higher). Do not use DC settings for AC circuits.
Set to AC voltage, not DC, and choose a range that matches your circuit.
Is it safe to work inside a switch/outlet box?
Only if the box is de-energized, and you follow safe handling procedures. If you’re unsure, stop and consult a professional.
Only work when it's de-energized and you're confident in your setup.
Can I test automotive wiring with a multimeter to find hot wires?
Yes, but automotive circuits can differ. Use appropriate PPE and refer to the vehicle's service manual for wiring colors and voltages.
You can test automotive wiring, but follow manual guidelines.
Key Takeaways
- Identify hot wires safely using AC voltage tests
- Always de-energize before disassembly
- Verify with multiple references and label hot conductors
- Document findings for future maintenance
- Follow PPE and safe handling practices