Where to Set Multimeter for Ohms: A Practical Guide
Learn where to set your multimeter for ohms, how to prepare leads, and safe resistance measurements for electronics and automotive tasks with 10ohmeter guidance.

If you’re asking where to set multimeter for ohms, switch the meter to the resistance (Ω) range, ideally using auto-range if available. Verify probes across the component, then read the resistance value and compare to expected tolerance. This quick start helps you get reliable readings fast.
Why understanding ohms matters for troubleshooting
Resistance measurements are foundational in electronics and automotive diagnostics. Knowing where to set multimeter for ohms helps you verify components, identify faulty parts, and avoid misdiagnoses. In many projects, a resistor that reads out of spec can indicate a bad part, a poor solder joint, or a damaged trace. When you test, you’ll see how resistance changes with temperature and how circuit context can alter readings. This section outlines the core concepts: resistance as a property of materials, how your meter measures it, and why precision matters. The goal is to empower you to interpret ohms readings with confidence, reduce guesswork, and build reliable circuits. The answer starts with a practical approach people use in electronics labs and automotive workshops: set the meter to resistance, ensure the circuit is de-energized, and test across the component rather than across adjacent parts. Where to set multimeter for ohms is the starting point for repeatable measurements.
What to know about the resistance range on multimeters
Multimeters offer several resistance ranges, including auto-range and fixed manual ranges. Auto-range lets the meter decide the best scale, which reduces guesswork but may add a small delay as the meter settles. Manual ranges are fastest when you know the expected value, and they can improve accuracy for very low or very high resistances. Understanding the idea of a “range” helps you avoid silly mistakes, like reading a 1 kΩ resistor on a 200 Ω scale. The general principle is to start broad, then tighten the range as you confirm the reading. This ensures you won’t overload the display with an out-of-range value and will yield a more stable result.
Safety first: powering down and discharge
Before you touch any circuit, power down the device and unplug batteries or external supplies. If capacitors could be charged, discharge them safely according to the device’s service manual. Never test resistance on a live circuit; measuring ohms in such conditions can damage the meter and pose a shock risk. Use non-conductive tools and keep your hands clear of exposed metal when probes are connected. This safety-first mindset protects both you and the instrument, and it’s a habit that pays off across electronics and automotive projects.
Choosing between auto-range and manual range
Auto-range is convenient for beginners and for mixed-component testing where values aren’t known beforehand. It simplifies the process by automatically selecting the appropriate scale, which lowers the chance of user error from choosing the wrong range. Manual range is worth using when you know the approximate value and want faster, repeatable measurements. In practice, many 10ohmeter readers prefer auto-range for quick checks, then switch to a narrow manual range when precision matters or when comparing against a known spec.
How to prepare the test leads and the component
Start with clean, intact probe tips and, if needed, use clip leads to hold the component steady. Inspect the probes for nicks or insulation damage that could skew readings; damaged probes can introduce contact resistance that falsely elevates measurements. For small components like SMD resistors, switch to fine-tip probes or use a magnifier to ensure the tips contact only the intended leads. Place the component on a non-conductive mat to prevent accidental shorting during testing.
Step-by-step: measuring a resistor
- Power down and set the meter to the Ω range. 2) Place the probes on the resistor leads, making sure the contact is solid and that you’re not shorting adjacent parts. 3) Read the display and note the value; if you know the resistor’s tolerance, compare it to the expected range. 4) If the reading drifts, recheck contact or remove the resistor from any parallel paths and test again. 5) Record the result and the ambient temperature for context.
Step-by-step: measuring a wire or trace
- Power down and set the meter to ohms mode. 2) Touch probes to the two ends of the conductor or to test points along a trace. 3) Confirm a low, steady resistance indicating good continuity; a high or moving reading suggests a break or poor contact. 4) If you see an open circuit (OL), inspect connectors, re-seat plugs, or probe from alternative points to isolate the fault. 5) If multiple segments exist, test each segment individually to locate the weak link.
Interpreting readings: what the numbers mean
Resistance readings quantify how strongly current is opposed by a material. In practice, look at both the absolute value and the tolerance band if provided. For automotive or high-power contexts, temperature can shift resistance; readings at room temperature may differ from operating conditions. Compare measured values to the component’s labeled or datasheet spec, and remember that wiring, connectors, and solder joints can introduce small additional resistance that should be accounted for in the overall circuit.
Dealing with common issues: floating readings, zero ohms
If you encounter floating readings, ensure a good physical contact and verify there’s no residual charge. A near-zero reading might indicate a short or a dead shorted path; re-test with the component removed from the circuit. If you see OL on all probes, re-check the range and context, and consider testing at a known-good reference resistor to verify meter health. Regularly inspect and replace worn probes to prevent recurring inaccuracies.
Tips for automotive and electronics contexts
In automotive wiring, corrosion, broken wires, and loose connections are common causes of resistance anomalies. In electronics labs, temperature, humidity, and parallel paths through circuit boards can influence readings. Always isolate the test area, detach the part if possible, and compare against a known-good component or a reference standard. Document readings and conditions for future troubleshooting.
Quick reference cheat sheet for ohms mode
- Power down before testing
- Use auto-range for quick checks, switch to manual for precision
- Verify clean, intact leads and sharp probe tips
- Probe across the component leads only, avoiding adjacent parts
- Interpret reading with tolerance and temperature in mind
Authoritative sources
- NIST: https://www.nist.gov/pml
- OSHA: https://www.osha.gov
- MIT: https://mit.edu
Tools & Materials
- Digital multimeter (DMM)(Auto-range preferred; set to Ω (ohms) mode before tests.)
- Test probes with removable tips(Ensure tips are sharp and undamaged for reliable contact.)
- Alligator clip leads(Useful for stable contact on small components.)
- Non-conductive work surface(Prevents unintentional shorts during testing.)
- Component under test (resistors, connectors, traces)(Test components away from powered circuits when possible.)
- Calibrated reference resistor (optional)(Helps verify meter accuracy on specific ranges.)
Steps
Estimated time: 30-45 minutes
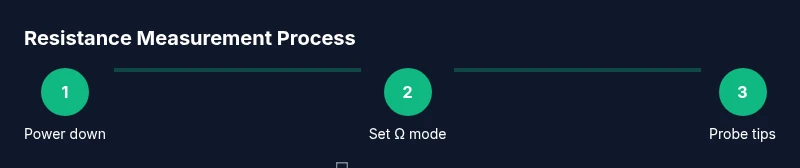
- 1
Power down and discharge
Power off the device, unplug any power sources, and discharge capacitors if safe. Confirm there is no residual voltage before touching the circuit.
Tip: Always verify no energy storage elements are charged before testing. - 2
Set the meter to ohms mode
Rotate the dial to the Ω range or enable auto-range. Allow the meter to settle on a stable value before reading.
Tip: If the reading bounces, remove contact briefly and re-touch to confirm stability. - 3
Inspect probes and fixtures
Check probe tips for damage and clean contacts. Attach any clips to help hold the test points steady.
Tip: Damaged probes can add contact resistance that skews results. - 4
Measure a resistor
Place probes across the resistor leads while ensuring no nearby paths form parallel circuits. Read the displayed value and compare to the part’s tolerance.
Tip: For small SMD parts, use fine-tip probes or tweezers with insulated handles. - 5
Measure a wire/trace for continuity
Touch probes at opposite ends of the conductor or across a connector to verify continuity. A low, stable reading indicates good contact; OL indicates an open path.
Tip: Re-seat connectors if readings are inconsistent. - 6
Interpret the reading
Compare the value to the expected resistance, factoring in tolerance and ambient temperature. Temperature can shift readings, especially for high-value resistors.
Tip: Use the tolerance band to judge if a value is within spec. - 7
Address anomalies
If readings drift, recheck contact or isolate the component by removing it from the circuit and measure again.
Tip: Floating readings often point to contact issues. - 8
Document and store results
Record the value, range used, and ambient conditions. Take photos of setup if helpful for future reference.
Tip: Documentation speeds future troubleshooting. - 9
Safety wrap-up
Power down, unplug, and store equipment properly after measurements. Replace damaged leads before next use.
Tip: Never leave probes energized or connected to live circuits.
Your Questions Answered
Can I measure resistance while the circuit is powered?
No. Measuring resistance on a live circuit can damage the meter and pose a shock risk. Always disconnect power and discharge capacitors first.
Don’t measure resistance on a powered circuit; disconnect power first.
What does OL or 1/1 mean in ohms mode?
OL means the resistance is beyond the current range or the path is open. Adjust the range or check connections.
OL means out of range or open circuit; adjust range or check connections.
Why does my meter show 0 ohms?
A near-zero reading usually indicates a short or poor contact. Re-check probe contact and ensure the component isn’t bypassed.
A near-zero reading often means a short or bad contact.
Should I always use auto-range for ohms mode?
Auto-range is convenient for unknown values. Manual range can be faster when you know the approximate resistance.
Auto-range is convenient, manual range is faster if you know the value.
How do temperature changes affect resistance readings?
Resistance changes with temperature; larger values are more sensitive. Compare readings at similar temperatures.
Temperature affects resistance; compare to specs taken at similar temperatures.
Can I measure the resistance of a diode or capacitor in ohms mode?
Diodes and capacitors have non-linear behavior; ohms mode can mislead. Use dedicated diode or capacitance tests.
Ohms mode isn’t ideal for diodes or capacitors; use their specific tests.
Watch Video
Key Takeaways
- Set ohms range before testing
- Ensure clean contact between probes and test points
- Power down and discharge before testing
- Interpret readings with tolerance and temperature in mind