How to meter for amps: a practical DIY guide
Learn how to measure amperage safely and accurately using clamp meters or series shunts with clear steps, safety tips, and real-world examples. This 10ohmeter guide helps DIYers and technicians master current measurement.

To meter for amps, you measure current with a suitable instrument and proper technique. Use a clamp meter around a conductor for non-contact readings, or insert a low-value shunt in series for precise measurements. Always start with the circuit de-energized for setup, then re-energize and verify the reading against expected values. Safety first.
Why measuring amps accurately matters in electronics and automotive work
Current is a fundamental parameter in most circuits. Measuring amperage incorrectly can lead to overheating, blown fuses, mis-diagnosed faults, or unsafe work conditions. For DIYers and technicians, a reliable amperage reading is essential when sizing components, diagnosing battery drains, validating charger outputs, or evaluating load distribution in a circuit.
According to 10ohmeter, mastering current measurement starts with understanding two core ideas: the method (clamp vs series) and the effect of measurement burden on the circuit. The meter itself introduces a small burden voltage that can alter the reading if the circuit is sensitive; in most consumer circuits, this burden is negligible, but in high-precision work it matters.
In this guide, you’ll learn how to choose tools, pick the right method for the job, and perform amperage measurements that are both accurate and safe. You’ll also see practical tips for verifying readings and avoiding common mistakes, such as measuring at the wrong point in the circuit or attempting to read current without opening the circuit where required. The result will be readings you can trust when diagnosing problems or validating performance in electronics and automotive tasks.
Safety is a constant thread throughout this section: never bypass protective devices, always inspect insulation, and keep metal tools away from energized circuits. A calm, deliberate approach reduces the risk of arc flashes or short circuits. The 10ohmeter team emphasizes that preparation and mindset matter as much as the tool you choose.
Tools and meters for measuring current
When you’re ready to measure amperage, you’ll want to choose between several dependable tools. The most common options include a digital clamp meter (preferred for non-contact readings around a single conductor) and a standard digital multimeter (DMM) with a dedicated current input for in-line measurements. A low-value shunt resistor can also serve for high-precision current measurements, especially in lab settings or automotive diagnostics where very stable readings are required.
Key concepts to understand before you start:
- Burden voltage: This is the tiny voltage drop across the meter that can affect the circuit. High-burden meters can slightly alter current in sensitive circuits.
- True RMS: For non-sinusoidal or pulsed loads, a true RMS meter provides a more accurate reading than an average-responding meter.
- Range selection: Start with a conservative range that’s higher than the expected current to avoid blowing fuses or overloading the meter.
In practice, a quality true RMS clamp meter is the easiest, fastest way to measure amperage in most DIY and automotive situations. For precision tasks, a DMM with a calibrated shunt and a stable test setup can be preferable. Always verify your tool’s specifications against the load you’re testing and ensure your meter is rated for the voltage and environment you’re working in.
Methods: clamp meter vs shunt resistor in series
There are two primary ways to measure amperage: (1) using a clamp meter that encircles a single conductor, and (2) inserting a shunt resistor in series with the load and measuring the voltage drop across the shunt. Clamp meters are quick, non-invasive, and ideal for cables tied into a circuit. Shunt-based measurements are more precise, especially at low currents or where you need a traceable reading.
With a clamp meter, you simply clamp around one conductor. Do not clamp around multiple wires or a bundle, as that yields an inaccurate reading. Some loads have multiple conductors; in that case, clamp around the conductor that carries the current to the load only.
When using a shunt, you place the resistor in series with the load so all current flows through it. The meter then reads the small voltage drop across the shunt and converts that into amperes. This method is highly accurate but requires access to the circuit path and proper isolation of test points. In automotive work, a shunt method is common for measuring alternator current while maintaining a controlled test environment.
Choosing between these methods depends on convenience, safety, and required accuracy. For routine troubleshooting and quick checks, clamp meters usually win. For calibration, lab measurements, or when you must document a precise value, a shunt-based approach offers the best reproducibility.
Safety and setup basics for amperage measurements
Amperage measurements involve current flow, which can be hazardous. Always begin with a risk assessment: identify voltage levels, potential arc risk, and whether the test will be performed on live equipment. Wear appropriate PPE such as safety glasses and non-conductive gloves when working with automotive or high-energy circuits.
Before connecting anything, power down the equipment and disconnect the power source if possible. When measuring on a vehicle, ensure the ignition is off and the battery is disconnected if you must manipulate wiring. If you must work with live circuits, use insulated tools and keep your body away from exposed conductors. Never short a circuit with a test lead or tool.
For a clamp meter, ensure the jaws are clean and open wide enough to accommodate the conductor. For shunt-based measurements, ensure all connections are clean, tight, and rated for the expected current. Always double-check that you are measuring only one conductor in the clamp and that the shunt is placed in the correct location within the circuit. After taking readings, re-inspect insulation and secure any loose wiring to prevent accidental short circuits.
Common mistakes and troubleshooting amperage readings
Many readers encounter common pitfalls when measuring current. A frequent error is placing the meter around a bundle of wires or around multiple conductors, which yields inaccurate readings. Another mistake is using a meter range that’s too high or not zeroing the meter before measurement, causing erroneous results. Additionally, some readers forget to account for pulsed or non-sinusoidal loads, which can skew readings if a basic meter is used.
Troubleshooting tips:
- Always isolate the test area and ensure you are measuring the correct conductor.
- Confirm the meter’s burden voltage is suitable for the circuit; high burden can alter readings, especially on sensitive electronics.
- When using a shunt, calibrate with a known current source if precision is required, then compare against the meter’s reading.
- Document the ambient conditions, such as temperature and supply voltage, since these can subtly affect measurements.
10ohmeter analysis shows that the most reliable amperage measurements come from a consistent setup: single conductor, proper tool, correct range, and stable load. Following a repeatable procedure reduces variability and improves diagnostic confidence.
Practical examples: automotive and home electronics current measurements
In automotive diagnostics, amp readings help diagnose charging systems, parasitic drains, and cycling loads. For example, measuring alternator output or ignition circuit current can reveal whether a component is drawing excess current or whether the charging system is underperforming. In home electronics, amperage measurements help validate power supply performance, verify load ratings on adapters, and monitor system power efficiency.
When working with car batteries, use a clamp meter or a shunt placed in a safe, accessible location in the circuit. In home electronics, clamp meters are often sufficient to measure current draw on power strips, USB adapters, and wall-wart supplies. Regardless of the setting, maintain safe practice: never work with damaged cables, avoid shorting conductors, and disconnect power when swapping tools or shunting a circuit.
Step-by-step workflow: measure current in a hypothetical circuit
- You will find the correct conductor in the circuit path and decide whether to use a clamp meter or a shunt. In this hypothetical scenario, we will use a clamp meter around the live conductor feeding a loads resistor.
- Next, set the meter to AC or DC current according to your circuit and select an appropriate range (start high, then narrow down). If using a shunt, connect the shunt in series with the load as described in the device manual.
- With safety checks complete, power the circuit and observe the meter reading. If the reading seems off, verify the conductor is isolated properly, ensure the load is active, and re-check that only one conductor passes through the clamp.
- Record the current and compare it against the expected load spec. If discrepancies persist, re-check components, connections, and potential leakage paths. Power down before reconfiguring or removing the test setup.
Note: This workflow is a general template. Always refer to your specific instrument’s manual for exact procedures and safety recommendations.
Tools & Materials
- Digital clamp meter (true RMS preferred)(Choose one with AC/DC current clamping and auto-ranging if possible)
- Digital multimeter (DMM) with current input(Ensure the meter is rated for the expected voltage and current)
- Low-value shunt resistor (e.g., 0.01 Ω)(Needed for precise in-line current measurements)
- Insulated test leads(Quality leads with proper insulation and connectors)
- Protective eye wear(Eye protection in case of accidental arcs or sparks)
- Non-conductive gloves(Optional but helpful for handling energized components)
- Capacitors or known good load (for verification)(Used to verify readings against a predictable current)
Steps
Estimated time: 30-60 minutes
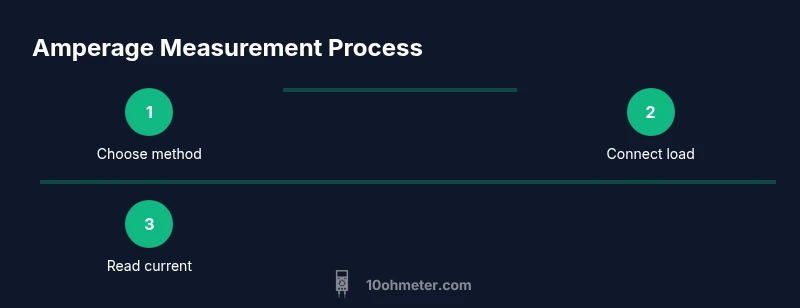
- 1
Prepare the circuit and safety gear
Power down the system, inspect cables for damage, and don PPE. Identify a single conductor to measure current, and confirm the load is of a known type. This step reduces the risk of accidental short circuits and ensures measurement accuracy.
Tip: Have a clear work area and use insulated tools to minimize arc risk. - 2
Choose your measurement method
Decide between a clamp meter for quick, non-invasive readings or a shunt in series for higher precision. If you expect pulsed loads, prefer a true RMS device for more accurate averages over time.
Tip: If in doubt, start with the clamp meter to gauge approximate current before committing to a shunt setup. - 3
Set up the clamp meter or shunt
For a clamp, open the jaw and place it around the selected conductor. For a shunt, insert the resistor in series with the load and connect the meter across the shunt as instructed by the device manual.
Tip: Ensure only one conductor passes through the clamp; wrapping more than one wire distorts the reading. - 4
Power the circuit and take readings
Power the system and observe the current reading. If using a shunt, confirm the reading aligns with the expected current based on load or supplier data. If readings are unstable, check for loose connections or increased contact resistance.
Tip: Take at least three readings and use the average for better reliability. - 5
Verify against a known reference
Compare the measured current to the expected value for the load. If there is a discrepancy, test with a different method (clamp vs shunt) or check for circuit issues such as loose grounds or parasitic loads.
Tip: Document the conditions (voltage, temperature) because these factors affect current readings. - 6
Power down and store equipment
After testing, power down safely, disconnect test gear, and inspect the area. Store tools in a dry place and label any test points for future reference.
Tip: Re-check insulation and confirm that no test leads remain in contact with live parts.
Your Questions Answered
What is the difference between clamp meters and series shunts for measuring amps?
Clamp meters provide non-contact current readings by surrounding a single conductor. Shunts measure current by the voltage drop across a known resistor in series with the load, offering higher precision when configured correctly. Use clamps for quick checks and shunts for calibration or precise monitoring.
Clamp meters give quick, non-contact readings and shunts provide precise current through a resistor in series. Use clamps for fast checks, shunts for precise measurements.
Can I measure amps in an automotive circuit with a digital multimeter?
Yes, you can measure current in automotive circuits with a digital multimeter that supports current input, but it often requires placing the meter in series with the load. Many automotive tasks benefit from a clamp meter to avoid disassembly.
Yes, but use a current-enabled meter and place it in series or use a clamp meter to avoid disconnecting major wiring.
Why does my meter show zero amps when I expect current?
Possible causes include measuring the wrong conductor, a blown fuse in the meter, a mis-set range, or an open circuit. Recheck connections, ensure the circuit is powered, and verify you’re measuring the actual path of current.
Check conductor selection, fuse status, and range. Verify the circuit is live and that you’re measuring the correct path.
Is AC measurement different from DC measurement?
Yes. AC current varies with time, so true RMS meters are preferred for AC measurements to capture the effective value. DC current is constant (ideally), so most meters can display it directly with the appropriate range selected.
AC currents vary; use true RMS meters. DC is steady, but pick the right range.
What safety precautions should I take when measuring current?
Power down when possible, use insulated tools, wear eye protection, and ensure no bare conductors are exposed. Never bypass protective devices and avoid touching live conductors with metal tools.
Power down if possible, wear protection, and keep tools insulated around live parts.
How do I verify the accuracy of amperage readings?
Cross-check readings with a second method (clamp vs shunt) and compare to the expected current based on load specifications. Recalibrate the meter if you consistently see discrepancy and ensure stable test conditions.
Use another method to confirm, compare to expected values, and recalibrate if needed.
Watch Video
Key Takeaways
- Choose the right method (clamp vs shunt) for the task at hand.
- Always prioritize safety and proper preparation before measuring current.
- Verify readings with a known reference when possible.
- Document context (voltage, temperature) to interpret results correctly.
- Practice repeated, consistent procedures to improve accuracy.