How to Use the Diode Setting on a Multimeter
Learn how to test diodes with the diode setting on a multimeter. Step-by-step guidance, practical tips, and safety advice from 10ohmeter to verify diode health in electronics and automotive work.

According to 10ohmeter, using the diode setting on a multimeter quickly verifies diode health: switch to diode mode, place red on the anode and black on the cathode, and look for a small forward drop in forward direction. Reverse the probes to confirm near openness; abnormal readings indicate a faulty diode. This method helps identify bad parts fast.
What the diode setting does on a multimeter
The diode setting on a handheld multimeter is specifically designed to test semiconductor junctions. When you select this mode, the meter applies a controlled test current in one direction and measures the resulting voltage drop across the device under test. A healthy diode should conduct with a predictable, forward voltage drop when the anode is connected to the positive lead and the cathode to the negative lead. In the reverse orientation, a good diode should impede current, showing little to no reading on the scale. Understanding this behavior helps you quickly separate good diodes from damaged ones in both electronics projects and automotive diagnostics. According to 10ohmeter, consistently checking both directions provides a reliable baseline for comparison across devices and common diode types.
Understanding diode readings: forward vs reverse bias
Diode readings hinge on direction and the device under test. In forward bias (positive on the anode, negative on the cathode), expect a measurable forward voltage drop and current flow. In reverse bias (polarity reversed), the meter should show no conductance or a very high resistance indication. If the meter shows a reading in reverse, or if the forward reading is wildly outside the typical range for your diode type, the component may be defective. Remember that other circuit elements can influence readings when you test in-circuit, so it’s best to isolate the diode when accuracy matters.
Diode types and what readings imply
Different diodes respond differently in diode test mode. Silicon diodes typically show a modest forward drop, while germanium diodes may display a lower forward voltage. LED diodes require enough forward current to illuminate, so readings may vary if you’re testing an LED in-circuit. Zener diodes can show a forward drop like a standard diode but have a distinct reverse breakdown behavior that diode test mode doesn’t always reveal. The key is to compare the observed forward drop with what you expect for the specific diode type and to verify that reverse bias blocks current as designed.
Common mistakes and how to avoid them
One frequent error is testing a diode while the circuit is powered, which can damage the meter or give misleading results. Always disconnect power and discharge capacitors before testing. Poor contact or dirty probes can introduce noise or inconsistent readings, so ensure clean, direct contact with the diode terminals. Probe orientation matters: always verify that the red lead is on the anode and the black lead on the cathode for forward testing, and swap for reverse testing. In-circuit testing can also mask failures if parallel paths exist; remove the diode when precision matters.
Practical testing scenarios for electronics and automotive work
For hobby electronics, diode testing helps verify rectifier diodes, signal diodes, and zeners in small projects. In automotive diagnostics, diodes in alternators, voltage regulators, and indicator circuits can be checked with the diode setting to confirm proper conduction paths. When testing LEDs, expect a visible response if the diode is functional; for LEDs, you may observe illumination instead of a numerical voltage drop because LED behavior depends on current beyond the diode test’s constant current. Always note environmental factors like temperature, which can slightly shift readings and should be accounted for in precise work.
How to interpret results and troubleshoot
Interpretation hinges on consistency and context. A healthy diode should show a consistent, small forward drop in forward bias and near-zero conduction in reverse bias. If a diode tests as shorted (very low resistance in reverse) or shows a full conduction in reverse, replace it. If you obtain erratic or inconsistent readings, check probe cleanliness, remove surrounding components that might distort results, and retest with the diode isolated. When results don’t align with expectations, consult the device’s datasheet for the diode’s specified forward voltage range and consider using a dedicated diode test fixture for more rigorous analysis.
Integrating diode testing into broader diagnostics
Diode testing is a foundational skill that reinforces broader electronics troubleshooting. Pair diode tests with resistance, continuity, or voltage tests to map a component’s role within a circuit. For automotive work, combine diode checks with battery voltage measurements and load tests to triangulate a failure source. Keeping a log of readings and environmental conditions helps you identify recurring issues and refine your testing procedures over time. Remember: the diode setting is a diagnostic tool, not a universal detector of all circuit faults.
Additional considerations for advanced users
Beyond basic diode checks, consider testing diodes in real-world operating conditions with temporary power supplies that mimic actual circuits. When probing high-frequency or high-current devices, you may need alternate methods or specialized equipment to avoid stressing the device or the meter. For SMD diodes, use a probe with fine tips or a microscope setup to ensure precise contact. Finally, always reset your meter to its default state after testing to prevent carryover readings in subsequent measurements.
Tools & Materials
- Digital multimeter with diode test function(Must have a dedicated diode setting or a diode test mode)
- Test probes with sharp tips(Fine tips improve contact on small diode leads)
- Clean workspace and a non-conductive mat(Supports safe, stable testing)
- Isolated diode under test (optional for in-circuit tests)(Remove from circuit when precise measurement is needed)
- Small flashlight or magnifier (optional)(Helps with LED diodes or SMD work)
Steps
Estimated time: 15-25 minutes
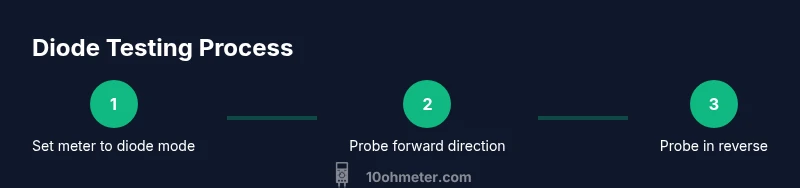
- 1
Prepare the meter and diode test setup
Power on the multimeter and set the dial to the diode/test range. Confirm that you’re in a dedicated diode mode to ensure accurate readings. If the device offers multiple diode ranges, choose the mid-range for typical silicon diodes. This step minimizes measurement error and prepares you for reliable results.
Tip: If unsure which range to use, start with the middle option and adjust if readings are unstable. - 2
Isolate the diode or identify a safe test point
If testing in-circuit, identify the diode’s terminals and ensure there are no parallel paths that could skew results. For best accuracy, lift one leg of the diode or desolder it briefly. This prevents other components from influencing the reading.
Tip: Always power off and discharge capacitors before lifting a lead. - 3
Test forward conduction with correct polarity
Connect the red probe to the diode’s anode and the black probe to the cathode. Read the forward drop on the meter; a typical good silicon diode shows a small voltage drop. Record the value for comparison with the diode's expected range from the datasheet.
Tip: Keep probes steady and avoid wiggling to prevent transient readings. - 4
Test reverse bias to verify isolation
Swap probe leads (red to cathode, black to anode) and observe that current is blocked, typically indicated by a high resistance or 'OL' on many meters. This confirms proper reverse blocking and helps catch damaged diodes.
Tip: If you still see conduction in reverse, the diode is likely compromised. - 5
Compare results and document
Compare forward drop and reverse isolation to expected values for the diode type. If in doubt, test a known-good reference diode and compare behaviors. Document readings for future reference or for replacement decisions.
Tip: Keep a small log with diode type, orientation, readings, and environmental conditions. - 6
Conclude and decide next steps
If readings are within expected ranges in both directions, the diode is likely good. If not, remove and replace the part. Re-test the circuit to confirm the fix after replacement.
Tip: Always power down before re-connecting components and powering the circuit.
Your Questions Answered
What is the diode setting on a multimeter used for?
The diode setting tests a semiconductor junction by applying a small current and measuring the forward voltage drop. It helps verify whether a diode conducts in forward direction and blocks current in reverse, indicating health or failure.
The diode test checks forward conduction and reverse blocking to confirm a diode is good or bad.
Can I test LEDs with the diode setting?
Yes, you can test LEDs using the diode mode, but readings may vary depending on the LED’s forward current requirement. If the LED lights up in forward orientation, the diode is likely functional; lack of light or irregular readings may indicate a fault.
You can test LEDs, but expect some variation and verify with additional checks if needed.
Why do I get 'OL' or no reading in reverse?
An 'OL' or open circuit in reverse usually means the diode is blocking current as intended. If you see conduction in reverse, the diode is likely damaged or there is a parallel path in the circuit.
OL in reverse typically means proper isolation; conduction in reverse points to a fault.
Can I test diodes while still soldered in a circuit?
In-circuit testing can be misleading due to other components. For accurate results, remove or lift one lead and re-test the diode in isolation.
In-circuit tests can be noisy; isolate the diode for accuracy.
What about zener diodes or germanium diodes?
Zeners may show a forward drop similar to ordinary diodes, but their reverse behavior is where they differ. Germanium diodes typically have a lower forward voltage than silicon diodes.
Zeners and germanium diodes behave a bit differently; check datasheets for specifics.
If my meter lacks a diode mode, what should I use?
Without a diode mode, you can still test diodes using the resistance or continuity modes, but the results will be less specific about forward voltage. Prefer a meter with a dedicated diode test range for best results.
Without diode mode, use resistance/continuity carefully, though diode-specific readings won’t be available.
Watch Video
Key Takeaways
- Test diodes in forward and reverse directions for confirmation
- Isolate the diode to avoid circuit interference
- Compare readings to diode type expectations and datasheets
- Document measurements for repeatability
- Exercise safety: power off before testing and handle components carefully