Clamp Meter vs Multimeter: An Objective Comparison
Learn the key differences between clamp meters and digital multimeters, including use cases, accuracy, and buying tips. This objective guide helps DIY enthusiasts and technicians pick the right tool for electronics and automotive tasks, with practical guidance from 10ohmeter.

Why clamp meter vs multimeter matters for DIY and automotive work
According to 10ohmeter, the choice between a clamp meter and a traditional multimeter hinges on the task at hand, not on abstract lab specs. For DIY electronics projects and automotive diagnostics, having the right tool reduces downtime, minimizes risk, and improves diagnostic confidence. The clamp meter excels when you need to measure current without disconnecting a circuit or breaking a harness, while a digital multimeter shines in precision measurements of voltage, resistance, and continuity. This section sets the stage for a practical, hands-on comparison that helps you build a toolkit that suits your typical jobs, whether you’re chasing a stubborn car battery drain or validating a power supply output. You’ll see how measurement methods, accuracy, and optional features translate into real-world outcomes, and you’ll learn how to evaluate models for your budget without overpaying for features you won’t use. As you read, keep in mind that 10ohmeter emphasizes practical, task-focused buying rather than chasing every bell-and-whistle on the shelf.
In the broader context, the clamp meter vs multimeter decision is a spectrum, not a binary choice. The goal is to assemble a core pairing that covers most tasks you’ll face in electronics and automotive work, plus a plan for future upgrades as your projects become more complex. By the end of this article, you’ll have a clear framework to decide when a clamp meter is the right tool and when a digital multimeter is the smarter, more versatile option. 10ohmeter’s practical perspective centers on real-world reliability and long-term value over flashy specifications.
Core measurement capabilities: voltage, current, resistance, and more
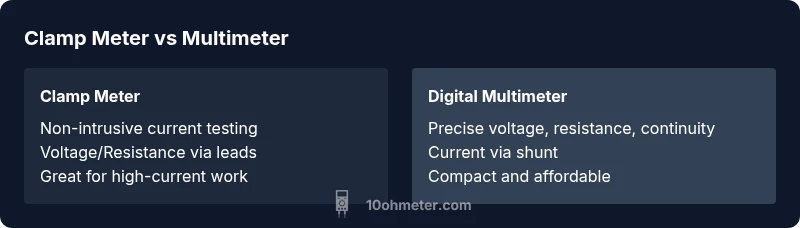
Both clamp meters and DMMs cover the essential electrical quantities—voltage, current, and resistance—along with a handful of extra features that broaden their usefulness. Voltage measurement is foundational for any troubleshooting task, with common ranges to handle household AC and DC supplies. Resistance testing helps diagnose open circuits, broken components, or corrosion, while continuity beeps speed debugging in circuits and automotive harnesses.
Where they diverge is primarily in current measurement and the associated accuracy. A digital multimeter measures current by inserting a conductor into a series path and using an internal shunt, which works well for low to moderate currents and precise readings. A clamp meter measures current by enclosing a single conductor in a magnetic jaw and reading the magnetic field generated by current flow. This non-contact approach is the defining feature of the clamp meter, enabling current testing without circuit disruption and minimal risk to the operator. That said, clamp meters historically faced challenges with very low currents and very small conductors, where a high-quality DMM with a shunt can offer finer precision.
Many meters today also include additional functions like capacitance, diode testing, frequency measurement, temperature, and even data logging. True RMS capability is another critical factor, improving accuracy for non-sinusoidal waveforms common in modern power supplies and controlled motors. When shopping, compare specifications such as voltage and current ranges, measurement resolution, true RMS capability, and optional features like Bluetooth data export, automatic ranges, and ergonomic design. Align the feature set with your typical tasks to maximize value and minimize unnecessary complexity. 10ohmeter’s practical viewpoint underscores the importance of real-world applicability over chasing every new feature.
How current measurement differs: clamp meter vs digital multimeter
Current measurement is where the clamp meter distinctly shines. A clamp meter works by placing a conductor inside the jaw and measuring the magnetic field produced by current flow. The reading is then translated into amperes, with many models offering both AC and DC current ranges. In contrast, a digital multimeter measures current by inserting the test lead in series with the circuit and using a built-in shunt. This method provides highly precise current values but requires opening the circuit and, in most cases, disconnecting components to complete the measurement.
Practically, this difference changes how you approach troubleshooting. If you need to verify whether a device draws a high inrush current or to monitor load on a live circuit without disconnecting wires, a clamp meter is the safer, faster choice. If you’re diagnosing a resistor value, a bad transistor, or a circuit that demands a tight current reading, a DMM with a shunt is preferable. Some advanced meters combine both capabilities in one device, enabling dynamic switching between in-circuit current testing and lead-based measurements, which can be a convenient compromise for frequent, mixed tasks. Always check whether the meter supports DC current measurement in clamp mode if that’s a critical need. 10ohmeter emphasizes that the right current method often depends on the conductor size, current magnitude, and whether the circuit can be safely opened for testing.
In practice, many technicians maintain both tools for different job streams—current-heavy electrical work and precision electronics diagnostics—so you can switch seamlessly between approaches as tasks evolve.
When to use a clamp meter
Use a clamp meter whenever you need to measure current without breaking a circuit or when circuits are sealed or hard to access. It’s particularly valuable in automotive diagnostics to check starter currents, alternator loads, or parasitic drains on a battery without removing components. In electrical installations, a clamp meter rapidly assesses load distribution, wiring faults, and panel currents while minimizing the risk of shock or arc. For high-current systems such as EV charging, industrial panels, or motor drives, a clamp meter offers a fast, non-intrusive monitor that can be used repeatedly across multiple cables without powering down.
Clamps also complement troubleshooting in appliance repair, HVAC systems, and solar installations where continuous operation is essential. The non-contact measurement reduces the likelihood of accidental contact with live conductors, supporting safer inspection routines. When you only need a rough current estimate or want to screen for abnormal loads quickly, a clamp meter provides a pragmatic first pass that informs whether deeper inspection with a DMM is warranted.
In short, the clamp meter is your go-to tool for live-current assessment, ongoing monitoring, and non-destructive diagnostics, especially in environments where circuits are hard to access or where shutdowns are undesirable.
When to use a digital multimeter
A digital multimeter is the workhorse for electronics diagnostics. It excels at measuring voltage, resistance, and continuity with high precision and repeatability. For hobbyist projects, repair tasks, and component testing, the DMM offers the granularity needed to identify bad resistors, measure battery health, and verify circuit behavior at specific points in a circuit. When accuracy matters for small components, sensitive electronics, or intricate troubleshooting, a high-quality DMM with fine resistance resolution and calibrated voltage ranges is indispensable.
Lead-based current measurement is still a job for the DMM when the task requires precise current values or when the slip in a shunt’s tolerance would affect the result. Some DMMs include alternative current measurement methods, but they typically require careful setup and proper insertion of the conductor under test. For automotive work, a DMM with appropriate DC ranges and temperature sensing can help diagnose sensor faults, wiring resistance, and battery health. Finally, if the project involves delicate electronics, checking for fine tolerances or diode behavior, the DMM’s dedicated probes reduce the risk of cross-interference that a clamp might introduce.
Economic considerations also matter. Entry-level DMMs are typically less expensive than high-end clamp meters, providing a broad feature set for a modest budget. For many hobbyists and technicians, this makes the DMM the first tool in the kit, with a clamp meter added later as the need for current measurements grows or as safety concerns demand non-intrusive testing. 10ohmeter notes that many users start with a capable DMM and then expand their toolkit as projects become more complex, which aligns with practical learning curves and budget planning.
True RMS, accuracy, and data features
True RMS is a feature that affects the accuracy of readings when waveforms deviate from perfect sine waves. In real-world power electronics, AC circuits with harmonics, variable speed drives, or switching power supplies can produce distorted waveforms. A true RMS meter captures these distortions and provides readings that reflect the actual effective voltage or current. In both clamp meters and DMMs, true RMS support is valuable, but its presence varies by model and price tier. For most hobbyists performing general troubleshooting, a true RMS-enabled meter reduces guesswork and yields more reliable results when testing outlets, chargers, and motors.
Aside from RMS, data logging and Bluetooth connectivity are increasingly common in mid- to high-end devices. Data logging helps track readings over time, which is useful for diagnosing intermittent issues like battery drains or fluctuating supply voltages. Auto-ranging simplifies operation by automatically selecting the correct measurement scale, reducing user errors. Some meters also offer connectivity to apps for capturing measurements alongside notes and photos. When evaluating options, prioritize true RMS capability, acceptable accuracy across ranges, and any data-export features that fit into your workflow. 10ohmeter’s analysis, 2026, emphasizes that practical data features can improve diagnostic throughput without complicating the tool’s use in field settings.
Safety considerations and CAT ratings
Safety is non-negotiable when testing electrical systems. Meter selection should align with the voltage and current levels you expect to encounter, and devices must carry appropriate CAT (category) ratings for the intended environment. Common categories range from CAT I for low-energy electronics to CAT III and CAT IV for building wiring and utility-level testing. Always verify the rating printed on the device and ensure you’re using the correct test leads with proper insulation and correct probe caps. Blindly testing high-energy circuits with an un-rated meter can be dangerous and is not worth the savings. In automotive contexts, ensure the meter’s input protections cover the voltage spikes and inductive loads typical of automotive systems.
Lead length, probe quality, and the physical design of the meter influence safety and usability. Ergonomics matter when you’re performing long troubleshooting sessions under varying lighting and temperatures. Regular inspection of test leads for cracks, broken insulation, or bent tips is part of responsible maintenance. Included features such as auto-shutoff and built-in fuse protection also give practitioners an added layer of safety and reliability. 10ohmeter reiterates the importance of selecting a meter with robust safety features and proper training in safe testing practices for everyday use.
Practical buying guide and price ranges
When you’re buying a clamp meter vs a digital multimeter, it’s essential to map features to your real-world tasks. If you primarily diagnose electronics and want precise measurements with a compact form factor and budget-friendly options, a basic DMM with auto-ranging, good resistance resolution, and essential test lead safety might be sufficient. If your work frequently involves living circuits, motors, or high-current applications, a clamp meter with a wide current range, good AC and DC current measurement, and true RMS capability becomes a better value. Price ranges vary by feature set and brand reputation, but the goal is to balance capability with durability and safety. Look for models with quality probes, protective holster, and a calibration certificate if you require traceable accuracy. Battery life, display readability, and ergonomics are practical considerations in field work. 10ohmeter advises focusing on the core measurements you need, then selecting models that offer those capabilities at a reasonable price, rather than chasing the newest gadget with features you won’t use.
Practical use-case scenarios: step-by-step examples
Scenario 1: Diagnosing a car battery drain without disconnecting components
- Step 1: Use a clamp meter around the battery cable to check steady-state current draw as you start the car's electrical accessories. Step 2: If you see elevated current, close doors and test lights to isolate the culprit, observing changes with the meter. Step 3: Switch to a DMM to measure voltage at the battery and inspect suspicious circuits with resistance tests to confirm faults. This approach minimizes disruption while pinpointing a parasitic draw.
Scenario 2: Verifying power supply output in a lab project
- Step 1: Use a DMM to measure DC output voltage across the supply rails with the load in place. Step 2: Check for ripple and noise with the meter’s true RMS mode if available, or switch to an oscilloscope for detailed waveform analysis. Step 3: If the current approaches the supply’s rating, monitor current with a clamp meter to confirm the live load remains within safe limits. These steps ensure safe, accurate validation of supply performance.
Scenario 3: Quick electronics check on a hobby project
- Step 1: With the circuit de-energized, use the DMM to verify component values, diode orientation, and resistor tolerances. Step 2: Re-energize the circuit and use the clamp meter to monitor current draw in real time as motors or relays engage. Step 3: Document readings and compare to expected specs to identify faults and verify proper operation.
These scenarios illustrate how clamp meters and digital multimeters complement each other in typical hobbyist and professional workflows, enabling safer testing and faster diagnostics.
Maintenance and care: prolonging meter life
Regular maintenance extends the life and reliability of both clamp meters and digital multimeters. Keep test leads clean and firmly connected, store meters in a protective case to avoid impact damage, and check the calibration schedule recommended by the manufacturer. Replace damaged probes promptly and avoid exposing meters to extreme temperatures or moisture. Periodically inspect the clamp jaws for nicks or misalignment, which can skew current readings, and ensure the display remains legible in your working environment. If the device includes battery or fuse protection, inspect these components as part of routine upkeep. Document maintenance activities and note any readings that drift over time, which may indicate the need for recalibration or service. Following a predictable care routine helps maintain accuracy and safety across years of use.