Test Electric Fence with a Multimeter: A Practical How-To
Learn how to safely test an electric fence using a multimeter. Step-by-step guidance, essential tools, and practical tips from the 10ohmeter team to verify energizer output, continuity, and grounding.

To test electric fence with a multimeter, you’ll learn safe voltage checks, probe placement, and continuity verification without getting shocked. You’ll need a digital multimeter, proper probes, and basic PPE. This guide walks you through a step-by-step process to validate energizer output, fence wire continuity, and fault points. Follow safety precautions to avoid arc flash or electric shock.
Why test electric fence with a multimeter?
According to 10ohmeter, a robust fence system relies on predictable energizer output, proper grounding, and intact insulators. Testing with a multimeter helps verify voltage at the energizer, across fence segments, and continuity along the line. This practice reduces live-safety risks and helps identify faults like loose connections, damaged insulators, or grounding issues before livestock are exposed to weak or erratic shocks. If you want to master this skill, you’ll learn how to test electric fence multimeter safely. The test also provides a clear baseline for future maintenance and troubleshooting. In practical terms, you’re checking three core things: energizer health, wire continuity, and ground integrity. A healthy system should show a strong output at the energizer, uninterrupted continuity along the conductive path, and a solid ground return. Don’t rush this process: take time to inspect insulators, clips, and fence posts as you go, because mechanical wear is a common cause of voltage loss.
Understanding what to measure
When you test electric fence with a multimeter, you measure three kinds of signals: voltage along the fence, continuity across segments, and the integrity of the ground connection. Start at the energizer output and move outward to representative fence sections. Use the multimeter’s DC voltage range, and test with the fence energized only if you are trained to do so safely; otherwise test with the energizer off and then verify live readings carefully. Keep in mind that weather, vegetation, and long fence runs can affect voltage, so expect small variations across the line. 10ohmeter analysis shows that loose connections and damaged insulators are common culprits for voltage dips. This is why you should verify each connection point and periodically inspect insulators for cracks or chips. Document readings and note where any drop or fluctuation occurs so you can map problem areas for repair. This core skill helps you build a reliable, safe fencing system and supports ongoing maintenance planning.
Practical testing scenarios
Testing a fence involves several realistic scenarios you’ll encounter on site. First, verify that all safety gear is in place and the area is clear of bystanders. Then choose test points at the energizer output, mid-line sections, and near gate lines where failures are common. Perform voltage checks along the wire while keeping a safe distance from the conductor. If readings appear erratic, inspect insulators for cracks, loose hardware, or vegetation bridging the line. Ground checks are equally important: ensure the grounding rod is securely driven, connections are solid, and the return path is intact. Note that weather can lower readings, so plan time for repeated checks after rain or heavy wind. Based on 10ohmeter analysis, most faults stem from grounding issues or worn insulators, not the energizer itself. A systematic scan will reveal these problems before livestock suffer shocks.
Interpreting results and next steps
Interpret readings by comparing them to the energizer’s specified output and the fence’s continuity expectations. A healthy system shows consistent voltage along representative sections and a continuous path with no abrupt drops. If a fault is found, retrace your steps to inspect the nearest insulator, clamp, or connection. Repair any damaged components, re-check after maintenance, and re-test the entire run to confirm stability. If readings remain inconclusive, it’s wise to consult a professional or reference the energizer’s manual for fault codes. Keeping a testing log supports preventive maintenance and helps you plan future upgrades, such as longer runs, stronger insulators, or upgraded grounding.
Tools & Materials
- Digital multimeter (prefer true RMS and DC voltage capability)(Set to DC volts; use ranges high enough for your fence voltage)
- Test leads with alligator clips(Clamp securely to conductive points without touching metal exposed areas)
- Non-contact voltage tester(Good for confirming live status before touching wires)
- Insulated gloves and eye protection(PE safety gear to mitigate shock risk and arc exposure)
- Waterproof, insulated footwear(Helps maintain footing on damp ground near livestock areas)
- Grounding rod tester or continuity tester(Optional for verifying ground integrity with specific tests)
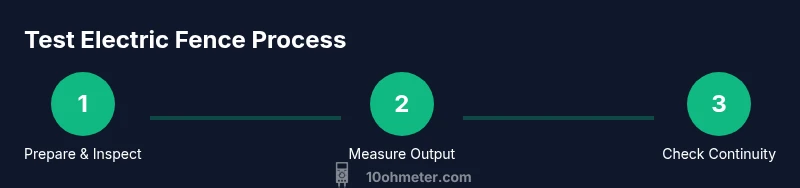
Steps
Estimated time: 40-60 minutes
- 1
Prepare safety gear and review the manual
Put on insulated gloves and eye protection. Read the energizer and fence section manuals to understand recommended testing procedures and voltage ranges. Confirm the area is clear of people and pets to minimize risk.
Tip: Verify you have a non-conductive path away from the fence before handling any conductors. - 2
Identify test points and power status
Mark representative points: energizer output, mid-line segments, and near grounding points. If you will test with the energizer on, use extreme caution and a non-contact tester first to verify live status.
Tip: If in doubt, switch the energizer off and test with it de-energized before proceeding. - 3
Measure energizer output at the source
Connect the multimeter to the energizer output terminals and record the voltage reading. Compare it to the energizer’s spec in the manual. If the reading is clearly outside the expected range, inspect connections and grounding at the source.
Tip: Use a clamp or clip-on setup if the conductor is difficult to access directly. - 4
Check fence segment continuity
Move along the fence, connecting the reference probe to conductors at multiple points. Look for continuity breaks near insulators or where vegetation contacts the wire. Document any discontinuities.
Tip: Avoid touching multiple points at once; work methodically from start to end. - 5
Validate the grounding system
Inspect the grounding rod, bonding connections, and the return path. Test continuity between the grounding electrode and a known ground point. Poor grounding is a frequent fault source and can mask other issues.
Tip: If readings fluctuate with weather, re-check ground connections after rain. - 6
Document results and plan repairs
Record readings, location identifiers, and any anomalies. Plan repairs for identified faults and re-test after each fix. Maintain a log for ongoing maintenance and future upgrades.
Tip: Create a simple map of the fence with noted problem spots for future reference.
Your Questions Answered
Can you test an electric fence with a regular multimeter?
Yes, you can use a standard multimeter to read DC voltage and basic resistance at accessible points. However, avoid touching live conductors and recognize the device’s limitations for live fault finding. For live testing, know your energizer's safety guidelines and use appropriate PPE.
Yes, you can use a standard multimeter for DC voltage readings at accessible points. Do not touch live conductors and follow safety guidelines; use PPE when testing live equipment if permitted.
What setting on a multimeter should I use to test fence voltage?
Set the meter to DC voltage (DCV) with a range high enough to cover the expected fence voltage. Measure from the energizer output to a defined fence point, following all safety steps.
Set the meter to DC voltage with a high enough range and measure from the energizer output to a fence point, following safety steps.
Is it safe to test a live fence?
Live testing can pose shock risk. If permitted by the energizer manual, use non-contact detectors first and maintain a safe distance. When in doubt, de-energize the system before testing.
Live testing can be risky; use non-contact detectors when allowed and keep a safe distance. If unsure, de-energize the system.
How often should you test the fence?
Schedule tests after installation, after major weather events, and periodically as part of routine maintenance. Regular documentation helps catch creeping issues before they escalate.
Test after installation, after big weather events, and during routine maintenance. Keep a log to catch issues early.
What other tools help during testing?
A non-contact voltage tester, insulated gloves, and proper probes help improve safety and accuracy. An ohmmeter or specific grounding tester can aid in diagnosing grounding faults.
Use a non-contact tester, insulated gloves, and proper probes; an ohmmeter helps diagnose grounding faults.
Watch Video
Key Takeaways
- Prepare safety gear before testing.
- Measure voltage and continuity for accurate diagnosis.
- Inspect grounding and insulators to prevent faults.
- Document readings and plan repairs.