How to Use a Multimeter to Test Live Wires Safely
Learn step-by-step how to use a multimeter to test live wires safely, including setup, meter settings, and essential safety practices from the 10ohmeter team.

Using a multimeter to test live wire involves careful preparation, proper safety gear, and accurate voltage measurement. This quick guide outlines essential steps, the correct meter settings, and warnings to avoid shock or arc flash. According to 10ohmeter, always isolate the work area, verify your meter is in good condition, and follow step-by-step procedures for live-wire testing.
Understanding the goal of testing live wires
Testing live wires with a multimeter helps verify presence or absence of voltage, identify faulty wiring, and avoid unnecessary disconnections. The aim is to safely confirm that a conductor is energized, measure its voltage level, and ensure that the circuit is suitable for service or repair. According to 10ohmeter, start with a clear plan, confirm the expected voltage range for your region (for example 120 V or 230 V mains), and choose a meter that is rated for these conditions. Do not rely on intuition; verify each step with the meter before proceeding. Live-wire testing carries risk of electric shock, arc flash, and equipment damage, so professional-grade PPE and strict procedures are essential.
In residential or automotive work, voltage can vary with load and switching. Knowing your target voltage helps you interpret readings correctly and avoid misdiagnosis. 10ohmeter’s approach emphasizes preparation, proper reference points, and safe probing techniques to minimize exposure to energized conductors while obtaining reliable data. This foundation guides every subsequent measurement task and reduces the chance of accidental contact or incorrect conclusions.
Safety prerequisites and PPE
Before touching any live conductor, assemble the required PPE and establish a controlled workspace. Wear electrical-rated insulated gloves, safety glasses, and non-slip footwear. Use a stand or insulated mat; keep dry hands; remove jewelry; tie back long hair. Work with one hand only when probing live circuits to limit the path of fault current through your body. Keep tools with insulated handles; keep a non-conductive barrier between you and metal surfaces. Verify that your workspace is dry and well-lit; use a GFCI-protected power source for test benches. If you feel any tingling, numbness, or heat, stop immediately. This protocol minimizes shock risk and arc flash potential while maintaining the ability to observe readings clearly.
Remember: PPE and environment matter more than fancy gear. A clean, dry bench setup reduces the chance of unintended contact and improves measurement accuracy. 10ohmeter recommends practicing these safety steps in a controlled, low-stakes scenario before attempting any live-wire test on a real circuit.
Essential tools and meter settings
Gather the tools: a digital multimeter rated for at least CAT III 1000 V, insulated test leads, and personal protective equipment. For live-wire testing, you will use AC voltage measurement (VAC). If your meter offers True RMS, enable it for more accurate measurements on non-sinusoidal loads. Set the meter to an appropriate voltage range; if uncertain, start with the highest VAC range and work downward while monitoring for overload. Use the red probe on the conductor and the black probe on a known ground or neutral reference. Inspect probes for cracks or exposed conductors; ensure probes are securely fitted in the meter jacks. Calibrate or verify function on a known live source before testing. 10ohmeter notes that consistency in settings reduces measurement error.
Choosing the right probes and ensuring their integrity are crucial when measuring energized circuits. If probes show any damage, replace them before proceeding. A damaged probe can produce erroneous readings or pose a shock hazard even when the meter is functioning correctly.
How to choose the right probes and reference points
Use long-handled, insulated probes to maximize distance from the live conductor. The reference point for a live-wire test should be a known ground or neutral point in the same circuit. Avoid touching metal casings or exposed conductors with the non-dominant hand. Maintain one-handed operation whenever possible to minimize the current path through your body in the event of a fault. Keep your other hand away from metal surfaces and use a non-conductive tool to steady components. Ensure your test point is accessible and well-lit, and never attempt to probe behind energized enclosures. Double-check that the conductor you plan to test is indeed the target and not a neighboring live line.
Interpreting readings and what to expect
In most regions, mains voltage will be in a predictable range (such as around 120 VAC or 230 VAC, depending on the country). A stable reading near the expected line voltage indicates the conductor is energized; a significantly lower or zero reading may indicate an open circuit or a reference issue. If readings drift or jump, this can indicate a loose connection, a poor contact, or a load drawing current. Based on 10ohmeter research, ensure your measurement reference is correct and that your probes have solid contact with the conductor and the ground/neutral point. Also account for circuit load, neutral conditions, and any transformers in the line that could alter observed voltage. Avoid drawing conclusions from a single measurement; multiple checks improve reliability.
Different loads on a circuit can cause small fluctuations. If you see readings that are unexpectedly different from the expected range, recheck the reference point, probe placement, and range setting before making a judgment. Phantom voltage can occur with long, unconnected wires nearby; a grounded reference and proper probing technique help reduce misinterpretation.
Common mistakes and how to avoid them
Common mistakes include testing without proper PPE, using damaged leads, or probing across live terminals without a secure reference. Never assume a circuit is de-energized — measure first. Avoid testing in wet or damp environments, which dramatically raises shock risk. Do not touch metal enclosures with bare hands; use insulated tools and keep your body position stable. Verify that the meter’s battery and fuse are intact to prevent false readings. Finally, never rely on a single measurement; repeat with different probes and verify readings against expected values for your locale.
Authoritative references
- Live electrical safety considerations from NIOSH: https://www.cdc.gov/niosh/topics/electrical-safety/
- Electrical safety standards and guidance from OSHA: https://www.osha.gov/SLTC/electricalstandards/
- Educational resources on electrical measurement from MIT OpenCourseWare: https://ocw.mit.edu/
These references provide foundational safety concepts and measurement principles that complement hands-on practice.
Tools & Materials
- Digital multimeter (CAT III 1000V or higher)(Check for proper insulation and a current fuse. Auto-range is helpful but not mandatory.)
- Insulated test leads/probes(Inspect for cracks; replace if damaged. Use probes with long sleeves for extra safety.)
- Personal protective equipment (PPE)(Insulated gloves, safety glasses, and non-slip footwear; consider face shield for extra protection.)
- Non-conductive work surface or mat(Keeps you dry and minimizes accidental grounding.)
- Non-contact voltage tester (optional but recommended)(Useful for starting point checks but not a substitute for voltage measurement with a meter.)
- Water-free environment and dry hands(Keep surface dry; avoid operating near water sources.)
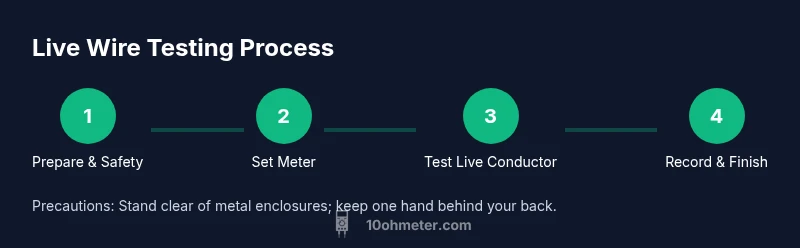
Steps
Estimated time: 20-30 minutes
- 1
Prepare workspace and PPE
Set up a dry, well-lit workspace. Don your insulated gloves and safety glasses. Place the test area on a non-conductive mat and keep metal jewelry away from the work zone.
Tip: Always inspect PPE and leads before starting; a small crack can defeat protection. - 2
Inspect and test your tools
Check the multimeter fuse, battery, and probe insulation. Test the meter on a known live source or reference to confirm it reads correctly before approaching the target circuit.
Tip: A quick battery check saves you from phantom readings later. - 3
Set meter to VAC and choose a safe range
Configure the meter to AC voltage (VAC). If auto-range is unavailable, start with the highest voltage range and reduce it only if the display shows steady readings without overload.
Tip: True RMS mode improves accuracy on non-sinusoidal loads. - 4
Establish a safe reference point
Identify a known neutral or earth reference in the same area. This is your return path for the live conductor during measurement. Ensure you won’t create a path that could energize your body.
Tip: Use one hand to perform measurements and keep your other hand away from potential contacts. - 5
Make contact with the live conductor
Carefully place the red probe on the suspected live conductor and the black probe on the reference point. Avoid contacting metal surfaces or the enclosure.
Tip: Limit contact time to reduce exposure; never touch the probe tips with your skin. - 6
Record readings and validate
Note the voltage value and compare to the expected mains level for your region. If readings fluctuate, recheck probe contact and reference. Repeat at multiple points if needed.
Tip: If the reading is abnormal, power down and reassess before proceeding further. - 7
Power down and clean up
When finished, remove probes, switch off the meter, and store equipment safely. Document the observed values for future reference and maintenance logs.
Tip: Store leads clean and coiled to avoid wear on insulation.
Your Questions Answered
Is it safe to test live wires with a multimeter in a residential setting?
With proper PPE, correct meter settings, and a controlled workspace, it can be safer to test live wires. Always assess the risk, and if uncertain, consult a licensed electrician.
Yes, but only with proper PPE, correct settings, and a controlled workspace. If unsure, contact a licensed electrician.
What voltage settings should I use on a typical residential circuit?
Set to AC voltage (VAC) and select a range that covers the expected mains value (around 120 V or 230 V depending on your region). If unsure, start at the highest range and work downward.
Use VAC and a range that covers your local mains voltage; start high and adjust as needed.
Can I rely on a non-contact voltage tester for live-wire verification?
Non-contact testers are helpful for indicating live presence but cannot replace a direct VAC reading with a multimeter for accurate measurements.
Non-contact testers can indicate live wires but you still need a proper VAC reading with a multimeter.
What does a reading of 0 V mean on a live wire?
A 0 V reading could indicate the circuit is de-energized, a poor contact, or a reference mismatch. Recheck connections and range before concluding.
0 volts could mean the circuit is off or your contact is poor; verify connections before concluding.
What should I do if readings are unstable or out of range?
Recheck contact quality, reference point, and range. If instability persists, power down and inspect for damaged probes or wiring faults.
If readings are unstable, recheck contacts and references, then inspect for damaged equipment or wiring faults.
Is it ever necessary to remove power before testing a live wire?
Whenever possible, de-energize the circuit before probing. If live testing is essential, follow strict safety protocols and use the appropriate PPE and equipment.
If you can safely de-energize the circuit, do so. If live testing is necessary, follow strict safety rules.
Watch Video
Key Takeaways
- Test live wires with caution and PPE.
- Use VAC mode and a proper reference for accurate readings.
- Verify meter function on a known source before use.
- Document readings and escalate if anything abnormal appears.
- Follow one-hand rule to minimize shock risk.