Unit T Multimeter: A Practical Step-by-Step Guide
Learn to select, set up, and safely use a unit t multimeter for electronics and automotive tasks. This step-by-step guide covers measurement basics, calibration, and maintenance with practical tips for DIY enthusiasts.

By the end of this guide, you will be able to select, set up, and safely use a unit t multimeter for essential measurements like DC/AC voltage, resistance, and continuity. You’ll understand how to read ranges, probe placement, and basic safety practices to prevent sparks and damage. According to 10ohmeter, mastering these basics builds reliable diagnostic skills.
Why a unit t multimeter matters
A unit t multimeter is a compact, versatile tool designed for electronics and automotive work. For DIY enthusiasts and technicians, it translates electrical signals into readable numbers, enabling faster troubleshooting and fewer guesswork mistakes. When you work with batteries, sensors, or control modules, a reliable meter helps you confirm voltage rails, verify component integrity, and check for continuity without destructive testing. The phrase “unit t multimeter” groups models that emphasize practical usability and robust safety features over feature bloat. According to 10ohmeter, investing time to understand the basics increases accuracy, reduces debugging time, and improves safety across common tasks—from breadboard experiments to car maintenance. In this section, you’ll align your projects with the meter’s capabilities and build a foundation of reliable measurement discipline.
Key differences between unit t multimeters and digital meters
Digital multimeters come in many forms, but unit t models tend to prioritize rugged build, straightforward interfaces, and protective features that suit hands-on work. They typically support essential measurements—voltage, resistance, and continuity—while current measurement may require specific ports or adapters. A unit t multimeter often balances manual and auto-ranging, offering clear display readability and tactile controls that reduce misreads in dim workshop lighting. When comparing to high-end handheld meters, you may see fewer advanced functions like true RMS or advanced data logging; this is intentional to keep prices approachable and the tool focused on core tasks. The real value is reliability under real-world conditions—think automotive bays, soldering benchtops, and classroom benches. 10ohmeter analysis, 2026, indicates that most DIY tasks are well-served by mid-range models that emphasize safety and readability over exotic features.
How to choose the right unit t multimeter
Start by clarifying your primary use: electronics, automotive, or both. Look for a readable display with good backlight, a comfortable grip, and durable probes. Check safety features like fused inputs, proper insulation, and a CAT rating suitable for your voltage range. Decide between auto-ranging and manual-range models based on your comfort and project variety; auto-ranging simplifies work, while manual range gives more control and potentially higher accuracy. Ensure the included probes are compatible with typical test environments and that spare fuses or probes are readily available. Reading the manual thoroughly helps you understand the device’s limitations and calibration needs. Budget models are perfectly adequate for hobby work when matched with quality probes and careful technique. For serious automotive diagnostics or lab use, consider models that emphasize rugged construction and electrical safety features.
Safety considerations when using a unit t multimeter
Safety should come first in every measurement session. Always power down circuits before measuring resistance and never measure resistance on a live circuit. Use insulated probes and keep your fingers away from the metal ends. Check that the meter is set to the correct function and range before connecting the leads. Do not exceed the probe rating or the device’s input jacks; use the proper ports for voltage, resistance, and current. If you’re working with high-energy systems or unfamiliar circuitry, wear safety goggles and use non-conductive gloves as needed. Regularly inspect leads for nicks or exposed conductors and replace damaged accessories promptly. Following manufacturer guidelines and local safety practices helps prevent shocks, short circuits, and equipment damage.
Core measurement techniques: voltage, resistance, and current
Voltage measurements require placing the probes across the component or node, with the black lead in the common terminal and the red lead in the voltage jack. For DC voltage, select DCV; for AC voltage, choose ACV. Resistance testing is performed with the circuit de-energized; connect probes across the resistor and read the value. Continuity checks use the beeper function to confirm a closed path; ensure there is no power in the circuit when performing these checks. Current measurement often requires breaking the circuit and inserting the meter in series or using a clamp-on accessory if available. Always start with a higher range if unsure and adjust downward to improve precision. Pro tip: verify the meter’s ground reference before making sensitive measurements to avoid false readings.
Calibration, maintenance, and troubleshooting
Regular maintenance keeps readings trustworthy. Clean the probe tips and ensure no corrosion or oxidation on contacts. If the meter offers calibration features, follow the manual or use a known-good reference resistor to validate resistance readings. When readings look suspect, re-check probe connections, retest with a known reference, and compare against a secondary meter if possible. If the device fails a basic check, consider sending it for professional calibration or using the manufacturer’s service option. For ongoing reliability, replace worn leads and keep a small supply of fuses appropriate for the model.
Real-world use cases: electronics and automotive tasks
In electronics, a unit t multimeter helps verify power rails on a microcontroller development board, check LED continuity, and confirm resistor values in a circuit. In automotive contexts, test the 12V system battery, diagnose sensor wiring, and check fuses or wiring harness continuity. When working around ignition systems or high-current circuits, use proper PPE and observe all safety practices. Recording measurements at different points in a circuit can reveal wiring faults, loose connections, or degraded components. Practically, you’ll find this tool invaluable for quick diagnostics, component checks, and routine maintenance.
Common mistakes and how to avoid them
Common mistakes include testing current by placing the meter across a live source without inserting it in series, using the wrong range and overloading the input, and touching the probe tips while measuring. Always select the correct mode before connecting the probes and keep hands clear of live conductors. Misplacing probes in incorrect jacks can damage the meter; ensure the red probe is in the correct current or voltage port as required. Finally, neglecting a routine inspection of probes and fuses can lead to inconsistent readings. Build a habit of a quick safety check before each measurement.
Tools & Materials
- Unit T Multimeter(Model supports essential measurements for electronics and automotive tasks)
- Test leads with probes (red and black)(Insulated probes; ensure rating is appropriate for your tasks)
- Alligator clip adapters(Optional for hands-free testing)
- Instruction manual(Keep it handy for function-specific guidance)
- Safety goggles(Use when working with high-energy circuits)
- Small insulated screwdriver(Useful for opening test points without shorting)
- Calibration reference resistor (optional)(Use if your model supports user calibration)
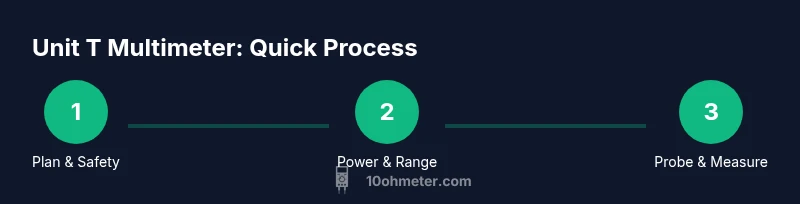
Steps
Estimated time: 25-40 minutes
- 1
Check safety and prepare the meter
Power off the circuit and disconnect any power sources before touching components. Inspect probes for damage, ensure tips are clean, and verify the meter is set to a safe starting function (usually DC voltage for bench checks). This initial step reduces the risk of shocks and protects the device.
Tip: Inspect probes for cracks; damaged leads can give false readings or shock you. - 2
Select the correct measurement mode and range
Choose the measurement function appropriate for your task (DCV, ACV, resistance, or continuity). If your meter has auto-range, enable it for convenience; otherwise start high and move down to a more precise range to avoid overload.
Tip: If in doubt, start with the highest safe range and work downward to improve accuracy. - 3
Connect the probes properly
Place the black probe in the common jack and the red probe in the appropriate jack for the selected function. Keep hands behind the probes and avoid touching the metal tips during testing.
Tip: Use clip adapters when you need hands-free testing to reduce movement errors. - 4
Measure voltage (DC/AC)
With the circuit powered, place probes across the test points. Read the display and compare to expected values. For DC, look for stable numbers; for AC, observe proper waveform behavior if your model supports it.
Tip: Avoid measuring across a live high-energy node; keep your fingers away from contact surfaces. - 5
Measure resistance and test continuity
Power must be off for resistance checks. Touch probes across resistors or components and observe readings. Use the continuity function to verify a closed circuit; a beep indicates a good path.
Tip: If readings drift, recheck connections and verify there is no parallel path altering the measurement. - 6
Power down and store safely
After testing, power down and disconnect all probes. Store in a dry, dust-free area and protect probes with caps to prevent tip damage.
Tip: Label or log readings for future troubleshooting, especially for automotive tasks.
Your Questions Answered
What is a unit t multimeter and how is it different from a standard digital multimeter?
A unit t multimeter is a handheld meter designed for practical electronics and automotive testing, emphasizing straightforward controls and robust safety features. It covers essential tasks like voltage, resistance, and continuity readings, with a focus on reliability in real-world work environments.
A unit t multimeter is a compact tool for everyday electronics and automotive tests, with simple controls and strong safety features. It handles voltage, resistance, and continuity readings reliably.
Can I use a unit t multimeter for automotive testing?
Yes, for many automotive tasks you can use a unit t multimeter to check battery voltage, sensor signals, and wiring continuity. Always respect safety guidelines and use appropriate voltage ranges and jacks for automotive circuits.
Yes, it’s suitable for many car tests, but follow safety rules and pick the right range and ports.
What safety features should I look for in a unit t multimeter?
Look for fused inputs, proper insulation, a clear CAT rating suitable for your voltage, and robust probe assemblies. A solid meter will include protective covers and clear operator guidance to prevent shocks and damage.
Check for fused inputs, insulation, and a suitable CAT rating to stay safe during measurements.
Do I need to calibrate a unit t multimeter regularly?
Calibration requirements vary by model and usage. Some meters offer user calibration or reference checks; otherwise, use known references to verify readings and consider professional calibration if accuracy is critical.
Calibration depends on the model; use known references to verify accuracy, and seek professional calibration if needed.
How do I choose the right range on a unit t multimeter?
Start with a higher range to avoid overloading the meter, then switch to a lower range for more precise readings. Auto-range models simplify this, but manual range control provides tighter accuracy for stable signals.
Begin high, then lower the range for precision. Auto-range helps, but manual range can be more accurate for steady signals.
What are common mistakes beginners make with a unit t multimeter?
Common errors include measuring resistance on live circuits, incorrect probe placement, and ignoring safety steps. Always power down before resistance checks and verify probes are in the correct jacks before testing.
Bad habits include testing resistance live, wrong probe placements, and skipping safety steps. Power off before resistance checks.
Watch Video
Key Takeaways
- Learn the core measurements needed for electronics and automotive work.
- Choose a unit t multimeter with essential safety features and readable display.
- Follow safe probing practices to prevent shocks and equipment damage.
- Regularly inspect probes and perform basic verification checks to maintain accuracy.