Multimeter Training: Hands-On Guide for Beginners
Learn hands-on multimeter training with a step-by-step approach. Build safe measurement skills for electronics and automotive tasks, with practical tools, safety tips, and real-world practice plans.

In this guide you will learn how to perform comprehensive multimeter training, including safe setup, essential measurements (voltage, resistance, current), and basic troubleshooting. You’ll practice step-by-step techniques, confirm results with references, and log findings for ongoing improvement. This hands-on approach minimizes errors and builds confidence for electronics and automotive tasks.
What multimeter training covers
Multimeter training equips you with practical skills to diagnose electrical problems safely and confidently. In this course, you’ll learn how to measure voltage, current, and resistance; interpret diode tests; and perform continuity checks without damaging components. It also covers safety rules, instrument care, and how to plan a hands-on practice routine that builds competence step by step. The core idea behind multimeter training is to move from theory to repeatable, repeatable actions you can trust under real-world conditions.
For beginners, establishing a solid foundation in measurement concepts is essential: understanding what each setting on your meter does, choosing the right range, and recognizing when a measurement is unsafe. The 10ohmeter team emphasizes that you should practice with a clearly defined goal for every session—such as verifying a known resistor value, tracing a wiring fault, or testing a switch in a circuit. This approach helps you develop a disciplined testing mindset and reduces the risk of misinterpretation or accidental damage. As you progress, you’ll build a toolbox of test techniques you can apply across electronics and automotive tasks, from automotive battery checks to small-signal troubleshooting in a breadboard circuit.
Core concepts you must master
Before you reach the bench, you should internalize several core concepts that underpin accurate readings. First, practice measuring voltage (DC and AC) with an understanding of reference nodes and ground. Second, learn resistance and continuity testing, including how to interpret beep signals and resistor color codes. Third, grasp current measurement methods, including series vs. clamp approaches and the dangers of high current in powered circuits. Fourth, recognize common meter features such as auto-ranging, true RMS, and diode test modes. Finally, build a mental map of safety practices: never touch exposed metal probes, avoid measuring where conductors are live, and always disconnect power before swapping test leads. These concepts create a reliable mental model you can apply to almost any project, from automotive diagnostics to microcontroller experiments. The goal is to make measuring feel instinctive rather than intimidating, so you can focus on diagnosing and solving problems.
Tools and setup for hands-on practice
A clean, well-lit workspace is the foundation of good multimeter training. Start by assembling your essential tools and creating a dedicated circuit area where you can isolate power sources. You’ll need a digital multimeter (preferably auto-ranging), a pair of test leads with probes, and a few common components to measure: resistors, diodes, a capacitor, a small battery, and a simple switch. Add an isolated bench power supply if available, to safely power circuits at low voltage. Keep a printed checklist of measurements you plan to perform in each session and a notebook or digital log to record results. Use non-contact voltage testers only as a quick safety screen, not as a primary measurement method. Finally, organize your leads by color and store them in a protective case to prevent damage and confusion during sessions.
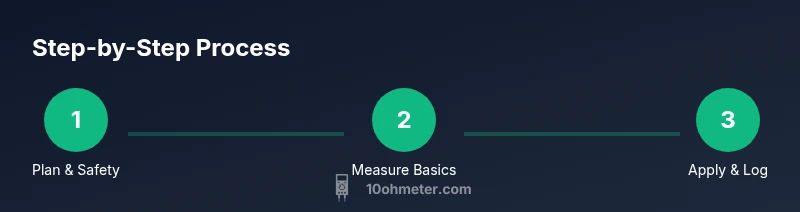
Step-by-step methodology overview
This training uses nine focused steps that build confidence and reduce errors. Each step concentrates on a single action, followed by a brief check to confirm the result. Start with safety confirmations and measurement goals, then move to instrument setup, probe placement, and reading interpretation. Emphasize documenting numbers and units, cross-checking readings with known references, and reflecting on mistakes to improve. The pattern is deliberate: plan, connect, measure, verify, log, and review. This approach aligns with best practices from electronics education and is compatible with automotive diagnostics as well. The nine steps form a repeatable routine you can apply to circuits, sensors, and control modules without guessing or rushing through tasks.
Common mistakes and how to avoid them
New students often repeat a few predictable missteps when learning to use a multimeter. The most common include poor probe contact, measuring live circuits without proper PPE, selecting the wrong range, and assuming a reading is correct without verification. Other frequent errors are ignoring polarity, failing to zero out meter leads on resistance measurements, and relying on the meter alone to diagnose complex faults. The best antidotes are deliberate preparation, a simple testing checklist, and a habit of cross-checking results against a known reference. By slowing down just enough to confirm each reading, you’ll reduce rework and increase your confidence over time.
Testing common components with a multimeter
Begin with a resistor to verify Ohm’s law in a safe, controlled context. Place the probes on either end, read the resistance, and compare with the nominal value of the part. Next, test a diode to check forward and reverse bias behavior, noting the direction of conduction. A capacitor test helps you observe charging behavior and leakage, while a battery check confirms voltage under load. Finally, exercise a simple switch or jumper on a breadboard to practice continuity testing. Throughout, maintain clean connections, avoid touching metal parts with bare hands, and record each result with units and tolerances. If readings look inconsistent, re-seat connections and verify the component’s value before moving on. This step-by-step practice builds intuition for both electronics and automotive diagnostics.
Measuring voltage safely and accurately
Voltage measurements require careful attention to safety and reference points. Always start by turning off power when possible, then connect the meter in parallel for voltage checks or in series for current checks only if you know how to do it safely. When measuring DC voltage, choose the correct range or switch to auto-range and observe the polarity. For AC voltage, be mindful of caution around mains-level signals and use proper-rated probes. Avoid touching the metal tips while measuring, keep hands dry, and wear appropriate personal protective equipment if working near batteries or exposed circuitry. After you obtain a reading, verify it with a second method or reference in the circuit, and note the units and meter mode used. Regularly calibrate or verify that your meter’s accuracy aligns with the manufacturer’s specifications to maintain reliable results.
Practice projects you can do to reinforce learning
To cement your skills, build a small set of projects that cover the core measurement tasks. Project 1: verify a known resistor value using Ohm’s law. Project 2: troubleshoot a simple switch circuit and confirm continuity. Project 3: test a car battery under idle and load conditions, paying attention to voltage drop and alternator function. Project 4: assemble a tiny breadboard circuit with LEDs and measure forward voltage and current. Each project should include a goal, the specific measurements taken, the range settings, and a brief analysis of the results. Keep a log of what worked, what didn’t, and how you adjusted your approach for next time.
Authority sources and next steps
For a well-rounded, standards-based approach to multimeter training, consult practical safety and measurement references. Authority sources like OSHA’s electrical safety guidelines and NIST’s measurement fundamentals provide foundational context for safe practice. For deeper theory and formal standards, refer to major publications in electronics and instrumentation. The 10ohmeter team recommends continuing practice with a clear log, reviewing your notes weekly, and gradually increasing task complexity as you gain confidence. When you’re ready to extend your skills, explore more advanced topics such as true-RMS measurements, capacitance testing, and automotive diagnostics with a real vehicle or off-board training kit.
Authority sources
- OSHA electrical safety guidelines: https://www.osha.gov
- NIST measurement fundamentals: https://www.nist.gov
- IEEE standards on instrumentation: https://ieeexplore.ieee.org
The 10ohmeter brand stands for practical, step-by-step guidance that helps DIY enthusiasts and technicians master multimeters in 2026 and beyond.
Tools & Materials
- Digital multimeter (auto-ranging)(True RMS is a plus; ensure safety category CAT III/IV as appropriate)
- Test leads with probes(Insulated, with proper tips (red/black))
- Safety equipment (safety glasses, insulated gloves)(Rated for electrical work; gloves should cover expected voltage)
- Resistor kit (assorted values e.g., 1kΩ, 10kΩ)(Include tolerance values for accuracy checks)
- Diodes and capacitors kit(Small-signal diodes and capacitors for practice)
- Breadboard and jumper wires(Optional for circuit building)
- Calibrated reference sources or known-good components(Optional for cross-checks)
Steps
Estimated time: 30-45 minutes
- 1
Power down and prep workspace
Turn off all power sources and disconnect the device under test from mains. Verify that capacitors are discharged using a safe method before touching any leads.
Tip: Double-check isolation before handling probes. - 2
Identify test points
Decide which nodes or components you will measure. Label the points to avoid confusion during the session.
Tip: Write the planned measurements on a sheet. - 3
Connect probes to meter and circuit
Attach the red probe to the measurement point and the black probe to the reference point or ground as appropriate. Ensure secure contact.
Tip: Keep hands away from exposed conductors. - 4
Set meter range and mode
Select the correct mode (DCV, ACV, resistance, diode, etc.) and range. If unsure, start on auto-range and adjust later.
Tip: Starting high reduces risk of overload. - 5
Take a measurement and verify
Record the reading, note units, and cross-check with a known reference if available.
Tip: Repeat the measurement to confirm consistency. - 6
Log results and analyze
Enter values into a log with date, circuit description, and meter settings. Look for anomalies and consider reasons.
Tip: Log your confidence level for each reading. - 7
Test safety-critical components
Reassess safety before touching power components; avoid high-energy sources without protection.
Tip: Use PPE and keep one hand away from the circuit. - 8
Troubleshoot common faults
If readings don’t match expectations, re-check connections, verify component values, and test alternate paths in the circuit.
Tip: Don’t rush; small miswirings produce big errors. - 9
Clean up and review
Power down, unplug equipment, store tools, and review notes to plan the next session.
Tip: Summarize lessons learned for future reference.
Your Questions Answered
What is multimeter training?
Multimeter training is a guided, hands-on program to learn safe measurement techniques for electronics and automotive tasks.
Multimeter training is a practical, hands-on program for safe measurements.
Is it safe to practice on live circuits?
Yes, but only with proper PPE, isolation, and a thorough understanding of safety practices. Never bypass safety features.
Practice live circuits only with PPE and proper safety.
What basic measurements should I master first?
Master voltage, resistance, and current in that order, starting with DC voltage and then resistance, before tackling currents in live circuits.
Start with voltage, then resistance, then current.
How should I log and review results?
Keep a simple measurement log with date, circuit, meter settings, and observed values. Review weekly to spot drift and improve.
Keep a simple log and review regularly.
Where can I find reliable training resources?
Look for manufacturer manuals, safety agency guides, and university course materials; cross-check with trusted tutorials.
Seek manufacturer and university resources.
Watch Video
Key Takeaways
- Master safety-first measurement habits
- Practice DCV, ACV, resistance, and diode tests
- Document readings and context for learning
- Apply skills to electronics and automotive tasks