How to Use Harbor Freight Multimeter: Step-by-Step Guide
Learn how to use Harbor Freight multimeter with step-by-step setup, measurements, and safety tips for electronics and automotive tasks. Includes tools, tips, and common mistakes to avoid.

This quick guide explains how to use harbor freight multimeter safely and effectively for common electronics and automotive tasks. You will learn how to set up the meter, select the right ranges, connect probes, and perform essential measurements like DC voltage, resistance, and continuity. For hands-on tasks, we cover safety protocols, calibration checks, and common troubleshooting tips to help you measure confidently and accurately.
How to use harbor freight multimeter: basics
If you’re new to basic electronics testing, understanding the core functions of a Harbor Freight multimeter is essential. This section addresses what you’ll typically see on the dial—DCV, ACV, resistance (Ohm), continuity/beep, and sometimes a diode test. For beginners, the goal is to establish a safe, repeatable workflow that you can apply to most simple circuits. The exact model from Harbor Freight will vary slightly, but the operating principles remain the same. The phrase how to use harbor freight multimeter appears frequently in beginner tutorials because it encapsulates the core skills: set the right mode, place probes correctly, and read the display with attention to units. As you practice, you’ll gain speed and confidence, especially when validating readings in a controlled, low-risk environment.
Safety first: electrical safety basics
Safety is non-negotiable when working with any multimeter. Start with a power-down mindset: unplug the circuit under test, discharge capacitors if applicable, and keep your body away from live conductors. Use insulated test leads and wear safety glasses if there is any risk of sparks. Never exceed the meter’s voltage rating, and never measure resistance on a powered circuit. This discipline protects you and preserves the meter’s accuracy. The Harbor Freight device is a tool for learning; treat it with respect, and always verify that probes are firmly connected before taking a measurement.
Setup and basic measurements: getting ready to test
Before you measure anything, install fresh batteries in your Harbor Freight multimeter and confirm the display is clear. Rotate the dial to the required mode (DCV for direct current voltage, ACV for alternating current, or Ohm for resistance). If your model has an auto-range feature, enable it to let the meter pick an appropriate range. Attach the red probe to the V/Ω port and the black probe to COM (ground). For both safety and accuracy, ensure the test area is dry and the leads are free of nicks or exposed conductors. This foundation step reduces user errors and improves reading reliability.
Voltage measurements: DC and AC basics
With the meter in DCV mode, place the black probe on the reference (ground) point and the red probe on the positive side of the circuit under test. Read the display and note the unit (volts). Switch to ACV for alternating current measurements, keeping the same probe positions. If readings seem unstable, recheck connections and ensure the circuit isn’t fluctuating due to external interference. For automotive or high-energy tasks, take extra precautions and consider using a clamp meter for large currents.
Resistance, continuity, and diode testing: non-powered measurements
Power must be off for resistance measurements. Set the dial to the Ohm symbol, and touch the probes across the component or section of the circuit you want to measure. A stable reading indicates resistance; if the meter has a continuity beeper, a continuous tone means a closed path. For diode testing, set the meter to the diode mode and test with the component in the correct orientation. If you get an out-of-range reading (OL) or a bizarre value, recheck connections and ensure the circuit is de-energized.
Automotive and practical testing tips: real-world tasks
Car batteries and vehicle electrical systems are common uses for a Harbor Freight multimeter. With the engine off, measure the battery’s DC voltage across the terminals to assess state of charge. When the engine is running, you can test the alternator by observing voltage rise, which should be above the resting battery voltage. Remember that automotive circuits can introduce noise; keep the leads short and avoid cross-contact with metal surfaces. For any measurement listed, always start with the highest range and work down for best accuracy.
Meter care and common mistakes: maintenance that matters
Store the meter in a protective case, disconnect leads after use, and keep the device away from moisture and extreme heat. Regularly inspect the probes for cracks in insulation and replace worn leads. If the meter stops displaying readings or the numbers drift, check the fuse or internal connections per the user manual. A well-maintained meter provides consistent results and reduces the risk of misinterpretation. In short, practice, patience, and good habits build your confidence with every test.
AUTHORITY SOURCES
For safety and measurement principles, consult reputable sources such as OSHA and NIST guidance on electrical safety and measurement accuracy. Additional reading from IEEE Spectrum provides industry-standard context on multimeter usage and instrumentation best practices. These references help ensure you follow best practices when using any handheld meter.
Tools & Materials
- Harbor Freight multimeter(Model HFMM-100 or equivalent; ensure battery installed)
- Test leads with probes(Red and black leads; 4-6 ft length recommended; ensure insulated tips)
- Spare battery compatible with the meter(Check model for battery type (usually 9V or AA))
- User manual or quick-start guide(Digital copy acceptable for quick reference)
- Non-conductive work surface(Silicone mat or rubber bench mat to protect the device)
Steps
Estimated time: 45-60 minutes
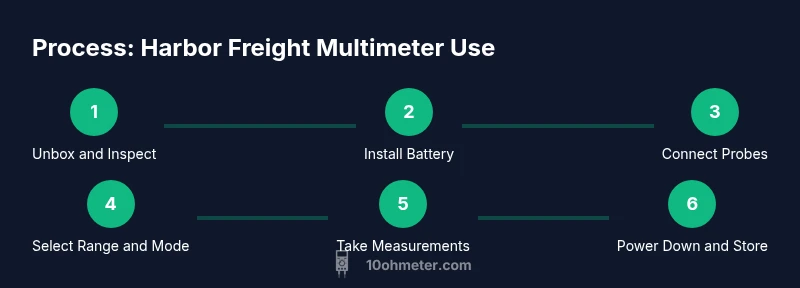
- 1
Unbox and Inspect
Remove the meter from its packaging and inspect for any visible damage. Check that the probes, case, and manuals are present. Install fresh batteries if needed and confirm the display turns on cleanly.
Tip: Inspect probes for cracks in insulation; replace damaged leads before testing. - 2
Power On and Set Mode
Power the meter on and verify the display is legible. Rotate the dial to the required mode (DCV, ACV, Ohm, or continuity). If your model supports auto-range, enable it to simplify measurements.
Tip: If the display is dim, swap the battery and recheck readability. - 3
Connect Probes Correctly
Insert the black probe into COM and the red probe into V/Ω. Keep hands away from the circuit under test while making connections. Verify that both probes are firmly seated.
Tip: Clips or grabbers can help keep connections steady on small components. - 4
Measure DC Voltage
With the circuit powered, place the probes across the source. Read the voltage value on the display and note the polarity. For sensitive sources, use the lowest current path to avoid loading the circuit.
Tip: Begin with a high range if unsure of the expected voltage. - 5
Measure Resistance and Continuity
Power off the circuit and set the dial to Ohm. Place probes across the component; allow the reading to stabilize. If the meter has a continuity beep, listen for the tone to confirm a complete path.
Tip: Always discharge capacitors before measuring resistance. - 6
Diode Test and Final Checks
If your meter supports diode mode, test a diode by placing probes with correct polarity. Note forward voltage drop if your meter provides that readout. When finished, remove probes and power down.
Tip: Replace any blown fuse if readings become unreliable. - 7
Power Down and Store
Turn off the meter, wind the leads neatly, and store in the protective case. Keep the meter away from moisture, dust, and extreme temperatures to preserve accuracy.
Tip: Label and date any calibration checks to track drift over time.
Your Questions Answered
Is a Harbor Freight multimeter accurate enough for DIY electronics?
For most hobby projects, Harbor Freight meters provide adequate readings. If precision is critical, cross-check measurements with a calibrated reference meter.
For most DIY projects, these meters are adequate, but compare readings with a reference meter when precision matters.
Can I test a car battery with this meter?
Yes. Use DC voltage mode; measure across the terminals with the engine off, and re-test with the engine running to gauge the charging state.
Yes, you can test a car battery by measuring voltage with the engine off and while running.
What safety precautions should I follow when using a multimeter?
Power down before resistance tests, keep hands away from live circuits, and use insulated probes. Wear eye protection if necessary near sparks.
Power down before resistance tests, keep hands away from live circuits, and use insulated probes.
Why might my meter show OL or 1?
OL or 1 indicates the reading is out of range or the connection is incorrect. Adjust the range or re-check the probe placement.
OL or 1 means the reading is out of range or the leads aren’t connected properly.
Does Harbor Freight require regular calibration?
Most consumer meters don’t require formal calibration; you can verify readings against a known reference if precision is needed.
Most meters don’t need regular calibration, but you can verify readings with another meter.
Watch Video
Key Takeaways
- Power down before resistance tests.
- Start with high or auto-range for accuracy.
- Use insulated probes and short leads.
- Verify results with a reference meter when precision matters.