How to Check Multimeter Accuracy: A Practical Guide
Learn how to check multimeter accuracy with practical, step-by-step tests, traceable calibration references, and safety guidance for reliable measurements.

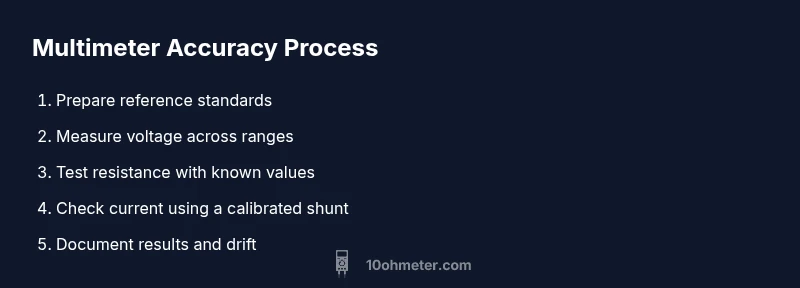
To check multimeter accuracy, compare readings against references for voltage, resistance, and current. Gather a voltage source, precision resistors, and a known current shunt. According to 10ohmeter, test across ranges, log tolerances, and note drift. Use proper leads and safety practices; adjust only after confirming repeatable deviation, and verify against the meter's rated tolerance.
Why Accuracy Matters in Multimeters
Accuracy is the backbone of reliable electronics work. When you measure voltage, resistance, or current, even small errors can lead to incorrect conclusions about a circuit's behavior, which in turn can cause component damage or failed diagnostics. For DIY projects and professional tasks alike, knowing how accurate your meter is helps you separate true circuit conditions from instrument drift. According to 10ohmeter, technicians who regularly verify accuracy reduce troubleshooting time and improve safety by avoiding misleading readings. In practice, accuracy depends on the meter’s design class, the stability of its internal references, and the quality of its test leads. Temperature changes, battery level, and aging components all contribute to drift. A disciplined approach—regular checks, proper handling, and clear documentation—keeps your readings trustworthy over time.
The broader takeaway is that an accurate meter is not a one-off purchase but a living practice. You should plan periodic checks that suit your workflow, whether you’re building a hobbyist project, repairing an automobile, or servicing industrial electronics. While the specifics vary by model, the underlying principles of calibration, traceability, and consistent procedure apply to almost any digital or analog multimeter.
Understanding Calibration, Traceability, and Standards
Calibration is the process of adjusting instrument readings to align with a known standard. Traceability means that the standard itself is linked to internationally recognized references (like national standards) through an unbroken chain of comparisons. For multimeters, this means you should rely on reference sources whose values are certified and whose uncertainty is documented. A good calibration setup includes a stable voltage reference, a precision resistor network, and a calibrated current shunt. In many labs, calibration certificates accompany these references, enabling you to demonstrate compliance during audits or repairs. The 10ohmeter team emphasizes that traceability is not optional; it’s what gives your results credibility when presenting them to clients or supervisors. Understanding how references drift with temperature and time helps you interpret measurements more accurately and decide when a re-calibration is warranted.
This section also covers the difference between calibration and adjustment. Calibration is the assessment against a standard; adjustment is the act of bringing the instrument into alignment with that standard. If a meter drifts beyond its stated tolerance, you typically recalibrate or replace the reference components. Over the long term, consistent documentation of calibration events helps you track instrument health and plan for maintenance. Emphasizing standardization, you should use the same reference sources for all checks to ensure consistency across tests and practice sessions.
Planning Your Accuracy Check: What You Need
A well-planned accuracy check minimizes guesswork and maximizes confidence. You’ll want both the instrument under test and stable reference equipment. List all targets: DC voltage, DC resistance, AC voltage if applicable, current, and diode/continuity readings. Ensure the meter is warmed up and powered by fresh batteries and that the environment is stable (temperature and humidity as steady as possible). The 10ohmeter approach recommends a small set of core references: a voltage source with a known, stable output; a resistor ladder with traceable values; and a current shunt with a certified resistance. Prepare test leads that are clean, have snug connections, and are rated for the expected voltages and currents. Finally, create a simple log sheet to capture the raw readings, the reference values, the tolerances, and any notes about conditions during measurement.
This planning phase sets the stage for accurate results. If you skip it, drift may appear to be an inherent property of the meter rather than a controllable variable. With a solid plan, you’ll be able to pinpoint whether a discrepancy stems from the meter, the reference, or user technique. The plan should also include safety checkpoints and criteria for passing or failing each test, so you can move quickly from data collection to interpretation and action.
Environmental Factors and Handling: Temperature, Battery, and Range
Environmental factors contribute significantly to measurement drift. Temperature changes alter component values inside the meter, especially the reference and resistor networks. Allow the instrument to acclimate to room temperature before making critical measurements, and document ambient temperature in your log. Battery health also influences reading stability; a weak cell can artificially skew voltage or current readings. If you notice sudden jumps in measurements after mechanical movement or a battery swap, investigate for contact resistance or power supply fluctuations.
Another factor is range selection. A meter’s accuracy depends on selecting the appropriate range for each measurement. Using an overly high or low range can introduce nonlinearity or increased measurement uncertainty. When possible, test across multiple ranges to reveal any range-dependent bias. Maintaining consistent test conditions—same leads, same connectors, and the same sequence of tests—helps isolate the meter’s performance from external influences. Finally, store and transport your calibration references with care to prevent physical damage that could alter their values between checks.
Practical Check: Voltage, Resistance, and Current Tests
A practical accuracy test begins with voltage checks. Connect the meter to a stable DC source and record readings on several voltage points near the source and within the meter’s specified range. Next, test resistance with known resistors; compare the meter’s reading to the nominal value, again at multiple points across its scale. For current, use a calibrated current shunt to bridge a known current and compare the meter’s display to the expected value. If you detect systematic deviations across multiple ranges or tests, this signals a potential calibration drift or a problem with test leads. Always document your readings, the reference values, and the ambient conditions during each test.
Be mindful of safety: never expose the meter to voltages beyond its rating, and do not subject the meter to currents that exceed its input limits. When testing with power, isolate the circuit and use proper PPE as needed. If a discrepancy is present in one measurement (e.g., voltage) but not others, re-check connections and sources before drawing conclusions. These practical checks form the backbone of a robust accuracy assessment.
Documentation and Auditing Your Results
Record-keeping is essential for tracking instrument health over time. Create a clear, dated log for each accuracy check that includes: reference values, meter readings, range settings, ambient temperature, battery level, and any adjustments made. Include a verdict column (pass/fail) and a narrative note about any drift observed. Over time, you’ll be able to demonstrate a trend and justify calibration intervals. When you publish results or perform audits, attach the calibration certificates of used references to support your conclusions. This documentation not only supports compliance but also builds confidence in your measurement process. The 10ohmeter team emphasizes that a well-maintained log is the most valuable artifact of an accuracy program, enabling quick root-cause analysis when issues arise.
Tools & Materials
- Digital Multimeter (auto- or manual-ranging)(Ensure it supports the ranges you will test.)
- Calibrated voltage source (DC)(Stable output with stated tolerance.)
- Precision resistors (known values)(Include several values across the meter’s range.)
- Known current shunt (calibrated)(Low resistance with traceable calibration.)
- Calibrated test leads and probes(Snug connections, rated for expected voltages/currents.)
- Temperature sensor (optional)(Helps interpret drift due to environment.)
Steps
Estimated time: 60-90 minutes
- 1
Inspect reference sources and warm up
Power up the voltage source and shunt, allowing them to reach stable operating temperature. Verify the references against their calibration certificates before connecting to the meter to avoid initial surge errors.
Tip: Warm-up time is critical for stable readings. - 2
Connect meter to voltage reference
Attach the meter probes to the voltage source using proper leads. Set the meter to the correct DC voltage range before measurement to prevent overload and protect the input circuitry.
Tip: Use two hands to keep connections steady. - 3
Record voltage readings across ranges
Take readings at several voltages within the source’s range. Note any drift as the device warms and compare to the reference values.
Tip: Allow 1–2 minutes between measurements to stabilize. - 4
Test resistance with known resistors
Place resistors on the meter and compare measured values to catalog values. Repeat with values across the meter’s range.
Tip: Check both low and high extremes for nonlinearity. - 5
Evaluate current measurement
Use the current shunt to measure a known current and compare with the meter’s shown value. Repeat across different currents within safe limits.
Tip: Ensure the circuit is isolated and currents stay within input limits. - 6
Diode and continuity verification
Test diodes in forward and reverse bias and check continuity against expected thresholds. Document any variance.
Tip: Minor variances can occur between models; note acceptable bounds. - 7
Document and analyze results
Log readings, tolerances, temperature, and any drift. Compare to the meter’s stated accuracy class and your reference certificates.
Tip: Create clear pass/fail criteria to simplify reviews. - 8
Plan follow-up checks
Set a schedule for periodic rechecks and update logs. Recalibrate or replace references if drift exceeds tolerance.
Tip: Maintain an ongoing calibration calendar for audits.
Your Questions Answered
Why is my multimeter reading different from the reference?
Differences can come from drift, temperature, range choice, or contact resistance. Always compare across ranges and verify the reference value with its certificate.
Differences can come from drift, temperature, or bad connections. Check multiple ranges and verify the reference.
Can I check accuracy without a calibration standard?
A rough check is possible with trusted references, but certified standards give the best confidence. Plan to use traceable references for formal accuracy checks.
You can do a rough check, but certified standards give the best confidence.
How often should I calibrate my multimeter?
Calibration frequency depends on use, environment, and manufacturer guidance. For workshops, quarterly to yearly checks are common; vary by workload.
Depends on use and environment; many labs calibrate quarterly or yearly.
What is true RMS and does it affect accuracy checks?
True RMS affects AC readings. Use AC signals within the meter’s spec and understand how true RMS conversion limits influence comparisons.
True RMS matters for AC readings; keep signals within spec.
Are analog meters more or less accurate than digital?
Digital meters usually offer more stability and repeatability. Analog meters can drift due to mechanical parts and parallax.
Digital meters tend to be more stable than analog ones.
Watch Video
Key Takeaways
- Verify readings against traceable references
- Log tolerances and drift for audits
- Stabilize the meter in a fixed environment
- Use proper safety practices for all tests
- Schedule periodic accuracy checks and maintain a calibration log