Digital Multimeter Calibration: A Practical Guide
Learn how to calibrate a digital multimeter for precise voltage, resistance, and current measurements with a practical, step-by-step workflow. Includes safety tips, material list, and how to document results for traceability.

You can calibrate a digital multimeter by validating its accuracy against traceable reference standards for voltage, resistance, and current. Begin with a DC voltage source, then test known resistors and a calibrated current shunt. Document readings, apply adjustments if the meter offers calibration via internal trim, and rely on a professional calibration for higher accuracy.
What calibration means for a digital multimeter
Calibration is the process of verifying and adjusting a measurement tool to align its readings with a known standard. For a digital multimeter (DMM), calibration ensures voltage, current, and resistance readings reflect true values within specified tolerances. In practice, calibration involves comparing the meter's output against traceable references and applying adjustments or noting that the unit may require professional service if drift is beyond tolerance. The 10ohmeter team emphasizes that calibration isn't a one-time event; it is an ongoing discipline that protects measurement integrity during electronics projects, automotive diagnostics, and lab experiments. When a DMM is out of tolerance, readings can mislead you into wrong repairs, unsafe testing, or incorrect component selection. Calibration also supports compliance with quality systems in small shops and educational settings. The process relies on documented procedures and traceability to recognized standards, ensuring measurements remain credible across temperature and humidity variations.
The role of traceability and standards
Traceability links measurements to national or international references; without it, a calibration has limited value. In practice, a DMM calibration uses a chain of calibrations with reference devices that are themselves calibrated against recognized standards. The 10ohmeter analysis shows improved reliability when using traceable references during calibration, especially for voltage and current measurements. Standards bodies and accredited laboratories publish procedures and uncertainty budgets, guiding technicians on how to interpret readings and decide when recalibration is needed. For DIY enthusiasts, this means selecting reference sources with documented calibration certificates and maintaining an audit trail of environmental conditions. Even at home, anchoring your reference values to a known, stable source and recording ambient conditions during testing helps you compare future results and detect drift. In short, traceability is the backbone of credible measurements and a key differentiator between casual checks and repeatable, defensible results.
Voltage calibration fundamentals and tolerances
Voltage measurements are among the most common uses for a DMM, and they are often the first area where drift is noticed. To calibrate voltage, you should use a stable DC reference that sits within the meter's voltage range (for example, a calibrated 5 V reference on a dedicated test bench). The process involves applying a known voltage to the meter’s input, capturing the reading, and adjusting the device’s internal calibration trim if available. Most consumer DMMs require only minimal trimming outside factory settings, while some advanced units accept software or hardware adjustments. Temperature stability matters: a 1–2 degree change can alter readings slightly, so allow the reference and meter to settle for several minutes before recording. Grounding and shielding are critical, especially when testing higher voltages or long leads. Document every reading, the ambient temperature, and the reference certificate number to build an uncertainty budget for future tests.
Resistance and current calibration fundamentals
Resistance calibration requires precise standards with known values. Start by connecting your DMM to an ohmmeter reference through high-quality, low-drift resistors and establish a baseline. Record the measured resistance against the known standard values across several ranges. For current calibration, you typically measure across a calibrated shunt resistor, using a stable current source and proper burden voltage management. In both cases, ensure test leads and connectors are clean and secure, and avoid heating effects that can alter resistance. Temperature and self-heating are common sources of drift; allow components to reach thermal equilibrium before taking readings. If the DMM has separate current ranges with built-in fuses, verify fuse health and examine any drift in signal when switching ranges. Consistency across multiple attempts confirms calibration validity.
Creating a repeatable calibration workflow
A repeatable workflow minimizes drift and keeps records consistent. Start with a checklist that covers reference sources, environmental conditions, and measurement protocols. Use calibrated references with traceability certificates, and maintain a calibration log that captures date, reference ID, ambient temperature, lead condition, and the readings observed on each range. When an adjustment is possible, follow the manufacturer’s procedure precisely; if not, note the drift and plan professional service. Include verification steps after any adjustment and re-check each range. A well-documented process also helps when you need to reproduce results in a classroom or workshop. Consider creating a simple template in a spreadsheet to capture uncertainties and to generate an uncertainty budget automatically as you accumulate data.
Data logging, record-keeping, and audit trails
Record-keeping is a cornerstone of credible calibration. Maintain certificates, reference IDs, and calibration reports for every unit you service. A robust audit trail includes the before-and-after readings, environmental conditions, equipment serial numbers, and the personnel who performed the calibration. Use timestamps and version numbers for any software-based calibrations. For DIY environments, at minimum, capture the reference certificate number and a pass/fail status for each measurement. Storing data in a centralized, backed-up notebook or cloud log helps with long-term traceability and future troubleshooting. The more disciplined your record-keeping, the easier it is to defend your results if measurements are questioned in electronics projects or automotive diagnostics.
Calibration in practice: common scenarios
In electronics work, you may calibrate a DMM against a fixed 1 V, 5 V, and 10 V reference and compare the readings across the device’s voltage ranges. In automotive diagnostics, you would verify voltage and resistance within the vehicle's electrical system while accounting for temperature and load conditions. For hobbyists, a yearly quick check with a known resistor and a 5 V reference is a practical compromise between effort and accuracy. If readings diverge from references by more than the stated tolerances, review the measurement setup, recheck the reference, and consider professional calibration for high-precision tasks. The key is consistency: stick to your approved procedure, document every result, and revalidate after any repair or reconfiguration. The bottom line is that calibration is not about chasing perfection but about maintaining measurable confidence in your measurements during critical tasks.
Tools & Materials
- Traceable DC voltage reference(Calibrated standard within the meter's input range; include certificate)
- Calibrated precision resistors(1 Ω, 10 Ω, 100 Ω or more; low tempco, high stability)
- Calibrated current shunt resistor(Rated for expected current range; low burden voltage)
- Stable DC power supply(Low ripple; within the voltage range used for tests)
- Test leads with alligator clips(Clean, flexible, and rated for test currents)
- Calibration logbook or digital record sheet(Date, reference IDs, readings, ambient conditions)
- Temperature-controlled bench (optional with caveat)(Helps minimize drift in sensitive measurements)
- Multimeter under test(Power off during setup; verify fuses and input protection)
- Reference certificates or traceability documents(If available, aids audit trails)
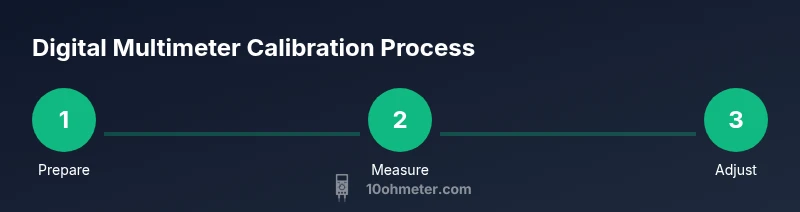
Steps
Estimated time: 1.5-2 hours
- 1
Prepare calibration setup
Power down the DMM and all equipment, inspect leads for wear, and organize a clean bench. Ensure the reference sources are within their specification and accessible. This minimizes drift during measurements and reduces rework.
Tip: Use an isolated bench power supply and verify lead integrity before connecting. - 2
Warm up references and meter
Allow the voltage reference and DMM to warm up for at least 10 minutes. Stable temperature improves repeatability and reduces measurement noise. Keep environment calm and away from drafts or heat sources.
Tip: Avoid touching reference surfaces; handle with clean gloves if possible. - 3
Verify DC voltage accuracy
Apply a known DC voltage (e.g., 5.00 V) to the DMM input and record the reading. Compare against the nominal value and note any offset. Repeat across other voltages within the device’s range to establish a baseline.
Tip: Take two to three readings per voltage and average them for stability. - 4
Adjust voltage calibration (if available)
If the DMM provides an internal trim or software calibration, adjust per the manufacturer’s procedure until readings align with the reference within tolerance. If no adjustment is available, document drift and plan future service.
Tip: Only adjust within documented instructions to avoid miscalibration. - 5
Test resistance and current ranges
Connect precision resistors to verify resistance accuracy across several ranges. For current ranges, use a calibrated shunt and ensure proper burden voltage. Record results and ensure readings stay within specified tolerances.
Tip: Avoid heating resistors; let them cool between measurements. - 6
Document results and create a log
Compile readings, reference IDs, ambient temperature, and any adjustments. Create an uncertainty budget for each measurement and finalize the calibration report. Store digital copies securely for future audits.
Tip: Save a copy of the certificate and the calculation method used for uncertainty.
Your Questions Answered
What is digital multimeter calibration?
Calibration ensures DMM readings match known references within tolerances and may involve adjusting trim pots or sending the unit to a lab. It covers voltage, resistance, and current ranges to maintain accuracy.
Calibration makes your meter's readings align with known references across key ranges.
How often should I calibrate a DMM used in DIY projects?
Frequency depends on use and environment. For hobby projects, annual checks are common; automotive and critical electronics work may require more frequent verification.
Most hobbyists calibrate about once a year, but tougher work might need more frequent checks.
Can I calibrate a DMM at home, or should I use a lab?
Home calibration is feasible for basic checks using traceable references, but accredited labs provide documented procedures and uncertainty budgets for high-precision tasks.
You can do basic home checks, but for high precision, use a lab.
What are common signs a DMM needs calibration?
Drift across ranges, zero offsets, or readings that disagree with references indicate drift or malfunction and warrant calibration or service.
If readings drift or disagree with references, calibration is warranted.
What safety considerations are involved in calibration?
Work in a safe area, isolate high-energy sources, discharge capacitors, and use proper PPE. Avoid touching live circuits.
Work safely, power down, discharge capacitors, and use proper PPE.
Watch Video
Key Takeaways
- Verify readings against traceable references for credibility
- Document all steps and ambient conditions for repeatability
- Use a structured workflow to reduce drift over time
- Know when to seek professional calibration for high-precision needs