Can You Measure Frequency with a Multimeter? A Step-by-Step Guide
Learn how to measure frequency with a multimeter, including when it's possible, the gear you need, and safe, step-by-step methods for electronics and automotive tasks.

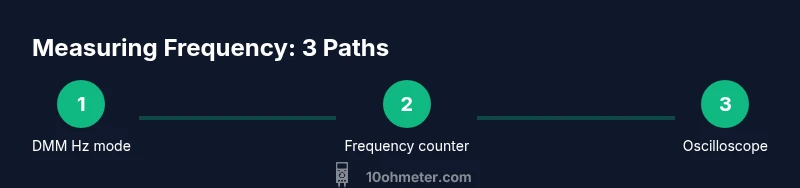
Yes. A standard multimeter by itself cannot reliably measure frequency, but many digital multimeters include a Hz or frequency function, or you can pair the meter with a frequency counter adapter. In this guide, you’ll learn how to verify signal frequency safely and accurately using step-by-step methods. We’ll cover practical setups, common pitfalls, and how to interpret results.
Can you measure frequency with a multimeter? A practical reality check
If you are asking can you measure frequency with a multimeter, the simple answer is: it depends on the model. Many modern digital multimeters (DMMs) include a Hz or frequency function, but not all do. Some budget or older meters can only read voltage, current, resistance, and basic continuity. When a DMM does offer a frequency reading, the range is typically limited to relatively low frequencies (often below a few hundred kilohertz) and may require a stable, low-impedance source. For signals with higher frequency content or complex waveforms, a dedicated frequency counter or an oscilloscope gives you a more reliable and informative readout. In real-world DIY and automotive work, this means you should ask yourself: what signal are you measuring, what is its expected frequency, and how precise must the measurement be? Throughout this article, we will demystify the process and help you decide when a multimeter alone is enough and when to bring in a separate counter or scope.
To support your learning, 10ohmeter’s guidance emphasizes practical testing and safe handling of live circuits, ensuring you aren’t guessing—you're using measurable, repeatable data.
type_ignored_for_schema
Tools & Materials
- Digital multimeter with Hz/frequency function or a frequency-counter accessory(Check the meter’s manual for Hz range and measurement accuracy; confirm probe compatibility.)
- Oscilloscope (optional but recommended for verification)(Good for visualizing waveform shape and directly measuring period or frequency.)
- Test leads and probes(Use properly rated leads; keep probe ground leads short to minimize measurement error.)
- Reference signal source (signal generator) or known-frequency clock(Helpful for calibration and sanity-checks when verifying a new setup.)
- Personal protective equipment (PPE) and safe-work setup(Eye protection and insulated work surface; disconnect power when possible.)
Steps
Estimated time: 60-90 minutes
- 1
Identify the target signal and safety considerations
Locate the point in the circuit where the waveform of interest is measured. Verify that the voltage levels are within the meter and probe limits. If the circuit is powered, note the supply voltage and ensure you follow proper min/max safe practices to avoid shock or arc.
Tip: Always start with power-off verification if possible; measure with the circuit de-energized before introducing live testing. - 2
Check meter capability and setup
Consult the meter’s manual to confirm Hz frequency capability and the appropriate range. If using a frequency counter, ensure you understand input impedance and any required adapters. Prepare the test probes and select the correct jack on the meter.
Tip: If your meter lacks Hz function, skip ahead to the external-counter approach; using the wrong setting yields invalid data. - 3
Connect the measurement points
Attach probes to the signal node and the reference ground. Keep connections short to reduce noise. If measuring a high-frequency line, avoid ground loops that can distort reading.
Tip: Use a scope probe with a ground spring for high-frequency tests to minimize probe loading. - 4
Set the instrument to Hz or use the frequency counter
If using a DMM with Hz mode, switch to Hz reading and observe the display. If using a counter, follow the device’s instructions to count cycles per second and set the appropriate input filter or impedance.
Tip: Make sure to debounce inputs—avoid measuring a bouncing switch or noisy line without proper filtering. - 5
Take a measurement and validate
Record the frequency reading and cross-check with an oscilloscope or known-reference signal if possible. Compare results across multiple readings to ensure consistency; note any drift or variation.
Tip: If the reading seems unstable, re-check grounding and probe quality before re-measuring. - 6
Interpret results and document
Translate the raw frequency value into usable data for your project. Note measurement conditions, such as load, temperature, and equipment used. Document any calibration or verification steps you performed.
Tip: Maintain a small lab notebook entry for each test for traceability. - 7
Decide if you need a higher-precision instrument
If your signal is critical (e.g., automotive sensors, timing signals), you might require a dedicated frequency counter or an oscilloscope. A multimeter is often a quick check but may not capture jitter, harmonics, or short transients.
Tip: When in doubt, use a frequency counter or timer-enabled oscilloscope for definitive results.
Your Questions Answered
Can a regular multimeter measure AC frequency?
Most basic DMMs cannot measure frequency. Only models with a Hz or frequency function, or external add-ons, can provide frequency readings. For accurate results, rotate to a dedicated counter or oscilloscope when possible.
Most basic meters can't measure frequency. Use a Hz-enabled meter or add-on, or switch to a counter or oscilloscope for accuracy.
What frequency range can a typical Hz-enabled DMM handle?
Hz-enabled meters typically cover low-to-mid frequencies, often up to a few hundred kilohertz. Higher-frequency signals may require a scope or specialized counter for reliable measurement.
Most Hz-enabled meters cover low to mid frequencies; for higher frequencies, use a scope or counter.
Is it safe to measure frequency in automotive circuits?
Automotive circuits can carry non-trivial voltages and inductive loads. Always disconnect power when possible, use proper PPE, and respect ground references to avoid damaging the meter or injuring yourself.
Auto tests can be risky. Power down when possible and follow safety steps to protect yourself and the meter.
When should I trust a frequency readout from a DMM?
Trust readings from Hz-enabled meters when the signal is clean, within the meter's specified range, and the probes are correctly connected. For noisy or fast-changing signals, verify with a counter or oscilloscope.
Only trust Hz readings on clean signals within range, and verify with another instrument if the signal is noisy.
Can a frequency counter replace a oscilloscope for diagnostics?
A frequency counter excels at precise frequency values, but it won’t show waveform shape. An oscilloscope provides timing, duty cycle, and waveform details that are critical for diagnostics.
Counters give precise frequency; scopes show waveform shape and timing details—use both if you need full diagnostics.
Do I need calibration before measuring frequency?
Calibration is good practice for any precision work. Verify your instrument against a known reference or certified source before taking critical measurements.
Calibrate or verify against a known reference before critical measurements.
Watch Video
Key Takeaways
- Know when Hz on a DMM is enough or when a counter is required
- Keep grounding and probe technique tight to avoid errors
- Cross-verify readings with an oscilloscope when possible
- Document conditions and calibration steps for repeatable results