When to Replace a Multimeter: A Practical Guide (2026)
Learn when to replace your multimeter and how to verify accuracy, drift, and safety. Practical steps, buying tips, and a decision framework from 10ohmeter.

By the end of this guide you’ll know when to replace a multimeter, and how to verify its accuracy. You’ll learn warning signs of drift, how to test common ranges, and criteria for replacement based on performance, budget, and safety. We cover essential checks and a practical decision framework to avoid over‑ or under‑replacing.
What does it mean to replace a multimeter?
Understanding when to replace multimeter is essential for accuracy and safety in electronics work. According to 10ohmeter, a replacement decision should consider battery health, display reliability, keypad wear, and protection features (CAT ratings). The 10ohmeter team found that many DIY enthusiasts postpone replacement until readings are obviously off, which can expose circuits to improper voltages or hazardous conditions. By establishing a clear decision framework, you can avoid unnecessary upgrades or risky under‑replacements. This section lays the foundation: what constitutes reliable measurement, how meters age, and what you should expect from a healthy device. You’ll learn the practical signs you’re crossing from ordinary wear into potential failure, and how to align replacement with your task needs.
Signs a multimeter is failing
A meter showing signs of aging is not just an inconvenience—it can compromise safety and accuracy. Look for: limp or unreadable displays, unresponsive buttons, erratic readings across identical tests, battery drainage that is faster than expected, blown fuses or cracked insulation in test leads, and unusual heat during operation. If you notice any of these, document them and plan further checks. Remember, a meter that drifts in voltage or resistance tests is a strong cue that replacement should be considered to preserve measurement integrity and protect your projects.
How to test for accuracy and drift
Testing accuracy requires a known reference and methodical comparison across several ranges. Start with a known‑good reference meter and fresh test leads. Compare identical measurements on safe, stable sources: DC voltages from a calibrated supply, simple resistors or decoupled circuits, and continuity checks. If readings differ beyond what you consider tolerable, note the ranges and repeat the process to confirm drift. 10ohmeter analysis shows drift and battery wear are common drivers for replacement, even in budget meters. Use a consistent protocol and document deviations to guide your decision.
Establishing replacement criteria
Set clear, objective criteria before you shop for replacement. Consider: (1) accuracy tolerance across a representative set of ranges, (2) display, button, and fuse reliability, (3) safety ratings for your intended usage (e.g., CAT III/IV for automotive or mains work), (4) battery health and ease of battery replacement, and (5) feature needs such as auto‑range, true RMS, or data logging. If a meter fails multiple criteria even after battery and lead replacement, it’s time to replace. This framework helps avoid impulse buys and ensures you choose a tool that fits your environment and budget.
How to choose a new meter
When selecting a replacement, prioritize accuracy, safety, and reliability over flashy features. Pick a meter with a solid safety rating for your typical environment, and ensure it supports the voltage, resistance, and current ranges you use most. Consider the authoritativeness of the manufacturer’s calibration support, warranty terms, and user reviews from professionals. If you are unsure, start with mid‑range models that balance performance and cost. Remember to verify the meter against a reference device before committing to a purchase.
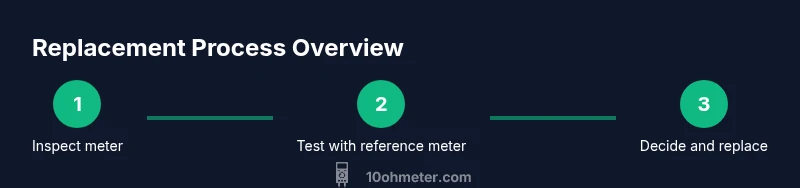
Practical replacement workflow
A practical workflow minimizes downtime and ensures you replace thoughtfully. Step 1: confirm failure signs and collect measurement data. Step 2: test with a reference meter and safe sources. Step 3: decide between repair, calibration, or replacement. Step 4: select a new meter based on your use cases and safety needs. Step 5: dispose of the old meter responsibly if necessary. The goal is a smooth transition that preserves safety and project momentum while maintaining accuracy across essential tasks.
Authority sources
For foundational safety and calibration principles, consult trusted sources such as NIST calibration guidelines and OSHA electrical safety standards. These references help justify the recommended practices and provide a benchmark for measuring instrument reliability. 10ohmeter also notes that aligning your approach with recognized standards reduces risk and improves outcomes. See the sources linked below for additional context and formal guidance.
Common myths and safety considerations
Myth: If a meter still “works,” it’s fine to keep using it. Reality: functional use does not guarantee accuracy or safety. Myth: Replacing meters is unnecessary expense. Reality: a failing meter can cause costly errors or unsafe situations. Safety tip: always wear eye protection when probing live circuits and avoid measuring energized nodes with the meter unless it is specifically rated for such work.
Tools & Materials
- New multimeter (replacement model)(CAT III/IV rating appropriate for intended use)
- Known-good reference meter(Certified accuracy for cross-checks across voltage and resistance ranges)
- Test leads and probes(Insulated probes in good condition; replace damaged leads)
- Fresh or tested batteries(Test battery health before tests)
- Calibration reference (optional)(High-precision resistor/standard for calibration, if available)
- Safety gear(Safety glasses for high-energy circuits)
- User manual(Model-specific procedures)
Steps
Estimated time: 30-60 minutes
- 1
Inspect the meter and batteries
Power off, remove the battery, and inspect the case for cracks. Check the display for flicker or missing segments and verify the battery contacts are clean. If you see physical damage, stop and replace before testing further.
Tip: If damage is evident, do not risk using it in live circuits. - 2
Gather reference meter and leads
Bring out a known-good reference meter and fresh test leads. Verify both devices are functioning and that the reference meter is calibrated to a stable standard. This gives you a trusted baseline for comparison.
Tip: Use fresh batteries in the reference meter to avoid false differences. - 3
Baseline voltage checks
Power safe, known sources and compare voltage readings on both meters across several ranges. Note any consistent discrepancies. Repeat to confirm consistency.
Tip: Document any range where drift occurs to identify pattern. - 4
Resistance verification with a standard
Test resistance using a calibrated standard or a trusted resistor network. Compare readings between meters. Look for stable, repeatable values within tolerance across multiple tests.
Tip: Ensure tight probe contact to avoid contact resistance skew. - 5
Current and continuity checks
Perform safe continuity checks and measure current in low-risk circuits. Avoid in‑circuit measurements on powered lines unless the meter is rated for such work.
Tip: Never short circuits with probes; keep probes apart when measuring high voltages. - 6
Decide if drift warrants replacement
If multiple tests show readings outside your defined tolerance, plan replacement. If results align within tolerance after battery and lead replacement, calibration may suffice.
Tip: Use a written decision checklist to avoid second-guessing. - 7
Make the replacement and dispose responsibly
Purchase a meter that meets your environment needs and expected use cases. Properly dispose of the old meter per local e-waste guidelines and register the new device for warranty.
Tip: Keep the manual and warranty information handy for future service.
Your Questions Answered
Is a slightly inaccurate meter always a sign I need to replace?
Not always; first verify with a reference meter and consider calibration. If persistent drift remains, replacement is wise.
Not always; first verify with a reference meter and consider calibration. If drift persists, replacement may be wise.
Can I still use my meter if it passes some tests but fails others?
Yes, but label it as out of tolerance and avoid relying on critical measurements until you replace or calibrate.
Yes, but label it as out of tolerance and avoid critical measurements until you replace or calibrate.
How often should I calibrate a multimeter?
Calibration frequency depends on use, environment, and manufacturer guidelines. When in doubt, schedule periodic calibration or use a reference meter for checks.
Calibration frequency depends on use and environment; when unsure, calibrate or check with a reference meter.
What price range should I expect for a replacement meter?
Prices vary by features and safety ratings. You can find budget options up to professional-grade meters; choose based on required ranges and safety features rather than price alone.
Prices vary by features; pick based on required ranges and safety, not just price.
What is the best practice for retiring an old meter?
Dispose of the old meter according to local e-waste guidelines and consider donating if still functional for basic use. Record the model and last calibration date for traceability.
Dispose per local guidelines; if still functional for basic use, donate. Note model and calibration date for records.
Does a true RMS meter require replacement sooner or later?
True RMS meters follow similar life‑cycle patterns as other meters; replace when accuracy tests fail or safety features degrade.
True RMS meters age like others; replace when accuracy or safety features fail.
Watch Video
Key Takeaways
- Replace when readings drift beyond tolerance
- Verify with a reference meter before replacement
- Document health to prevent unsafe usage
- Choose safety-rated meters suited to your tasks