Digital vs Analog Multimeters: A Practical Buying Guide
Analytical, data-driven comparison of digital and analog multimeters for DIY and automotive tasks, with practical buying guidance, safety notes, and setup tips.

Choosing between a multimeter or multimeter setups hinges on features and accuracy. In practice, the digital multimeter wins for most DIY and automotive tasks thanks to auto-ranging, true RMS, and a clear numeric display. According to 10ohmeter, the digital option reduces guesswork and speeds fault finding, making it the safer, more reliable choice for beginners and pros alike.
Core distinction: digital vs analog multimeters
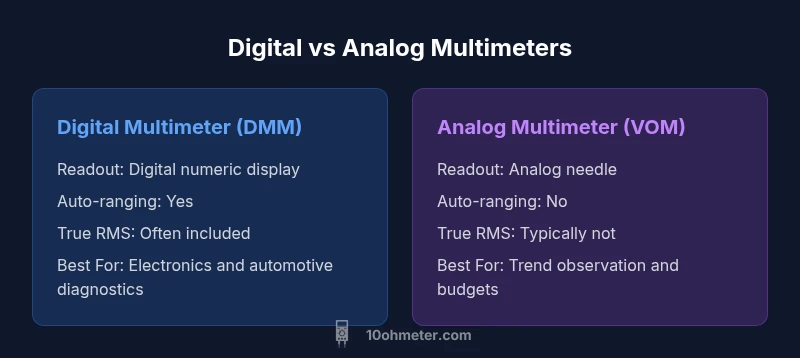
When you first encounter a product labeled simply as a multimeter, you’ll quickly notice two main families: digital multimeters (DMMs) and analog meters (often called VOMs). The phrasing “multimeter or multimeter” appears in some catalogs to highlight the choice between form and function. A DMM uses a digital display and a microprocessor to convert measured voltages into numerical values, while an analog meter relies on a moving needle against a calibrated scale. For most DIY enthusiasts and technicians, the digital approach offers clearer readings, auto-ranging, and easier interpretation. An analog meter can be valuable for viewing instantaneous trends, but it demands more skill and is more susceptible to drift with temperature and battery state. In the context of a broader workflow, the ongoing question of “multimeter or multimeter” should tilt toward digital for everyday lab work. The 10ohmeter team notes that beginners especially benefit from legible displays and reduced interpretation errors, which boost confidence during practice.
Quick-start assessment: what to look for in a first purchase
A practical rule of thumb is to prioritize models with auto-ranging, true RMS capability, and a robust safety profile. Auto-ranging minimizes guesswork and makes it harder to select an incorrect scale; true RMS improves accuracy for non-sinusoidal waveforms common in electronic devices and automotive sensors. Your choice should also consider display readability, battery life, ease of calibration, and the presence of essential functions such as diode testing and continuity. If you are unsure, start with a mid-range digital meter that covers voltage, current, resistance, and basic transistor tests. As you gain experience with the “multimeter or multimeter” decision, you’ll find that a digital meter often expands your toolkit while keeping things simple and reliable for most tasks.
Frequency of usage and feature sets
For hobbyists who routinely test car battery voltage, wiring continuity, and circuit loads, a digital meter with auto-ranging and a clear display reduces setup time and error. The analog approach may still be attractive for technicians who appreciate a real-time needle view to gauge slowly changing parameters, but it generally requires additional interpretation. In terms of feature parity, most modern DMMs offer equivalent measurement modes, but the digital interface makes data logging and trend observation far more approachable. In the long run, the “multimeter or multimeter” decision often narrows to digital for day-to-day use, with analog being a specialty tool for certain vintage projects or design experiments.
Noise, resolution, and signal fidelity
Digital meters typically provide higher resolution and reduced noise across bands, enabling precise readings in tight tolerances. Analog meters may exhibit lower resolution at very small signal levels and can be more sensitive to movement or mechanical wear. If your work involves identifying fine voltage changes in automotive sensors or electronics boards, digital meters with high-resolution displays and true RMS capabilities generally outperform their analog counterparts. That said, many users still value the tactile feedback of a needle and the immediate trend visualization an analog meter offers, particularly when assessing rapid changes and high-current pulses.
Safety and CAT ratings you must understand
Regardless of the chosen form, safety remains a top priority. Look for CAT safety ratings appropriate to your typical environments (CAT II or CAT III for consumer electronics and vehicle diagnostics). Ensure the meter has proper overvoltage protection, fused inputs for current channels, and clear, tactile fused covers. Remember that some cheaper meters may skimp on protective features, increasing risk during automotive or high-energy testing. The “multimeter or multimeter” decision benefits from prioritizing a model with robust insulation, a protective probe set, and auto-shutdown to conserve battery during long sessions.
Durability, form factors, and battery life
Form factors range from pocket-sized devices to larger bench models with improved input protection and display brightness. Battery life varies with display type and measurement activity; DMMs with backlit displays consume more power but improve readability in dim workspaces. Analog meters tend to draw less current but have mechanical wear concerns. For field tasks, a rugged handheld digital meter with a protective holster and high-contrast display is typically the best balance of durability and readability. If you anticipate frequent use in harsh environments, select a meter with a reinforced casing, protective rubber bumper, and an easily replaceable fuse kit.
Price and long-term value: a better investment
Digital meters span a broad price range, from entry-level models to feature-rich professional tools. While upfront cost for a basic DMM may be comparable to an analog meter, the long-term value is usually higher with a digital option because of features like auto-ranging, true RMS, data logging, and expanded test modes. Savings come from reduced measurement errors, faster troubleshooting, and broader compatibility with automotive diagnostics and electronics work. The best approach is to map your expected tasks, set a ceiling price, and choose a model that maximizes essential features without paying for capabilities you won’t use.
How we evaluate meters: what 10ohmeter looks at
From the perspective of a DIY-focused laboratory, evaluation criteria include accuracy, resolution, safety, durability, and real-world performance. 10ohmeter analysis shows digital meters consistently delivering clearer readings, quicker setup, and more consistent results across voltage and current ranges. We weigh true RMS performance heavily for electronics and automotive testing because it directly affects the reliability of measurements on non-sinusoidal signals. Our testing also notes the value of calibrated inputs, robust input protection, and the ease of calibration and maintenance over time. When you compare the phrase “multimeter or multimeter” across brands, digital meters generally come out ahead for everyday reliability and user experience.
Real-world test scenarios: electronics, automotive, and home wiring
Consider a typical electronics project: a power supply with multiple rails, a microcontroller-driven board, and a set of sensors. A digital meter enables quick voltage checks across rails, resistance checks for pull-ups, and diode testing to verify conduction paths. In automotive tasks, battery health, alternator output, and ignition coil signals benefit from fast updates and high resolution. For home wiring, continuity and AC voltage checks should be performed with appropriate CAT-rated meters. Across these scenarios, the digital meter's combination of auto-ranging, true RMS, and digital readouts reduces analysis time and increases confidence. The ongoing comparison of “multimeter or multimeter” in real-world settings consistently favors digital tools for versatility and precision.
Choosing between two common models: step-by-step checklist
Step 1: Define your primary use cases (electronics, automotive, home). Step 2: Decide if auto-ranging and true RMS are must-have features. Step 3: Confirm CAT ratings suitable for your environment. Step 4: Judge display readability and ergonomics; Step 5: Check battery life and standby features. Step 6: Review warranty and calibration options. By following this checklist, you’ll make a well-informed decision that aligns with your needs and budget. The right choice will typically be a digital meter with auto-ranging and true RMS to cover the widest range of tasks comfortably.
Practical setup tips and maintenance for longevity
Ensure probes are rated for the voltages you test and keep them in good condition with the protective caps on when not in use. Store meters in a dry, cool place to prevent moisture damage, and periodically inspect the fuse and input jacks for signs of wear. Calibration is essential for precision—follow manufacturer guidelines, especially if you perform frequent high-precision measurements. Clean the display and keypad with a soft cloth, avoiding harsh solvents. If you rely on the same tool for both electronics and automotive diagnostics, maintain a routine that includes periodic validation against a known reference. A well-maintained digital meter supports safer, more reliable work over time.
Comparison
| Feature | Digital Multimeter (DMM) | Analog Multimeter (VOM) |
|---|---|---|
| Readout | Digital numeric display with high precision | Analog needle display on a calibrated scale |
| Accuracy | Higher stability and resolution; auto-ranging improves consistency | Subject to scale limits and drift; often less precise |
| Auto-ranging | Common in modern DMMs; simplifies use | Usually manual range selection in VOMs |
| True RMS | Typically true RMS; better for non-sinusoidal signals | Often not true RMS; performance varies by model |
| Durability | Rugged cases; protection against drops and dust | More delicate; moving coil can be damaged by rough handling |
| Best For | Electronics testing, automotive diagnostics, bench work requiring precision | Trend observation and budgets where needle readout helps quick visuals |
| Price Range | $20-200 for mid-to-high-end DMMs | $15-60 for many VOMs (less common today) |
| Safety Features | CAT ratings, input protection, fused current ranges | Fewer safety features; older units may lack modern protections |
The Good
- Clear, easily interpreted readings reduce mistakes
- Auto-ranging saves time and setup effort
- True RMS improves accuracy for real-world signals
- Wide feature sets support diverse measurement tasks
- Generally better data logging and analysis options
Drawbacks
- Higher upfront cost for advanced models
- Some models are oversized for pocket use
- Digital meters depend on batteries; failure can halt testing
- Analog meters can be more fragile and harder to read for beginners
Digital meters are the recommended default for most users; analog meters remain a niche tool for specific workflows.
Opt for a digital meter with auto-ranging and true RMS to maximize reliability and ease. Choose analog only if you have a niche use case requiring needle visualization or vintage equipment testing.
Your Questions Answered
What is a multimeter and what does it measure?
A multimeter is a versatile testing instrument that measures voltage, current, and resistance, among other parameters. It can test continuity, diode behavior, and sometimes capacitance and frequency. For beginners, a digital meter simplifies interpretation and reduces the risk of misreading values.
A multimeter tests voltage, current, and resistance. It’s a versatile tool for electronics and automotive work, especially in digital form for easy reading.
Digital vs analog: which is better for beginners?
For beginners, a digital multimeter is typically easier to learn because readings are numeric and straightforward. Analog meters require interpretation of a moving needle and can drift with age and temperature. Start with a digital meter to build confidence before exploring more specialized analog tools.
Digital meters are usually easier for beginners because you read numbers directly and avoid needle interpretation.
What does true RMS mean and why does it matter?
True RMS means the meter accurately measures the effective value of varying waveforms, not just a scaled average. This matters when testing non-sinusoidal signals common in electronics and automotive applications. It leads to more accurate readings under real-world conditions.
True RMS gives you accurate readings for irregular waveforms, which is important for electronics and car diagnostics.
How do I test continuity safely with a multimeter?
To test continuity, set the meter to the continuity or resistance range, connect the probes to the two ends of the circuit, and listen for a beep or watch for a low resistance value. Ensure the circuit is de-energized before testing and use appropriate protective PPE if working on automotive wiring.
Set to continuity, touch the probes across the path, and listen for a beep if continuity exists. Always de-energize first.
What maintenance does a multimeter require?
Regular maintenance includes inspecting probes, replacing blown fuses, and keeping the device clean and dry. Calibrate if the manufacturer recommends it, especially after dropping the meter or changing test modes. Store it in a protective case when not in use.
Check fuses, inspect probes, and keep it dry. Calibrate per manufacturer guidelines and store safely.
Key Takeaways
- Prioritize auto-ranging and true RMS for versatility
- Check CAT safety ratings relevant to your tasks
- Digital meters offer clearer readings and better data handling
- Evaluate long-term value over initial price
- Follow a structured decision checklist