How to Test Wheel Speed Sensor with a Multimeter
Learn how to test a wheel speed sensor with a multimeter. This step-by-step guide covers safety, setup, resistance checks, signal observations, interpretation, and practical troubleshooting for DIY enthusiasts and automotive techs.

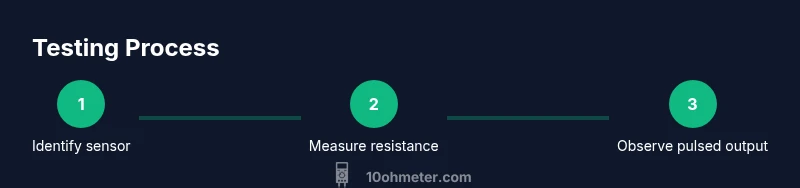
With a multimeter, you can verify a wheel speed sensor by checking its coil resistance and the sensor output signal. According to 10ohmeter, a quick test can reveal obvious faults before you dive into ABS diagnostics. Safely lift the vehicle, unplug the harness, measure resistance across the sensor pins, and rotate the wheel to observe the pulsed output.
Understanding wheel speed sensors and why test them
Wheel speed sensors (WSS) are essential for ABS, stability control, and traction systems. Testing them helps confirm whether the signal from the wheel or tone ring is accurate, or if you have a wiring fault, damaged connector, or a worn sensor. In this guide on how to test wheel speed sensor with multimeter, you’ll learn practical checks you can perform with a common meter, without needing an oscilloscope. According to 10ohmeter, a quick, methodical test can reveal obvious faults before you dive into more complex ABS diagnostics. Start by locating the sensor and its connector on the suspected wheel. Plan your approach around safety, ensuring the vehicle is secure and the engine is off before you disconnect any wiring. The goal is to differentiate between a mechanical issue, a wiring problem, and a faulty sensor so you can take the right next steps.
How a wheel speed sensor works
Wheel speed sensors are typically hall-effect or magnetic reluctance devices mounted near the wheel hub. They produce a pulse train as the wheel (and tone ring) passes by a magnetic field. The ABS controller reads the cadence and translates it into wheel speed. If signal quality degrades, the ABS warning light may illuminate, or the system may react unpredictably. In practice, you’re measuring two things: the coil resistance of the sensor itself and its output signal when the wheel turns. While a multimeter cannot consistently show a perfectly clean waveform in all setups, you can still catch several fault modes: a completely open circuit (infinite resistance), a short to ground or supply (near-zero resistance with a fault), or a noisy/irregular signal when rotating. Understanding these basics helps you interpret the measurements you’ll perform with the meter.
Safety and setup prerequisites
Before you start, secure the vehicle on level ground with wheel chocks placed behind the wheels that will stay on the ground. Use jack stands and never rely on a jack alone. Wear safety glasses and gloves; disconnect the battery if you’ll be handling the electrical connector for an extended period. Ensure the engine is OFF and the key is removed. Prepare a clean workspace and keep metal tools away from exposed battery posts and electronics. Planning safety steps ahead minimizes the risk of short circuits or fuel-line hazards during testing.
Locating the sensor and identifying test points
Typically, wheel speed sensors sit at the wheel hub, often behind the brake rotor or integrated into the knuckle assembly. Access may vary by vehicle, but you’re looking for a plug-in two- or three-pin connector that feeds into the sensor near the rotor. Before disconnecting anything, photograph the harness routing and pin layout. The test points are the sensor pins in the connector and the sensor body’s ground. If you’re unsure of pinout, consult the service manual or a reliable wiring diagram specific to your vehicle. Label connectors to avoid miswiring during reassembly, and keep track of any clips or shields that you remove.
Basic electrical checks you can perform with a multimeter
A methodical approach starts with the sensor’s resistance. With the harness unplugged, measure the resistance across the sensor’s two signal pins. A completely open circuit indicates a broken wire or damaged sensor, while a near-zero reading suggests a short. Reconnect the harness and perform a continuity check along the wiring harness to catch broken strands or chafed insulation. If your meter supports diode or continuity mode, test for a reasonable forward drop to ensure the internal circuitry isn’t compromised. Document the readings and compare them to the vehicle’s service manual or manufacturer specs for your exact sensor type.
Measuring sensor output during rotation (without oscilloscope)
Many ABS sensors output a rapid pulsed signal as the wheel rotates, which can be tricky to capture with a basic multimeter. If your meter can measure AC voltage or frequency, you may glimpse a pulsed signal while the wheel spins slowly. In most cases, using a logic probe or an oscilloscope yields a clear waveform; however, a standard multimeter can still confirm that the sensor is producing a signal by observing small voltage fluctuations in DC mode, or by checking the presence of pulsed activity when the wheel is rotated. If the signal is absent, recheck the wiring and sensor position. If you see sporadic readings, inspect the connector and look for corrosion, loose terminals, or damaged wiring.
Interpreting readings: resistance and signal
Interpreting results requires context. Resistance values vary by sensor type (Hall-effect vs. reluctance) and by vehicle. A reading that is dramatically outside the expected range points to a fault; a reading that gradually drifts or jumps may indicate a loose connection. If you see consistent, clean pulses while rotating the wheel (with the proper test gear), the sensor is likely functioning. When readings differ between left and right wheels, investigate mechanical binding, rotor alignment, or tone-ring damage. Always cross-check with the service manual and consider a second check on a known-good wheel to establish a baseline.
Troubleshooting common readings and faults
A completely open circuit means the sensor or wiring is broken. A short to ground or supply often points to damaged insulation or connector problems. Inconsistent or irregular pulsing during rotation can indicate a misaligned sensor, a dirty tone ring, or a failing connector. Corrosion inside the connector or damage to the harness can cause intermittent readings that look okay at rest but fail when the wheel turns. For stubborn cases, inspect the tone ring for chips or cracks and verify the sensor’s mounting clearance. If the sensor has a visible mechanical fault, replacement is usually the most reliable course.
When to replace or seek professional service
If resistance readings are out of spec, the signal is non-existent when the wheel turns, or you observe poor or inconsistent pulsing that cannot be traced to wiring or mounting, this is often a sign to replace the wheel speed sensor. Some vehicles may require a sensor specific to the hub assembly, so verify compatibility. If you’re unsure about the service manual or the risk of rotor damage during sensor replacement, consult a qualified professional for ABS diagnostics and sensor replacement to avoid misdiagnosis.
Documentation, records, and next steps
Keep a clear log of all readings, wheel tested, and whether the readings matched service manual references. Photograph the sensor area and connector states before and after testing. If you decide to replace the sensor, document the new part number, installation torque (as specified by the manual), and test results after installation. This documentation helps you confirm that the new sensor resolves the fault and provides a baseline for future diagnostics.
Quick recap and practical tips
Testing a wheel speed sensor with a multimeter is a practical, safety-conscious approach to diagnosing ABS wheel-speed issues. By verifying coil resistance, conducting continuity checks, and attempting to observe a pulsed output during wheel rotation, you can quickly identify obvious faults. Always use a proper lifting procedure, disconnect the battery when needed, and compare readings to vehicle-specific specifications. If in doubt, consult the vehicle manual or a professional.
What to do next: professional-grade diagnostics
If basic measurements indicate a possible fault but symptoms persist (ABS light, traction-control instability, or wheel-speed-related warnings), you should proceed with professional-grade diagnostics. An automotive scanner with ABS and wheel-speed PID data, along with a scope for waveform capture, can confirm sensor health and help you pinpoint whether the issue resides in the sensor, tone ring, or wiring harness. Document findings and plan next steps to minimize vehicle downtime.
Tools & Materials
- Digital multimeter(Prefer a meter with DC voltage, resistance, and continuity modes; optional AC or frequency measurement helps observe pulsed signals.)
- Test leads and probes(Silicone-insulated probes or back-probing pins for connector access; keep spare leads handy.)
- Wheel chocks and jack stands(Secure the vehicle on level ground; never rely on a jack alone.)
- Service manual or wiring diagram(Use vehicle-specific pinout and resistance reference values for your sensor type.)
- Gloves and eye protection(Personal protective equipment to reduce risk when handling metal parts and electrical connections.)
- Torque wrench (optional for sensor replacement)(If replacing the sensor, torque to manufacturer specs during reinstallation.)
- Flashlight or headlamp(Helpful for locating connectors and sensors in tight wheel wells.)
Steps
Estimated time: 20-40 minutes
- 1
Prepare the vehicle and safety gear
Park on level ground, chock wheels, and wear PPE. If you’ll disconnect the battery, wait a few minutes after turning the ignition off. This initial preparation reduces the risk of shock or accidental short circuits.
Tip: Double-check the parking brake is engaged and the vehicle is secure before lifting. - 2
Locate and access the wheel speed sensor
Find the sensor at the wheel hub or knuckle area. Trace the harness to the connector and inspect for obvious damage. Take photos of harness routing before disconnecting anything.
Tip: Avoid pulling on the sensor wire; disconnect at the connector to minimize damage. - 3
Disconnect the sensor connector
Carefully unplug the sensor connector from the vehicle harness. Inspect terminals for corrosion or bent pins. Set the harness aside without stressing the wires.
Tip: Use back-probing pins or thin probes to avoid connector damage. - 4
Measure coil resistance
Set the multimeter to resistance. Place leads on the sensor’s two signal pins. Record the reading and compare it to the service manual’s spec for your sensor type.
Tip: If you see an open circuit, recheck the wiring and re-test before replacing the sensor. - 5
Check continuity in the harness
With the harness connected or by back-probing, test continuity along the wire from the sensor to the connector. Look for sudden increases in resistance or discontinuities that indicate damaged insulation or broken strands.
Tip: Inconsistent results may require moving to a different testing point or removing more insulation for a clean test. - 6
Assess sensor output while rotating the wheel
Reconnect the connector and, if possible, rotate the wheel slowly to observe any pulsed output. If your meter has AC or frequency mode, try to capture a pulsed signal. If not, rely on the presence of a signal when tested with a scope.
Tip: Use a helper to rotate the wheel smoothly; avoid abrupt spins that may trigger safety systems. - 7
Interpret the results
Compare the resistance and signal readings with the manual. Look for a reasonable resistance value, stable connection, and consistent pulsing when the wheel turns.
Tip: Document both good and bad readings to build a reliable baseline for future tests. - 8
Decide on next steps
If readings are out of spec or the signal is absent, plan sensor replacement or professional diagnostics. Confirm with test where possible on another wheel.
Tip: Sometimes replacing the sensor is the most reliable fix to avoid repeated diagnostics.
Your Questions Answered
Do I need an oscilloscope to test a wheel speed sensor?
An oscilloscope provides a clear waveform, but many faults can be identified with a multimeter through resistance and continuity checks. If in doubt, an automotive oscilloscope will confirm signal shape and duty cycle.
An oscilloscope helps a lot, but you can still diagnose many issues with a multimeter when you test resistance and continuity.
What readings indicate a bad sensor?
Significantly abnormal resistance, open circuits, or no pulsed output when the wheel turns indicate a faulty sensor or wiring issue. Compare to manufacturer specs and test across wheels for baseline.
Very different resistance or no pulsed output while turning the wheel usually means the sensor or its wiring is bad.
Can I test with the vehicle on the ground?
Basic resistance checks can be done with the wheel mounted, but you should rotate the wheel while testing the output. Ensure the car is safely supported and never run the engine while you’re near moving parts.
Yes, but only for baseline resistance; actual signal tests need rotation and safe access.
Should I test every wheel sensor?
If you have ABS or stability-control symptoms on one wheel, prioritize that wheel first. It’s wise to test all wheels for a full diagnostic baseline, as discrepancies reveal wiring or tone-ring issues.
Test the affected wheel first, then consider testing the others for a complete picture.
What if readings are borderline?
Borderline values often indicate a marginal connection or a sensor near failure. Re-check connections, clean terminals, and compare both sides. If still uncertain, plan sensor replacement.
Borderline readings usually mean check connections again or replace the sensor.
Watch Video
Key Takeaways
- Identify sensor type and wiring first.
- Measure coil resistance and inspect the harness for faults.
- Look for clean pulsed output when the wheel rotates.
- Compare readings to service manual baselines.
- Replace the sensor if readings are out of spec or signal is missing.