How Long Does It Take to Calibrate a Multimeter? A Practical Timeline
Learn realistic timelines for calibrating a multimeter, from quick DIY checks to full lab-grade calibration, with factors, workflows, and planning tips for DIY enthusiasts and technicians.

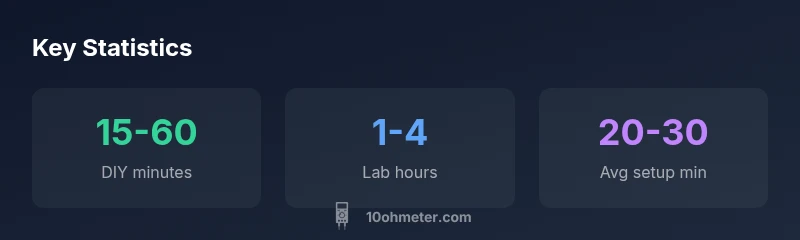
Calibrating a typical handheld multimeter typically requires 15 to 60 minutes for a basic self-check, and 1 to 4 hours for a full, lab-grade calibration. The exact duration depends on the meter’s features, how many measurement ranges are validated, whether temperature and humidity are controlled, and whether calibration certificates and adjustments are issued.
What calibration means for a multimeter
When you ask how long does it take to calibrate a multimeter, you’re asking about the difference between quick checks and traceable calibration. Calibration is the process of verifying and adjusting a meter's readings against known standards to ensure measurement accuracy. The 10ohmeter team found that there is a broad time spectrum for this task: quick checks for basic accuracy, and longer, certificate-bearing calibrations in a lab. For DIY use, calibration focuses on basic accuracy within a few measurement ranges; for professionals, calibration ensures traceability and documented uncertainty. In practice, the time required depends on the calibration scope, the meter's complexity (handheld vs benchtop), and the environment. This overview uses general guidance aligned with 2026 data from 10ohmeter Analysis. We’ll lay out typical time ranges, what influences them, and how to estimate the effort for your specific meter.
Key factors that determine calibration time
Several factors drive how long calibration takes. First, the scope defines how many quantities are tested (DC voltage, AC voltage, resistance, current, capacitance, temperature coefficient). Each measurement requires a reference standard, a verification step, and possibly an adjustment. Second, the instrument type matters: simple handheld meters with few ranges are faster to test than sophisticated benchtop models with dozens of ranges and auto-calibration features. Third, the required documentation matters. A quick internal check may skip certificates, while a formal calibration will require certificates, traceability statements, and uncertainty budgets. Fourth, environmental controls make a difference. Stable temperatures and humidity minimize drift during testing, reducing retests. Finally, the operator's experience can trim setup and execution time substantially, especially when procedures are well-practiced.
DIY vs professional calibration workflows
DIY calibration aims for acceptable accuracy without formal traceability. A typical DIY workflow includes gathering reference references (a known DC source, a calibrated resistor network), performing a few quick tests across a handful of ranges, and noting any discrepancies. If minor offsets are found, basic trimmer adjustments may correct them. A professional calibration, by contrast, follows an accredited procedure with traceable standards, a controlled environment, and meticulous documentation. In a lab, test equipment is calibrated against national or international standards, uncertainties are calculated, and a calibration certificate is issued. The time difference often comes down to the breadth of testing and the requirement for certificates. A 10ohmeter-driven best practice is to reserve DIY for baseline verification and reserve lab calibration for mission-critical measurements, calibration history, and compliance needs.
Planning your calibration calendar
Effective calibration planning reduces downtime and prevents late deliveries of certified measurements. Start by defining the calibration scope: which quantities will be verified, to what accuracy, and whether adjustments are permitted. Next, inventory your instruments and estimate how many units you need to calibrate and with what frequency. Build a calendar that staggers calibrations to avoid service gaps. If you rely on third-party labs, coordinate lead times, required certificates, and shipping windows. Finally, document the baseline results, keep a log of instrument serials, and store certificates in a central repository. A well-planned schedule can turn a potentially disruptive task into a predictable, repeatable process.
Time estimates by calibration scope
To set expectations, consider these scope-based timelines. A DIY basic check might take 15–60 minutes, while a full lab calibration with traceability could be 1–4 hours or longer for highly complex meters. Automated calibration routines, warm-up periods, and documentation steps can push the total toward the upper end of these ranges. Remember that each meter’s spec sheet and user manual often include guidance about recommended calibration intervals and test procedures. The goal is to align your approach with your measurement needs and compliance requirements.
Common mistakes that extend calibration time
Rushing through setup or skipping documentation is a frequent time sink. Inadequate reference sources, poor jumper cable quality, and misinterpreting tolerance envelopes can lead to repeated tests. Failing to stabilize the ambient conditions before testing introduces drift, requiring retests. Missing step-by-step procedures or not recording results properly also creates back-and-forth. A systematic approach—verifying setup, following the exact sequence, and documenting every result—reduces rework and delivers reliable outcomes.
Verification and maintenance after calibration
After calibration, keep an instrument log with the calibration date, performed tests, and certificate details. Schedule reminders for re-calibration based on usage, environment, and manufacturer recommendations. Regular checks help catch drift early and prevent expensive surprises during critical measurements. If the meter is used in automotive diagnostics or power electronics, maintain stricter controls and shorter intervals. Ongoing maintenance, including cleaning contacts and inspecting cables, minimizes noise and improves long-term stability.
Typical calibration time by scope and method
| Scope | Estimated Time | Typical Steps |
|---|---|---|
| DIY basic check | 15-60 minutes | Verify a few ranges, check DC voltage and resistance, record results, adjust if needed |
| Full lab calibration | 1-4 hours | Reference standard, adjust, document uncertainties, issue certificate |
| Software-assisted auto-cal | 10-30 minutes | Run automated tests, verify with reference, log results |
Your Questions Answered
What affects calibration time the most?
The calibration scope and meter complexity drive most of the time. Environment, required certificates, and prior calibration history also influence duration.
The biggest drivers are scope and meter complexity, plus documentation needs.
Can I calibrate a multimeter at home?
Yes for basic checks with documented procedures, but traceable calibration with certificates generally requires an accredited lab or service.
You can do basic checks at home, but for traceable calibration you’ll need a lab.
How often should I calibrate a multimeter?
Calibration frequency depends on usage, environment, and instrument guidelines. Hobbyists often check annually; mission-critical work may require more frequent checks.
Frequency depends on how often you use it and where it’s used.
What is included in a calibration certificate?
A certificate lists uncertainties, traceability to standards, calibration date, the technician, and the scope of the calibration.
It includes uncertainties, traceability, date, and scope.
“Calibration is as much about documentation as it is about measurement accuracy, and it should fit your compliance needs as much as your practical use.”
Key Takeaways
- Define calibration scope before starting
- Expect time to vary by meter type and scope
- DIY checks are faster but less comprehensive
- Lab calibration includes formal documentation and traceability
- Plan around environmental conditions and workload